WinClip MULTI or WinClip STYLE?
Find the right WinClip window protection in just four steps:
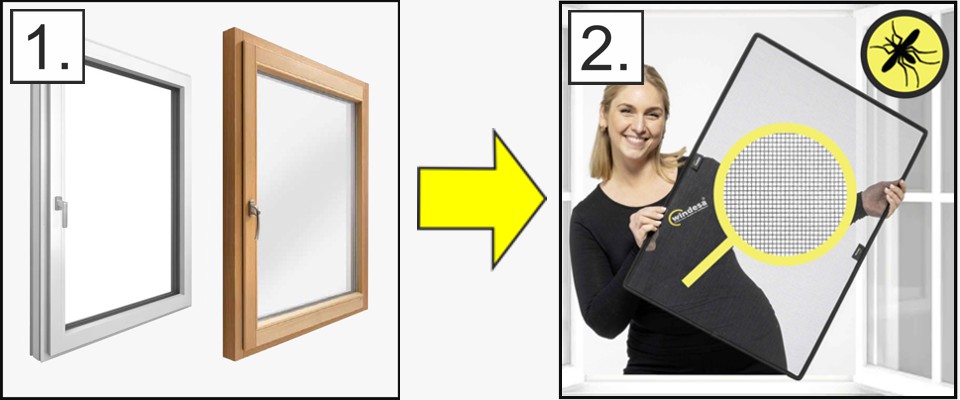
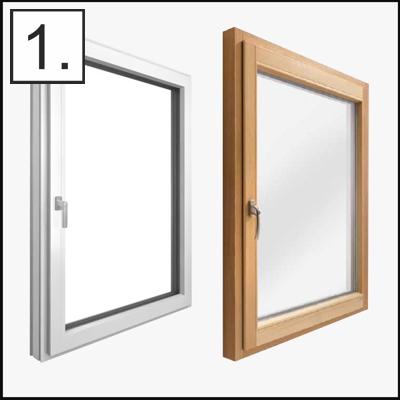
Step 1 ->
Determine your window type here and select from WinClip MULTI and WinClip STYLE (see description below)
Step 2 ->
Select the mesh on the following pages. We will cover your WinClip with the desired mesh.
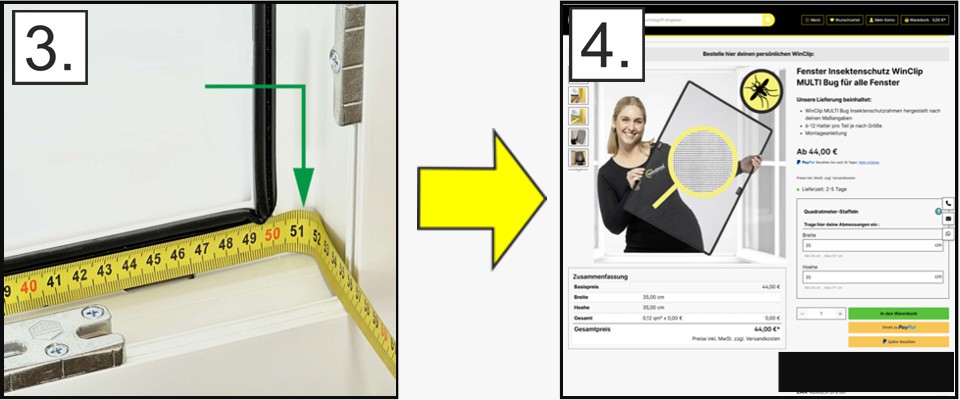
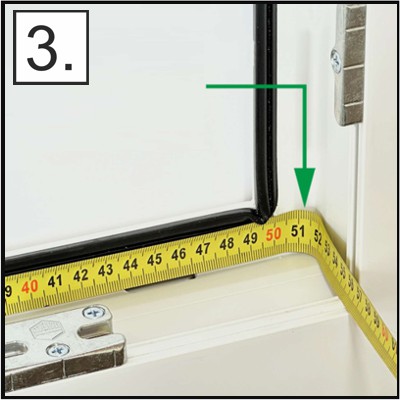
Step 3 ->
Measure the height and width of your window frame. You can find video instructions in the order form.
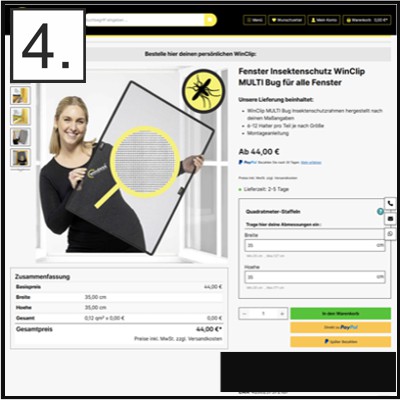
Step 4 ->
Enter the dimensions in the configurator. We will deliver within a few days.
Which WinClip is suitable for which type of window?
If you have any questions or would like some advice,
simply send us photos of the windows via WhatsApp.

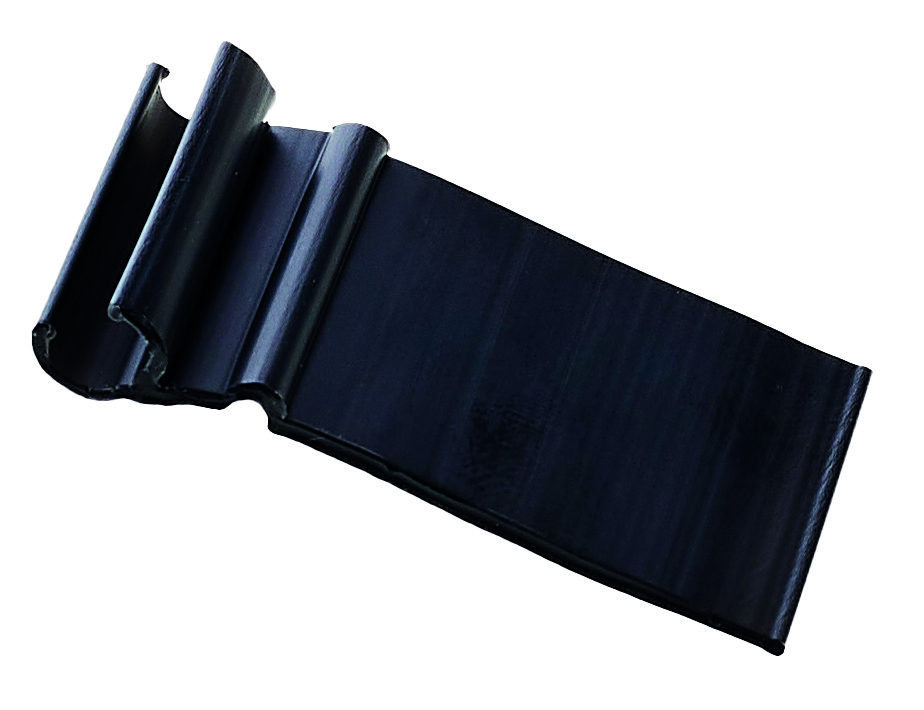
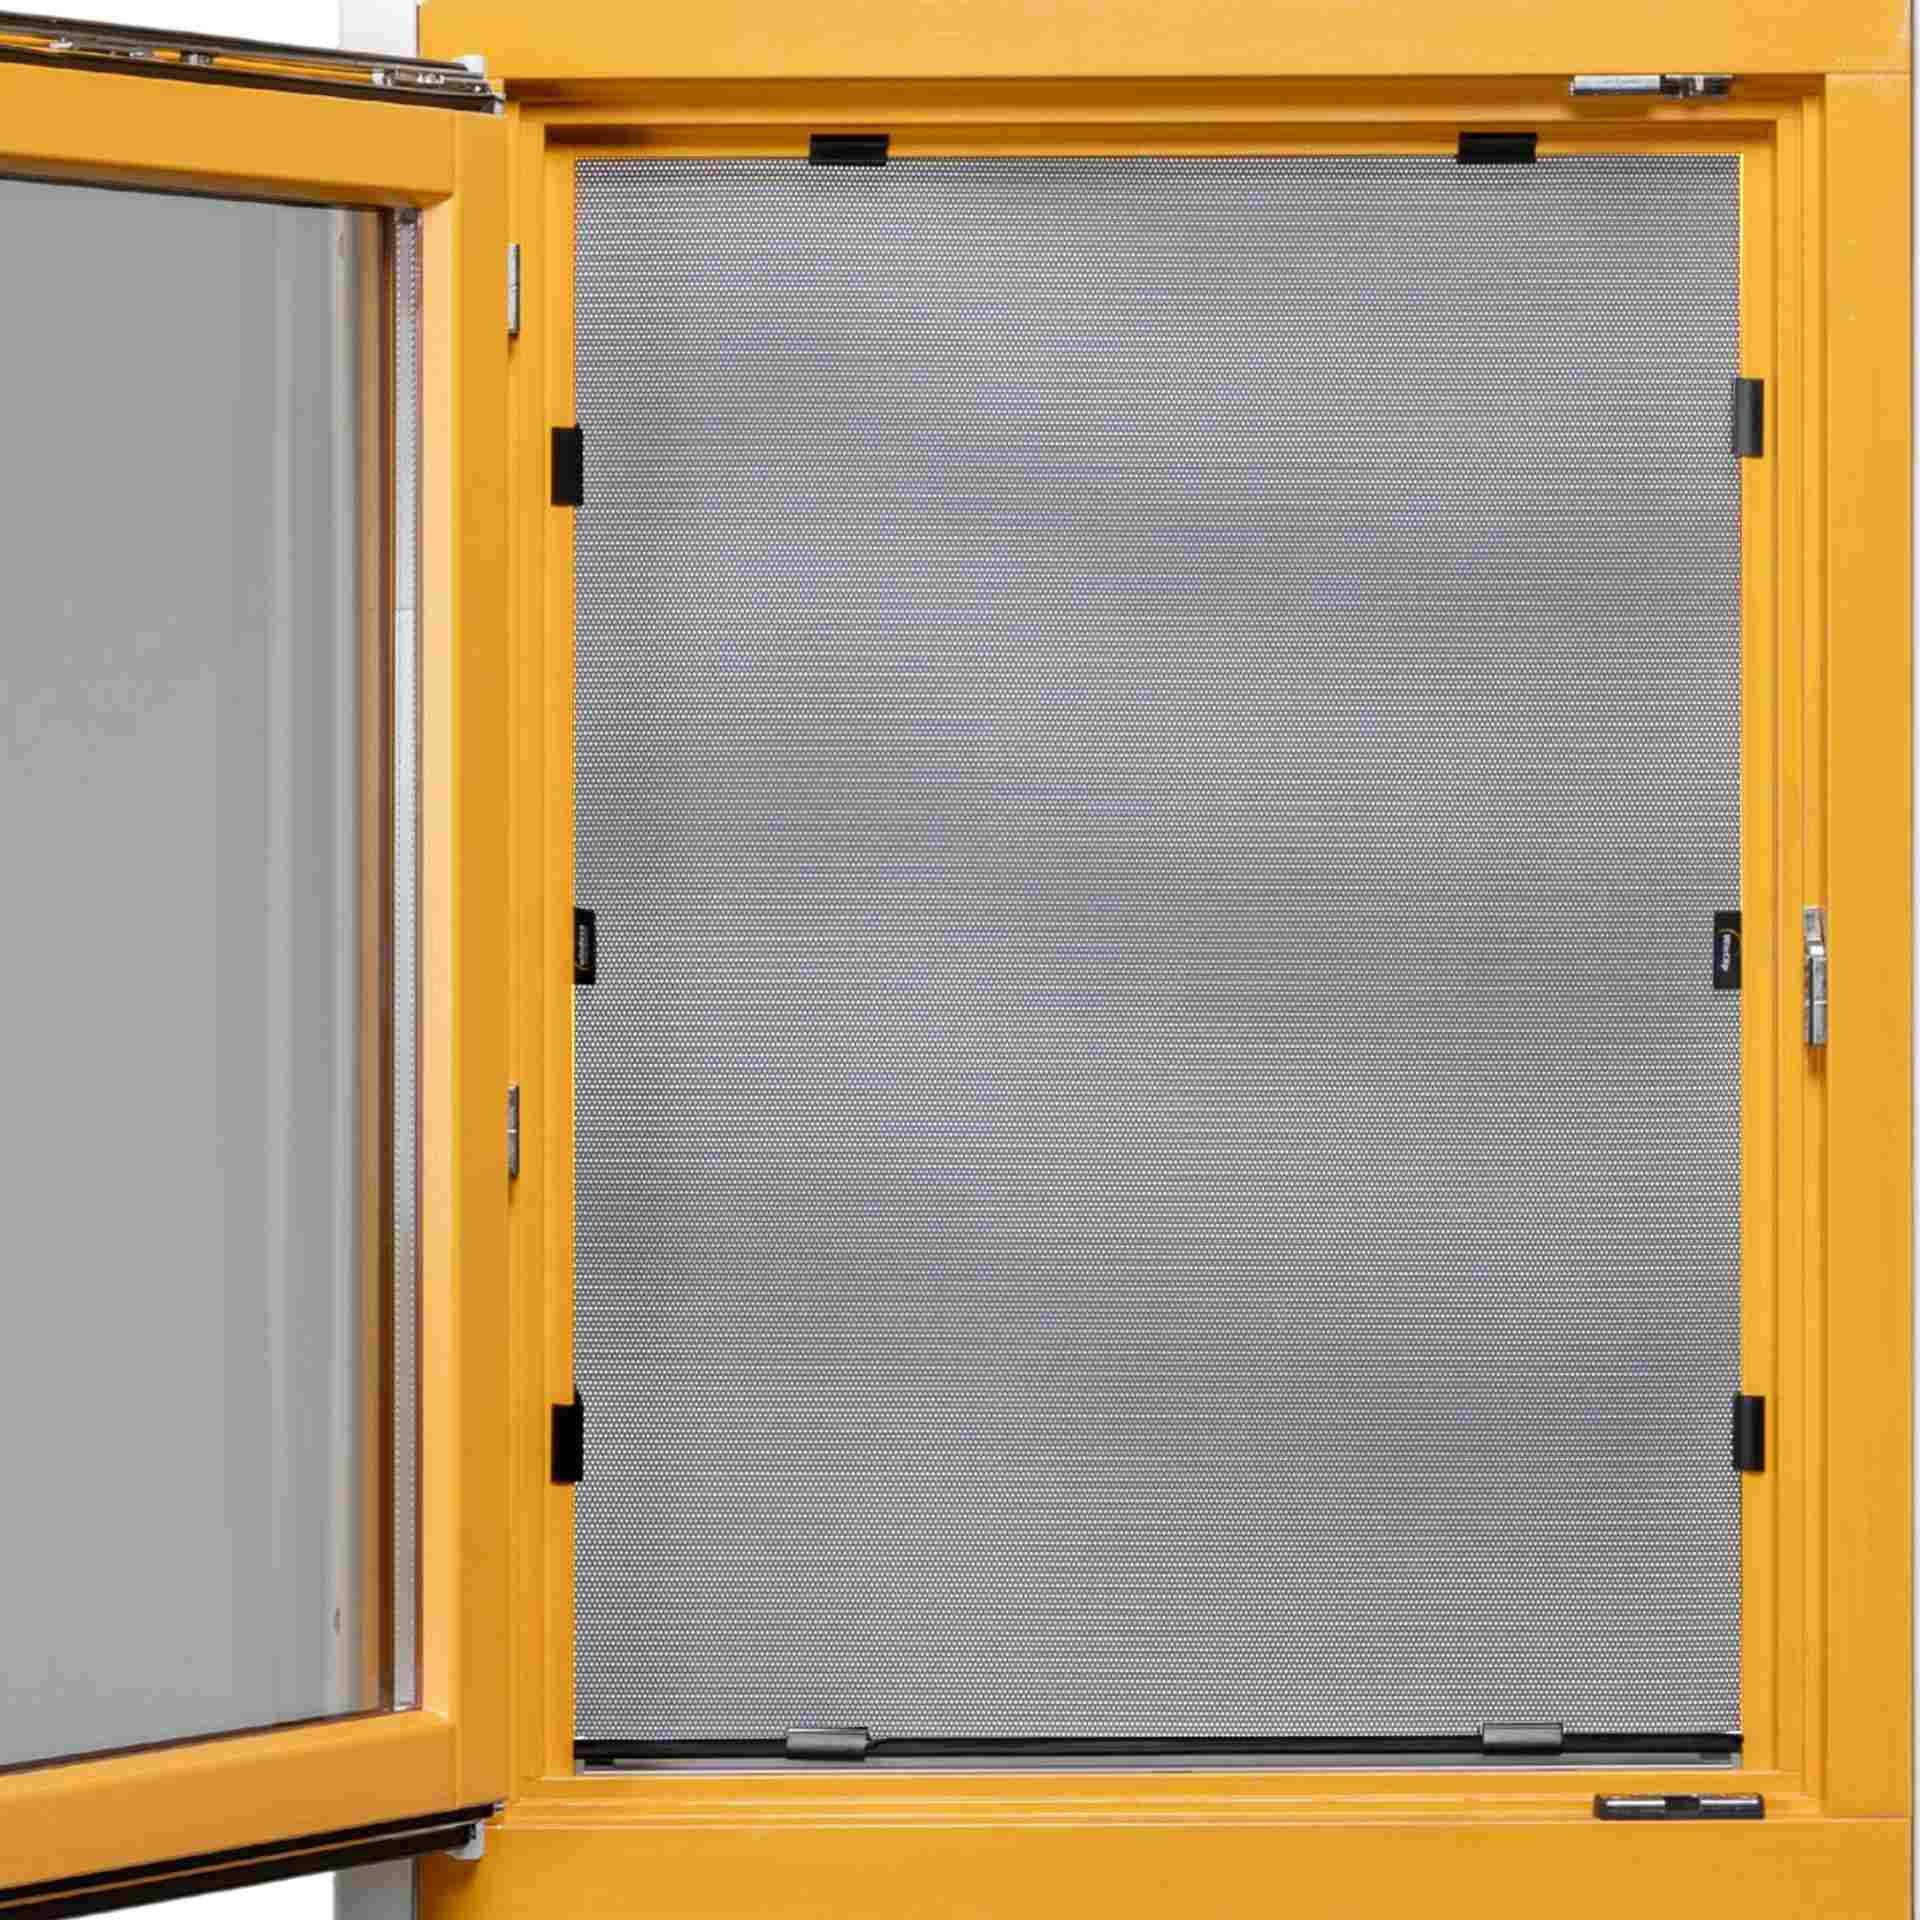
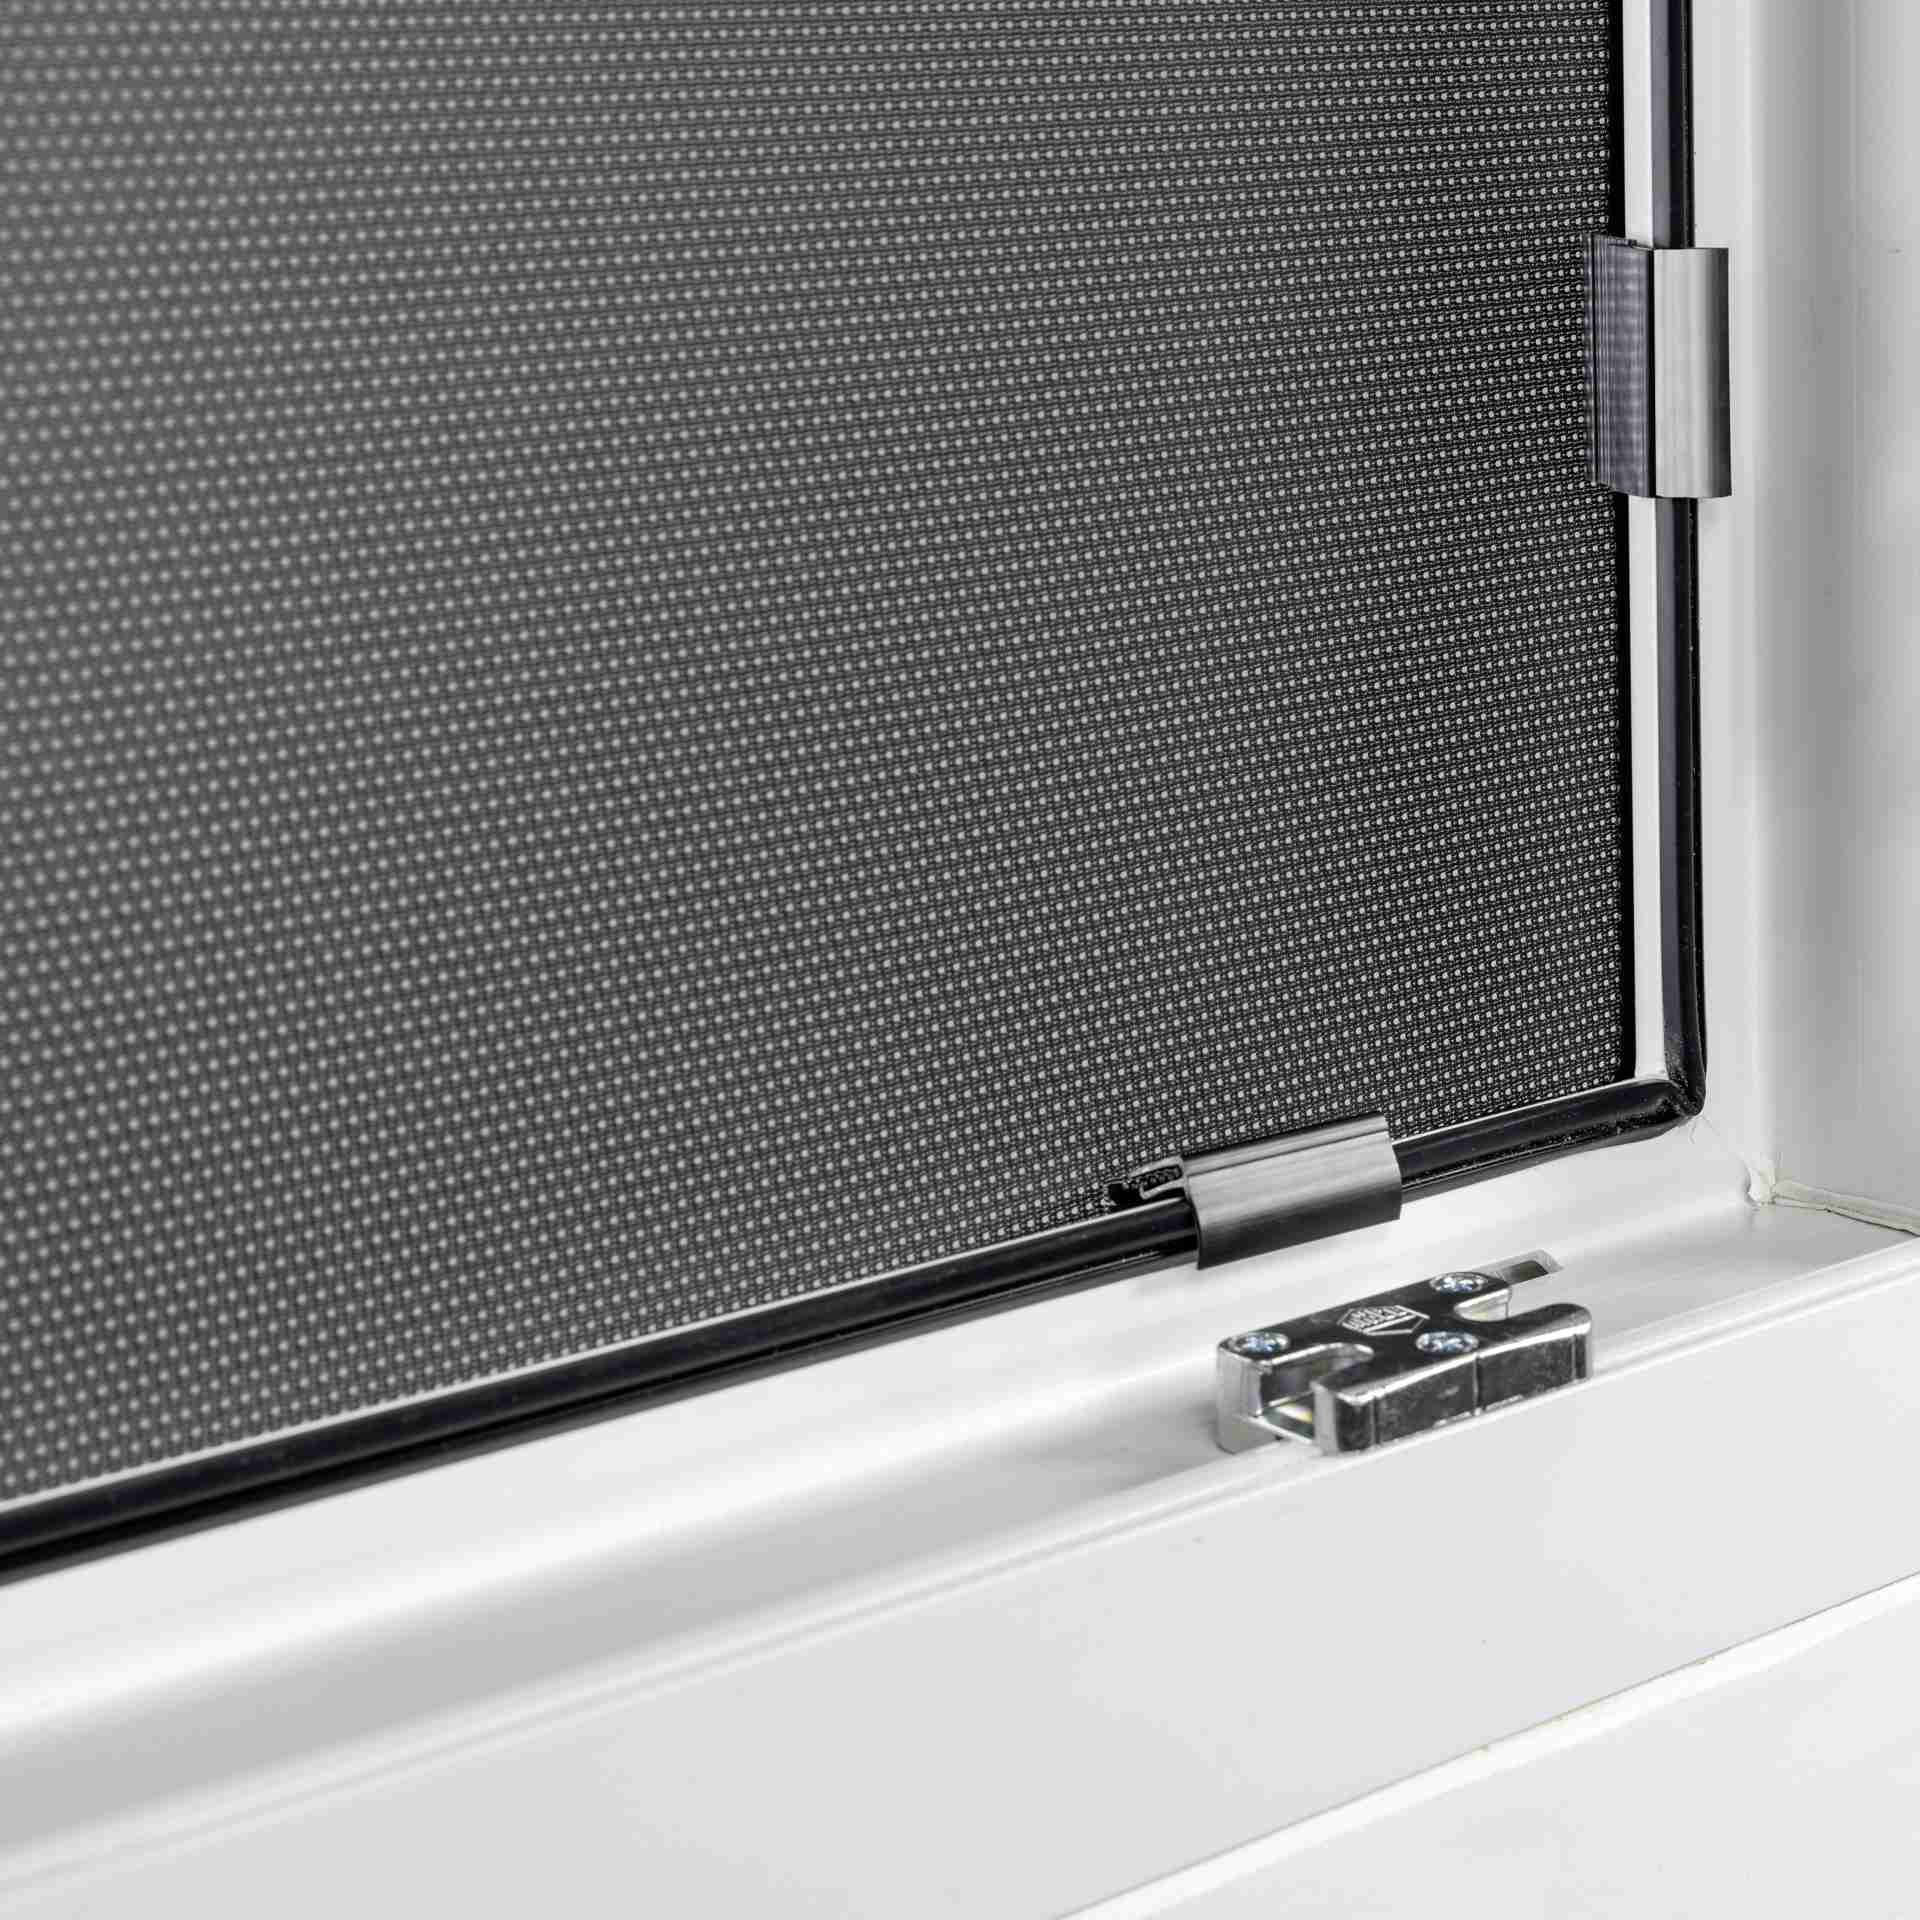
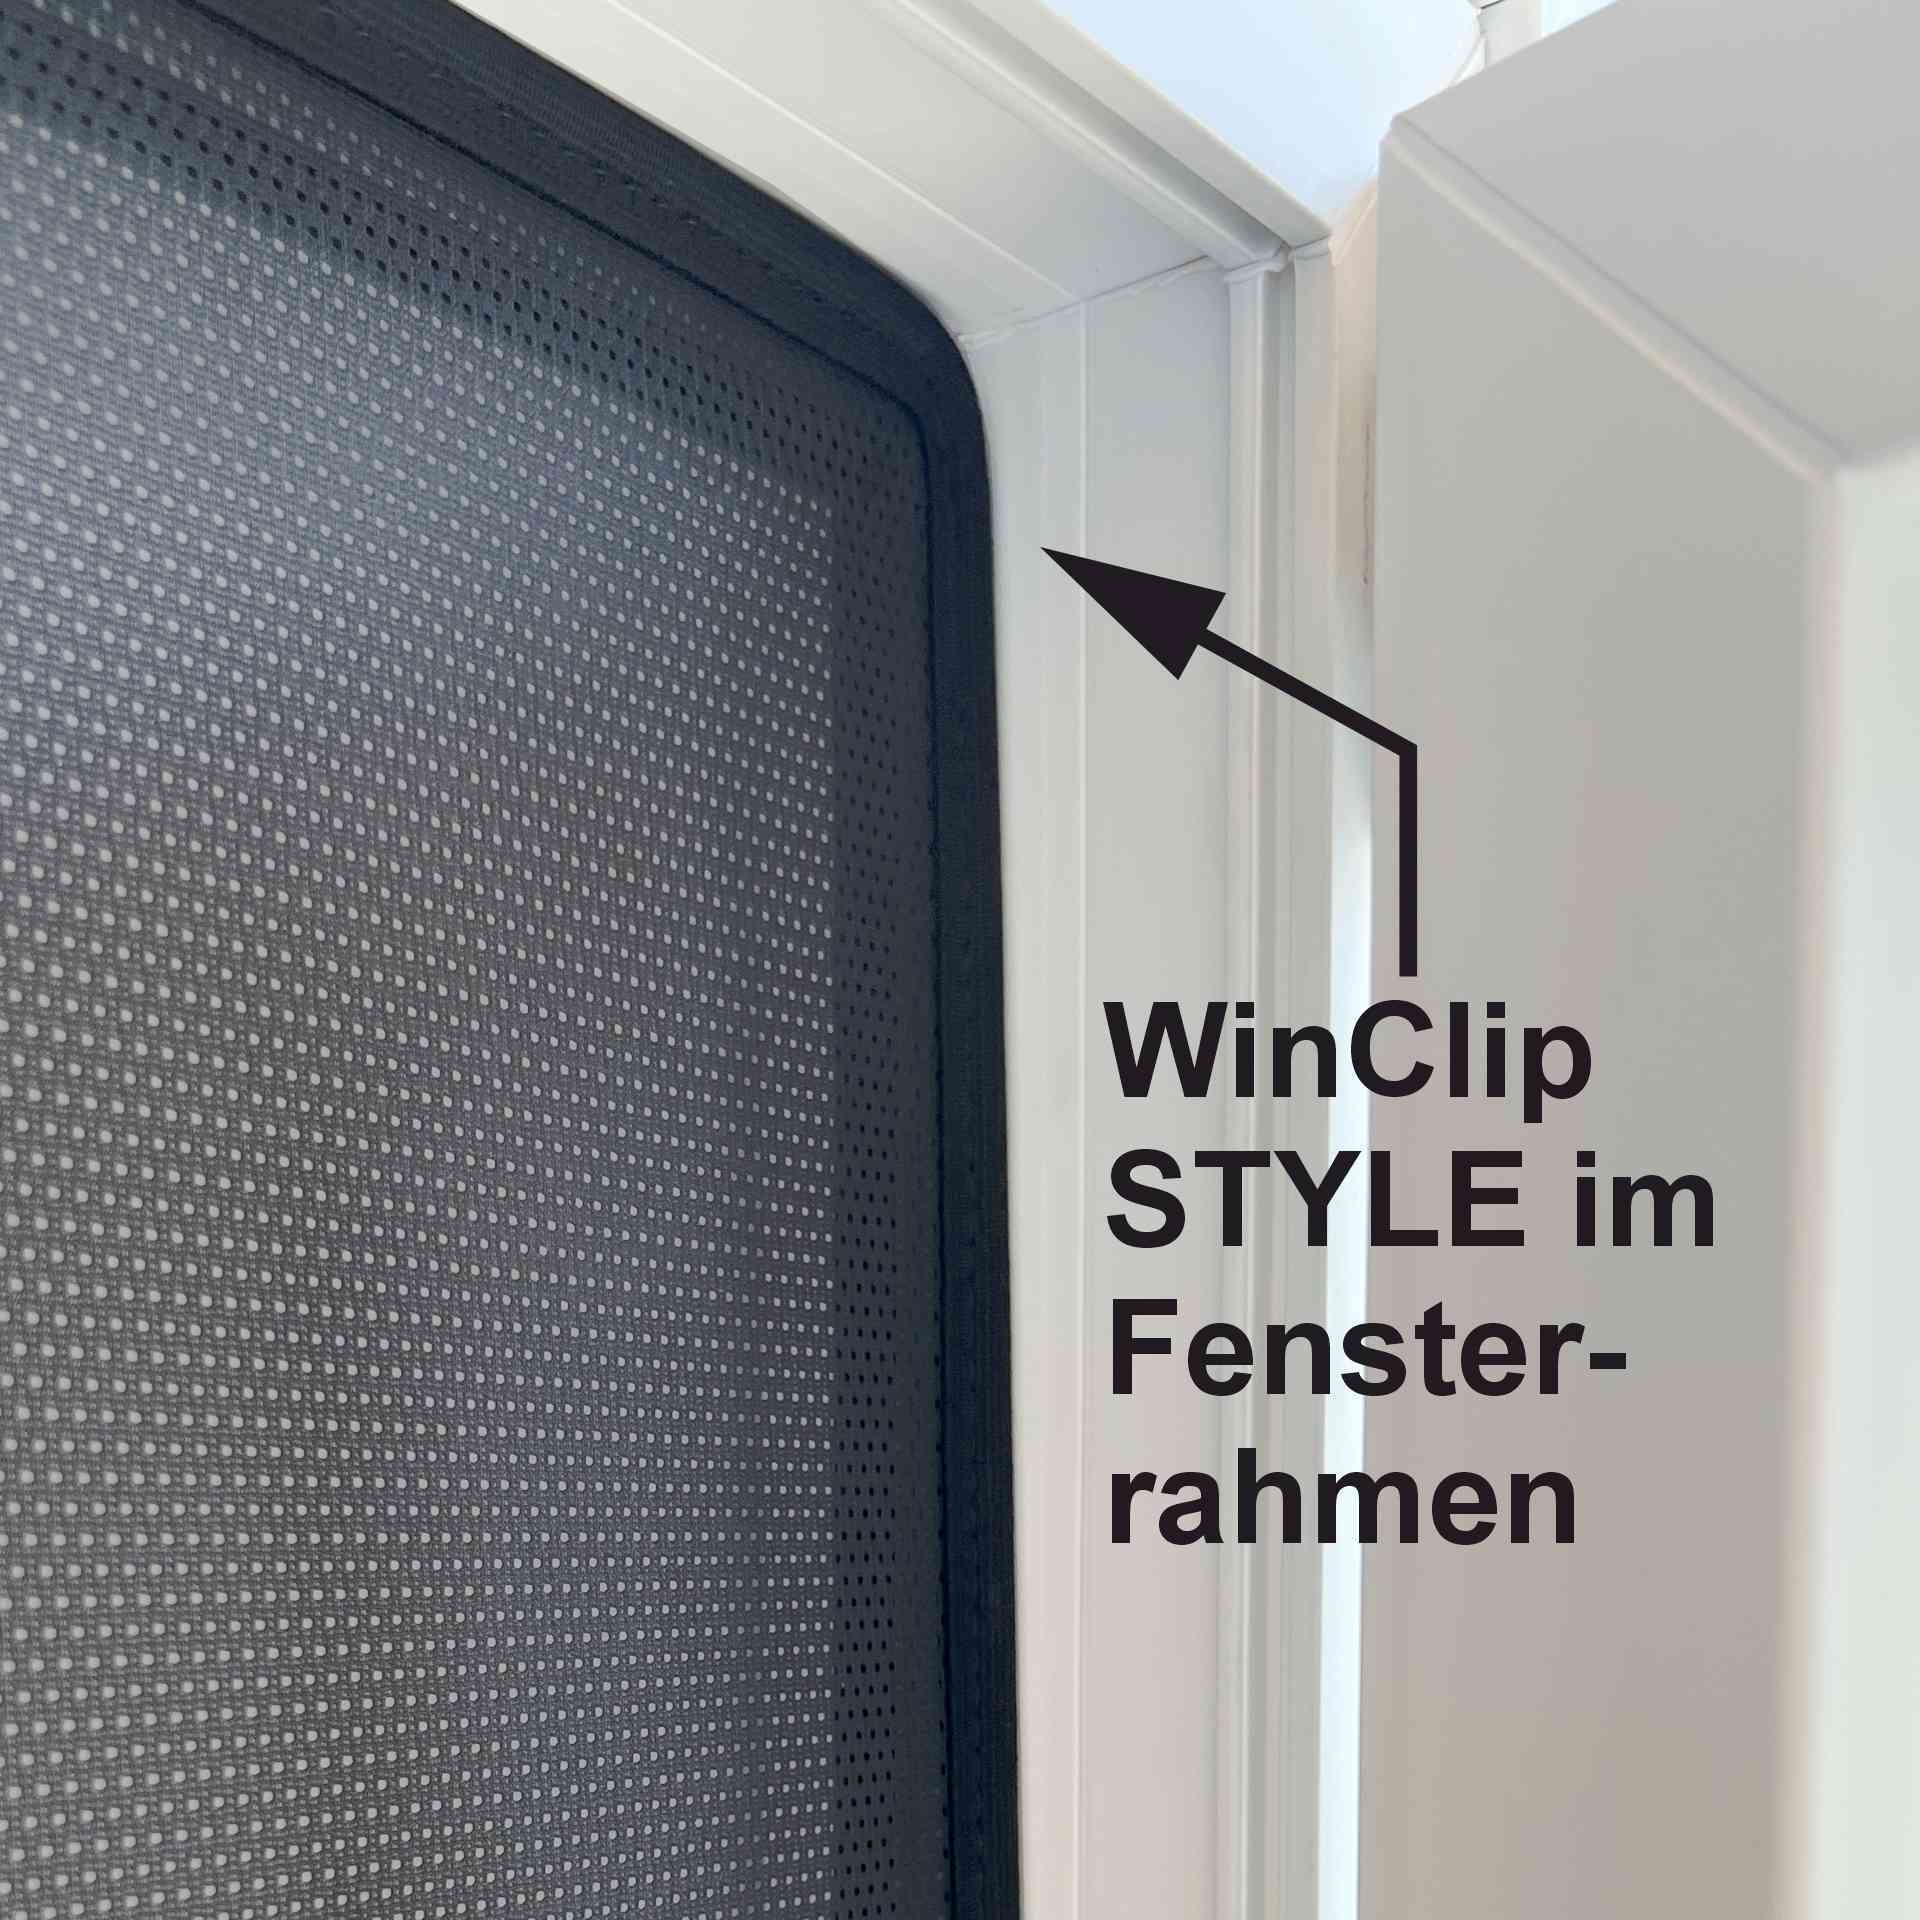
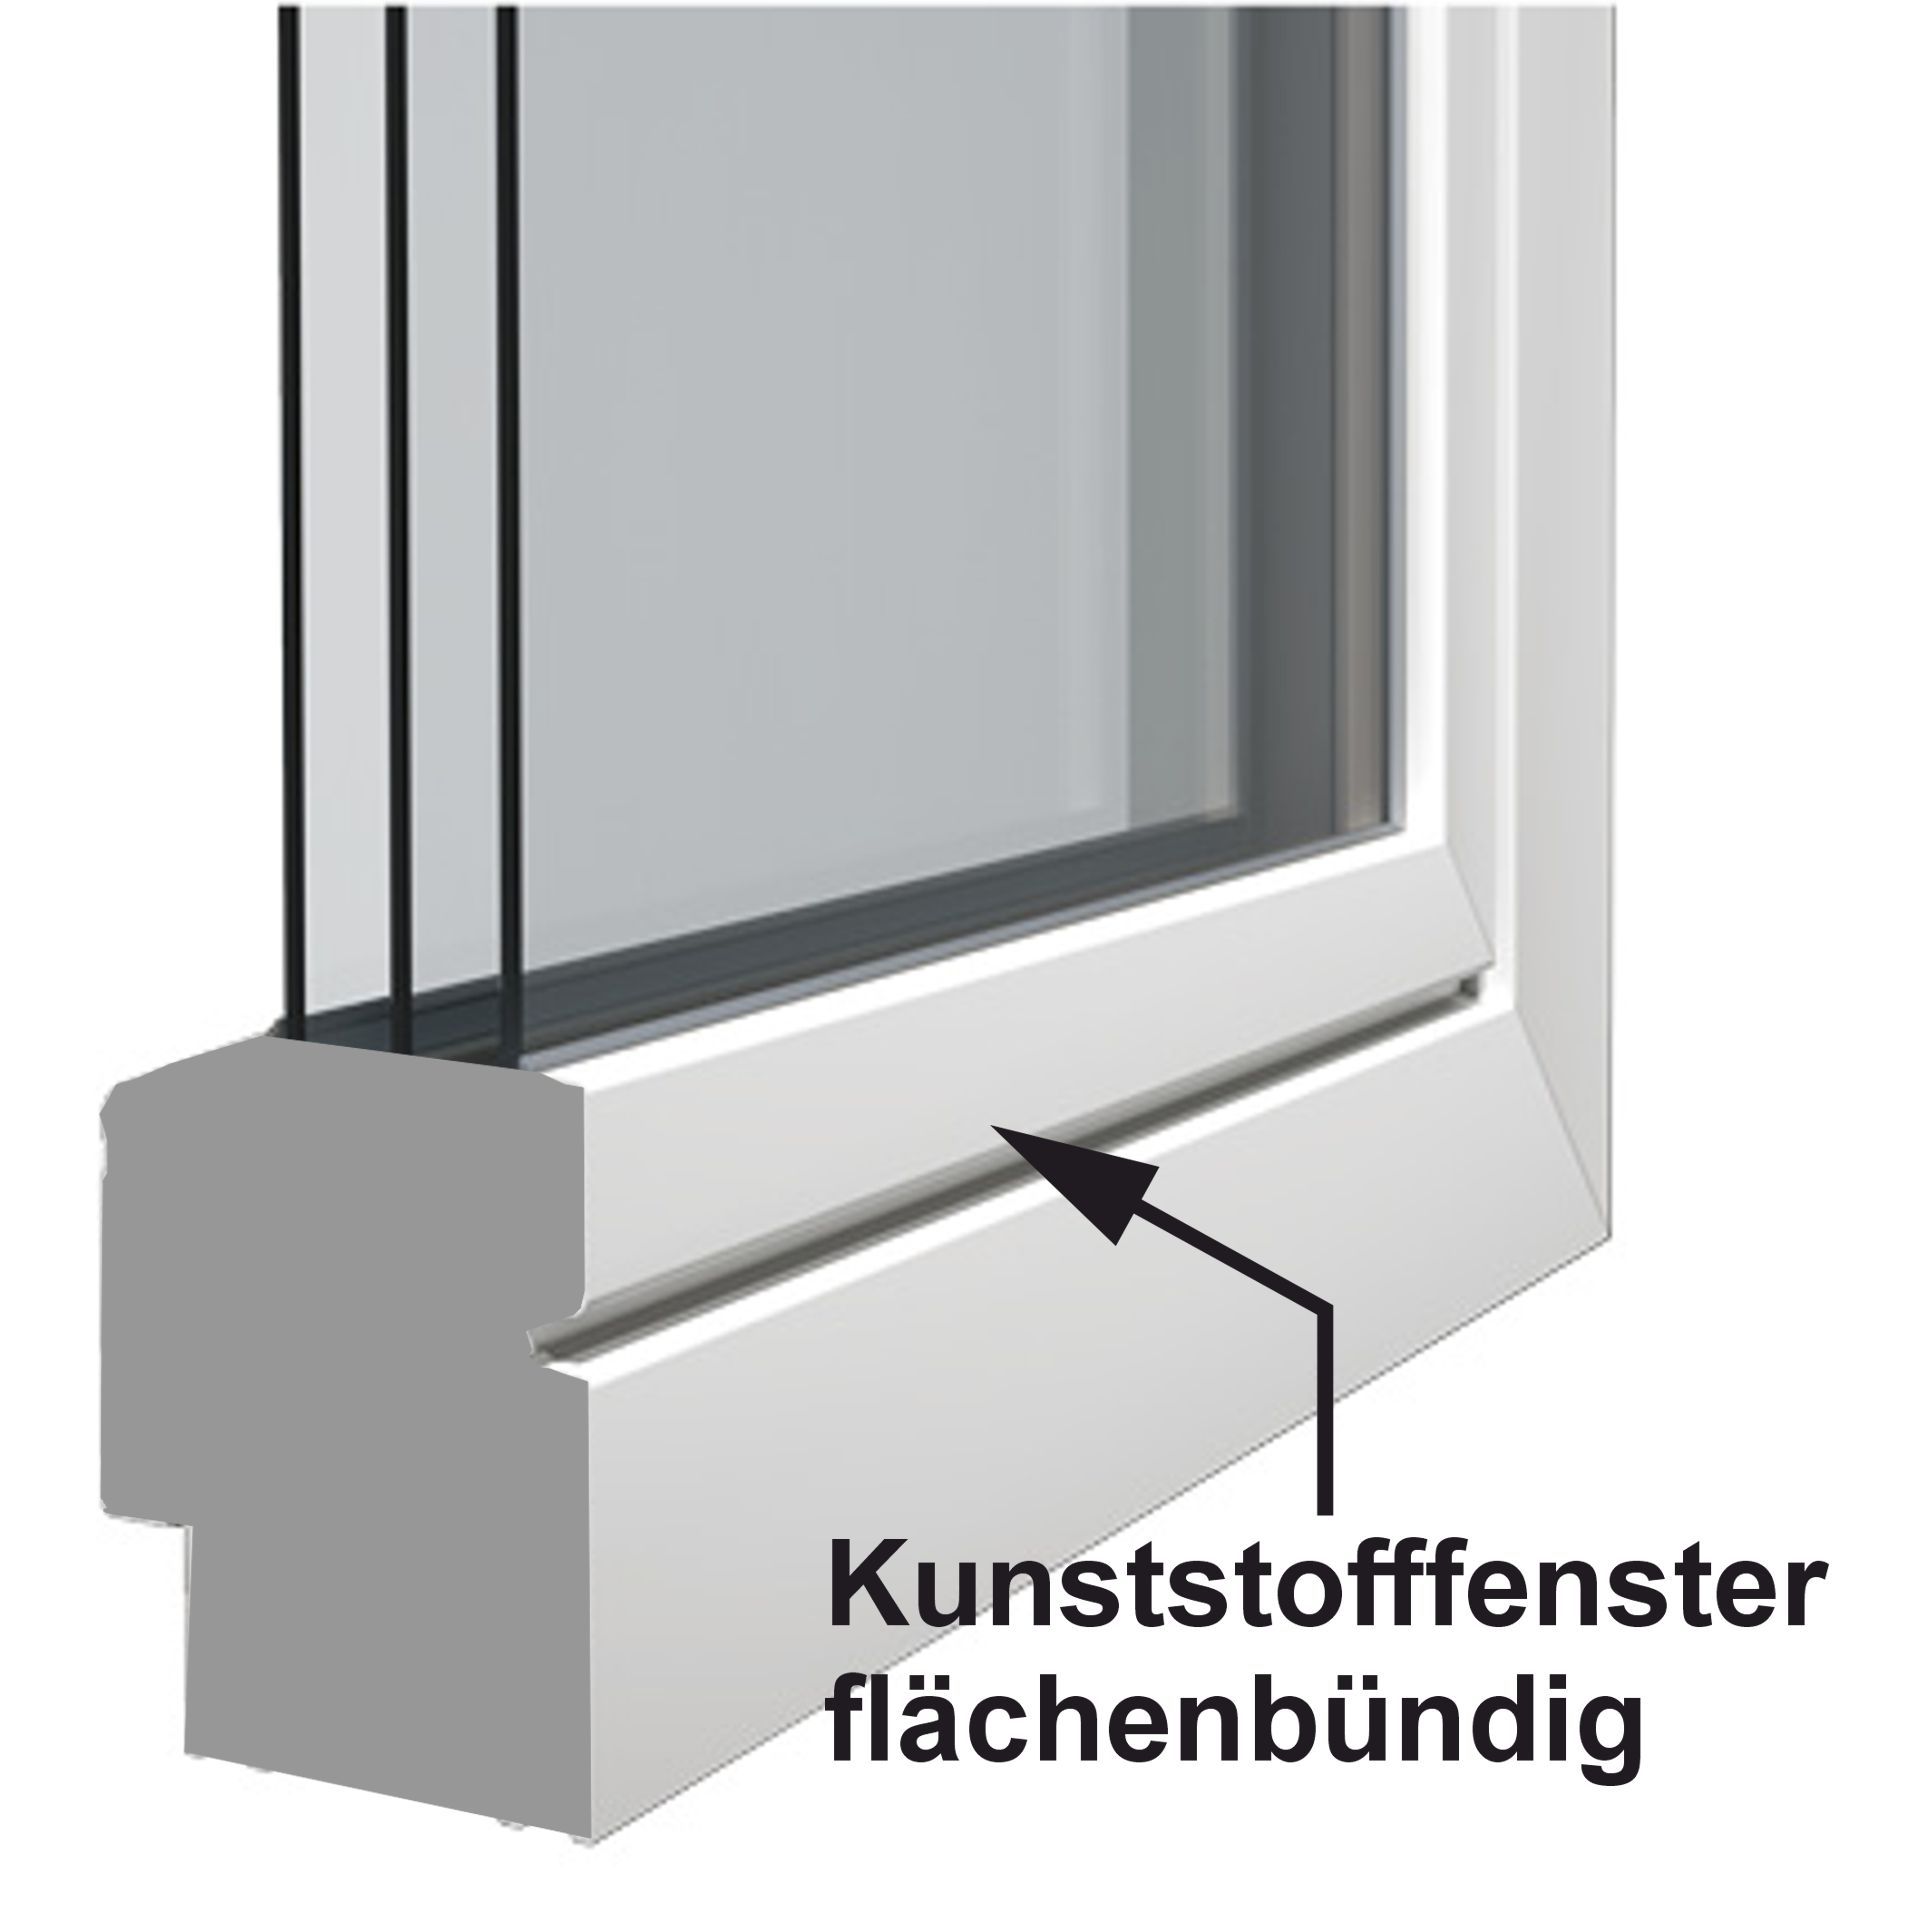
1. WinClip STYLE
- especially for offset plastic windows -


- Complete and precise protection when the window is open
- Very easy to install
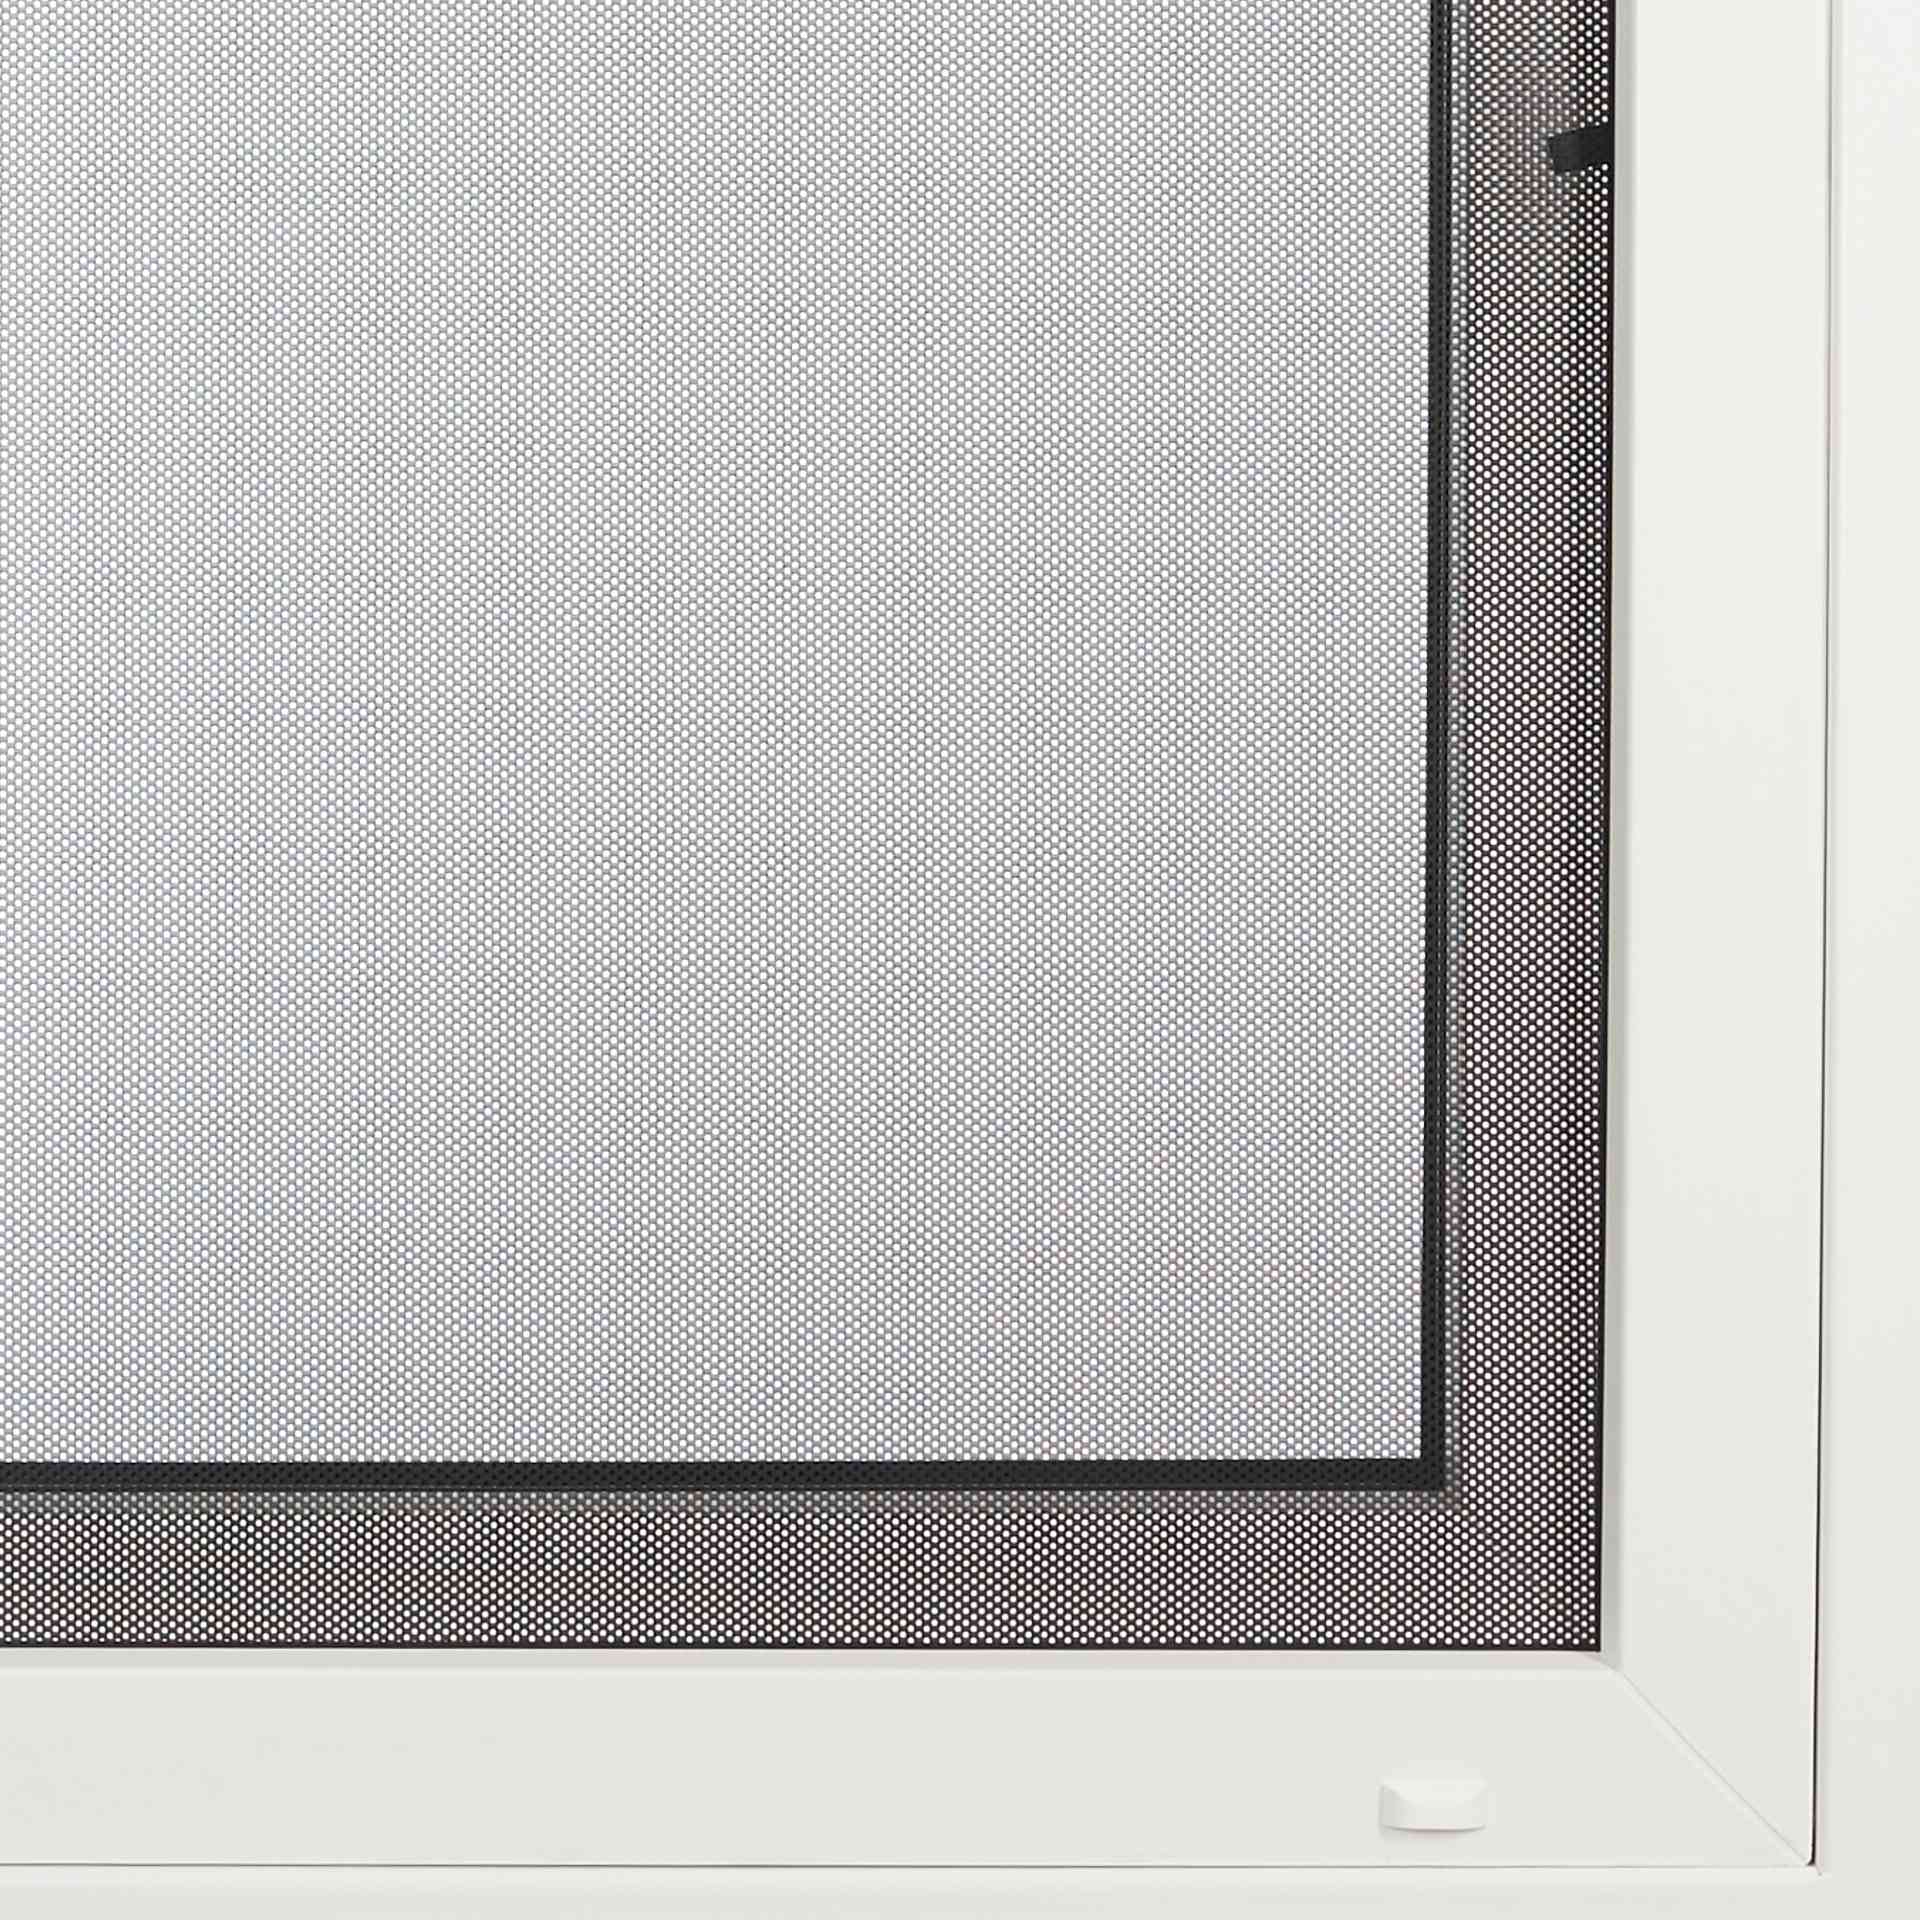
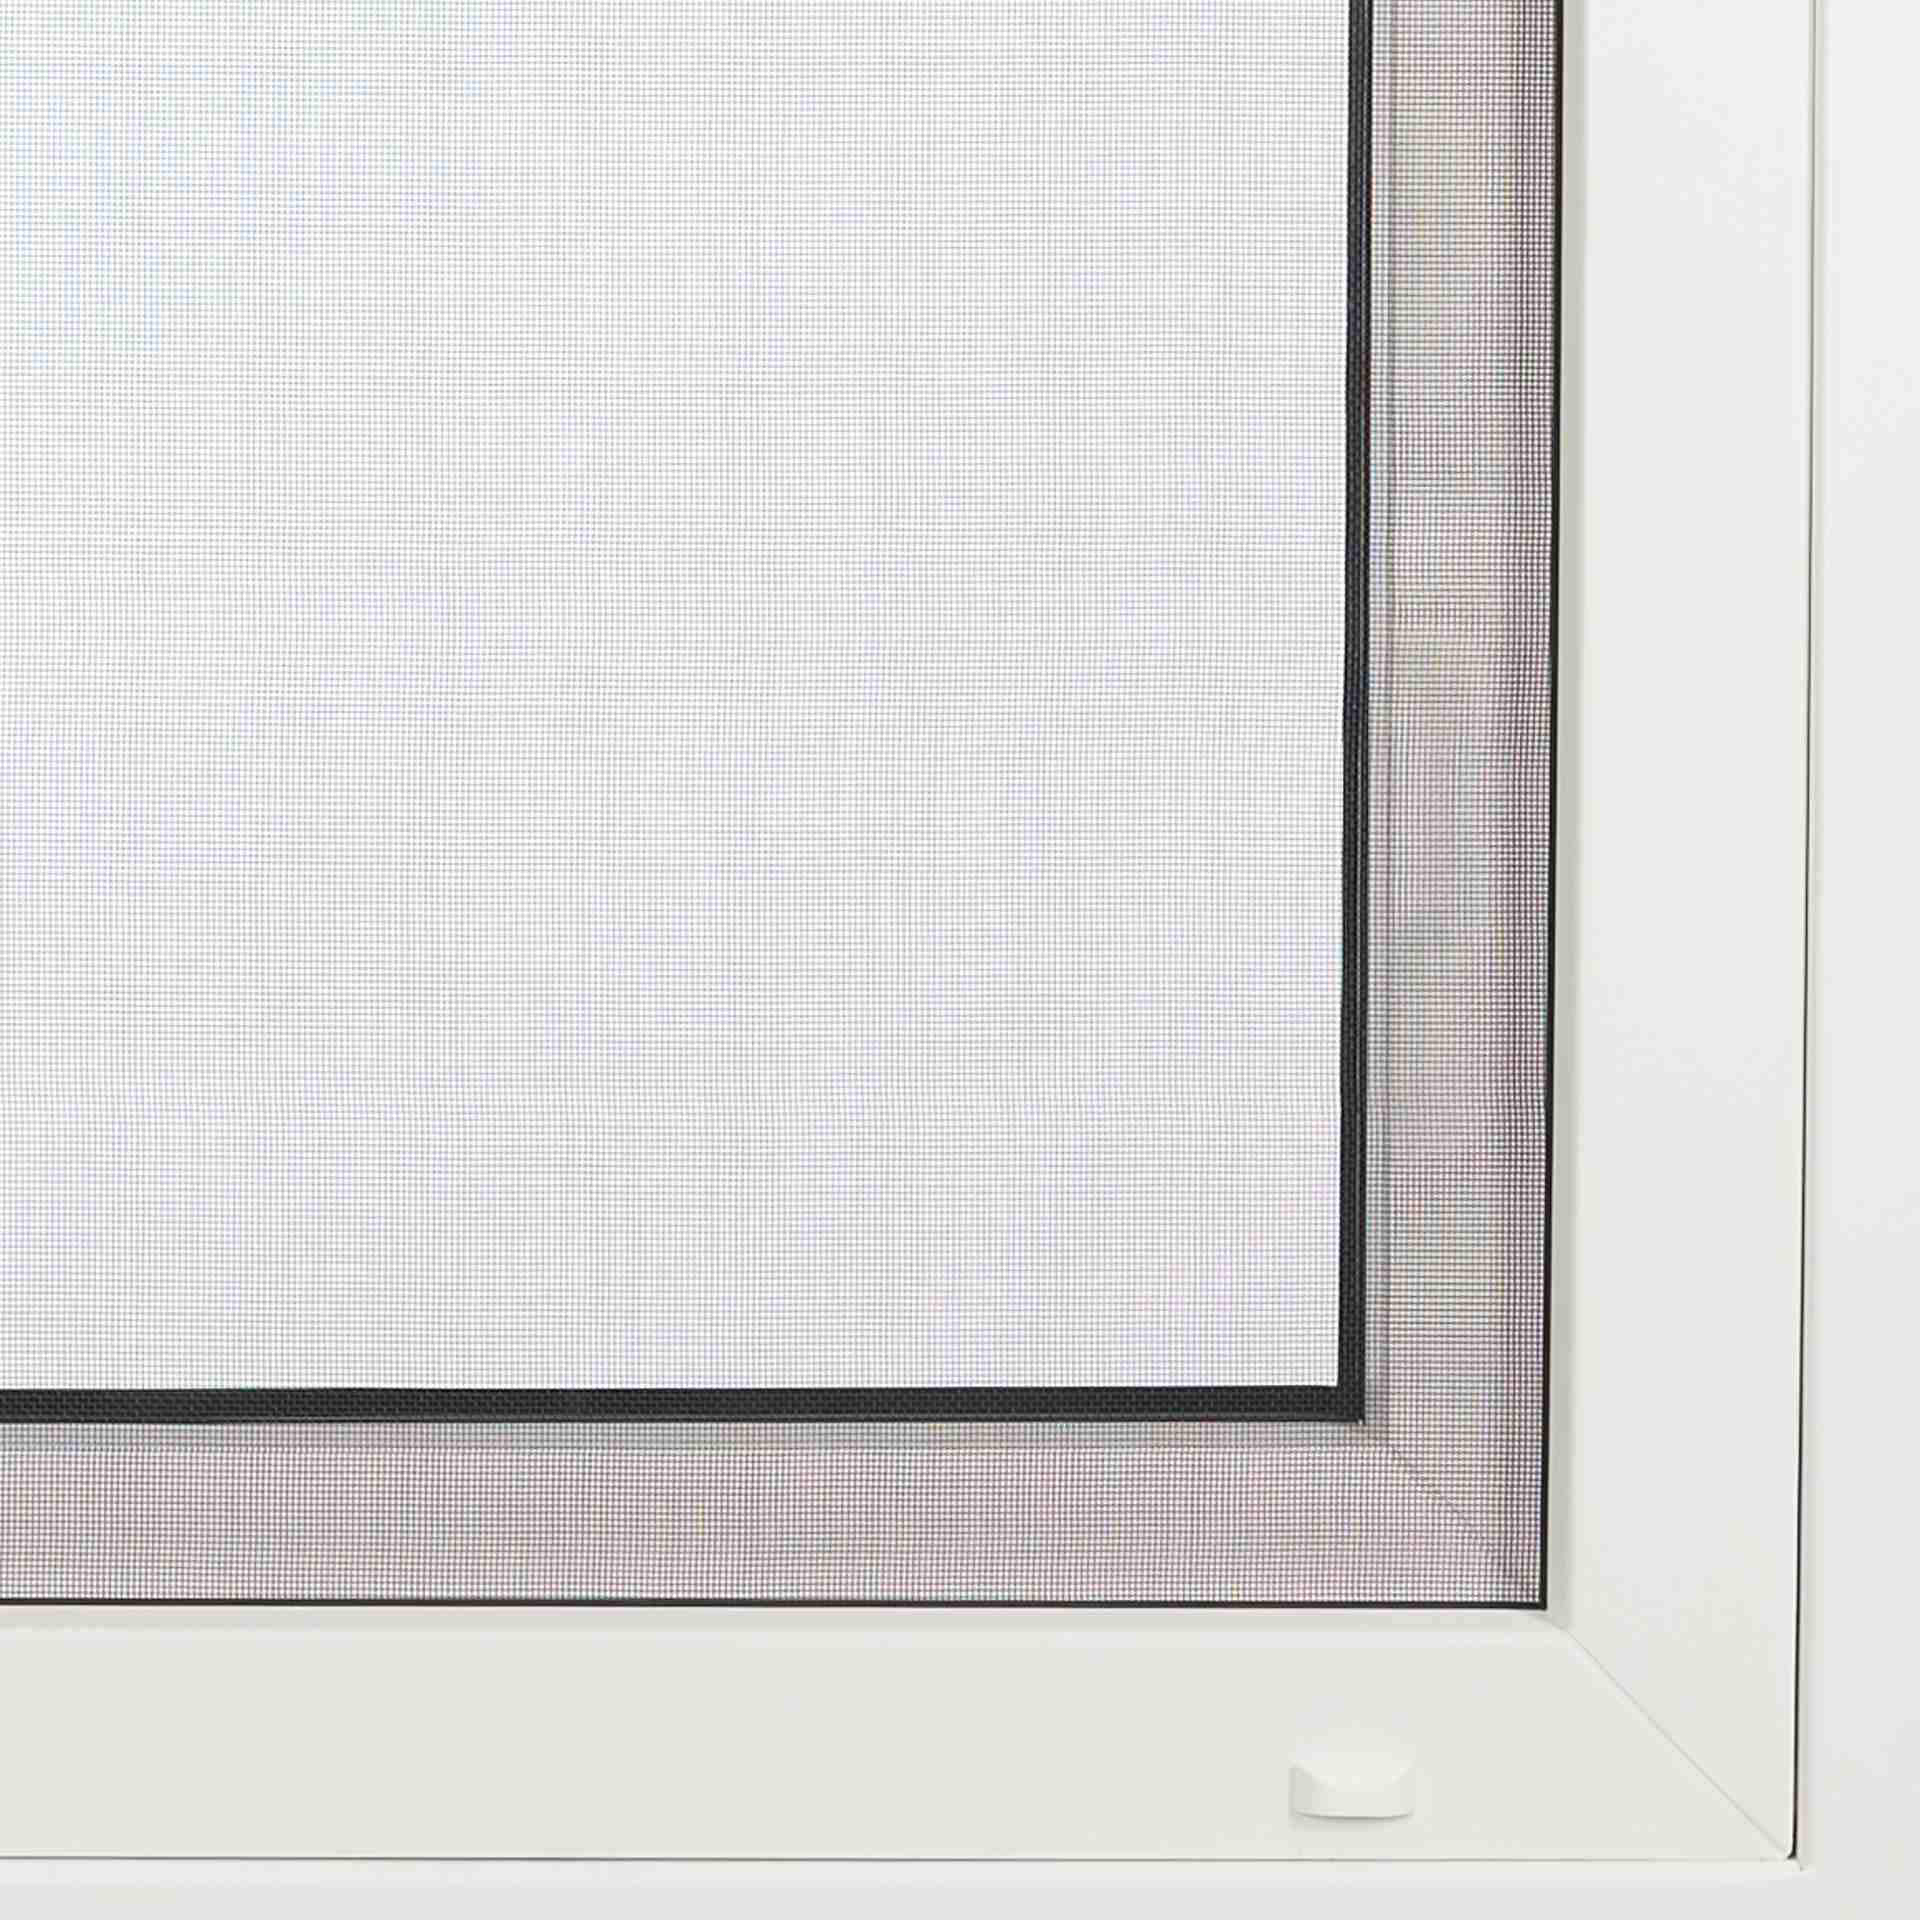
- Lies inside the window frame
- Residue-free removal
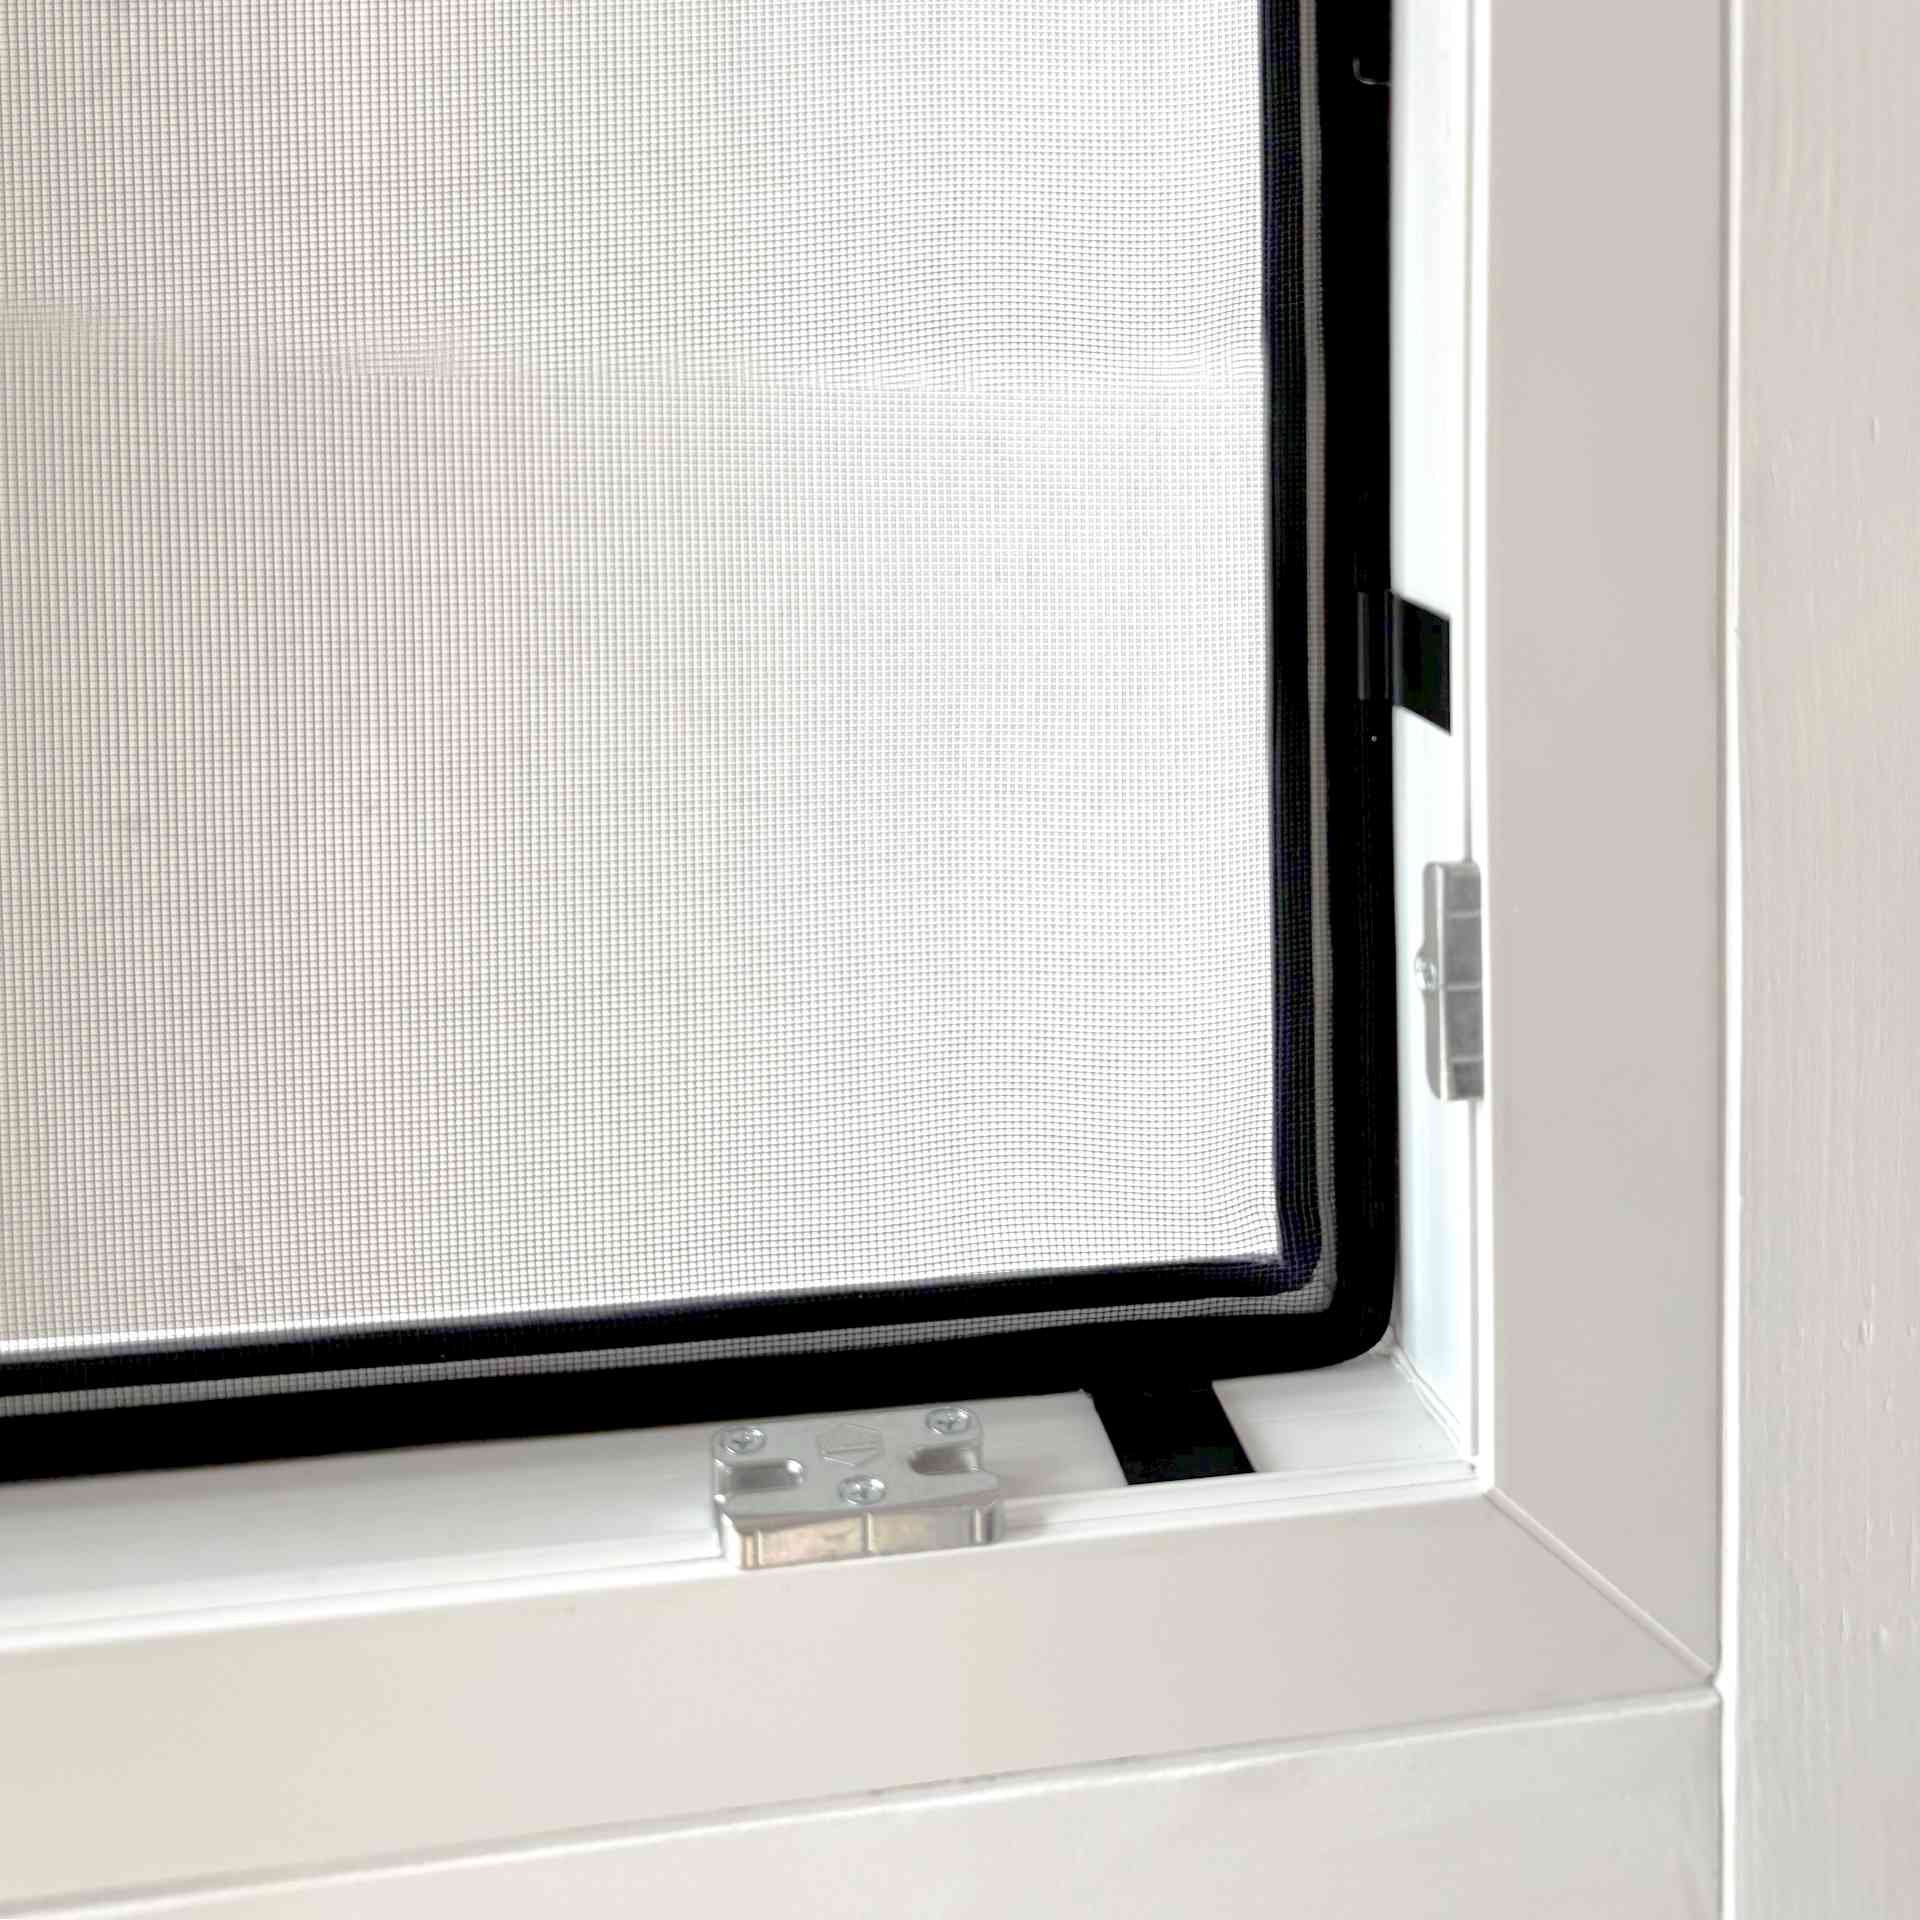
- Secure hold thanks to patented clip system
- UV-resistant and light-fast material
- Tensioning frame not visible from the outside
- plastic windows
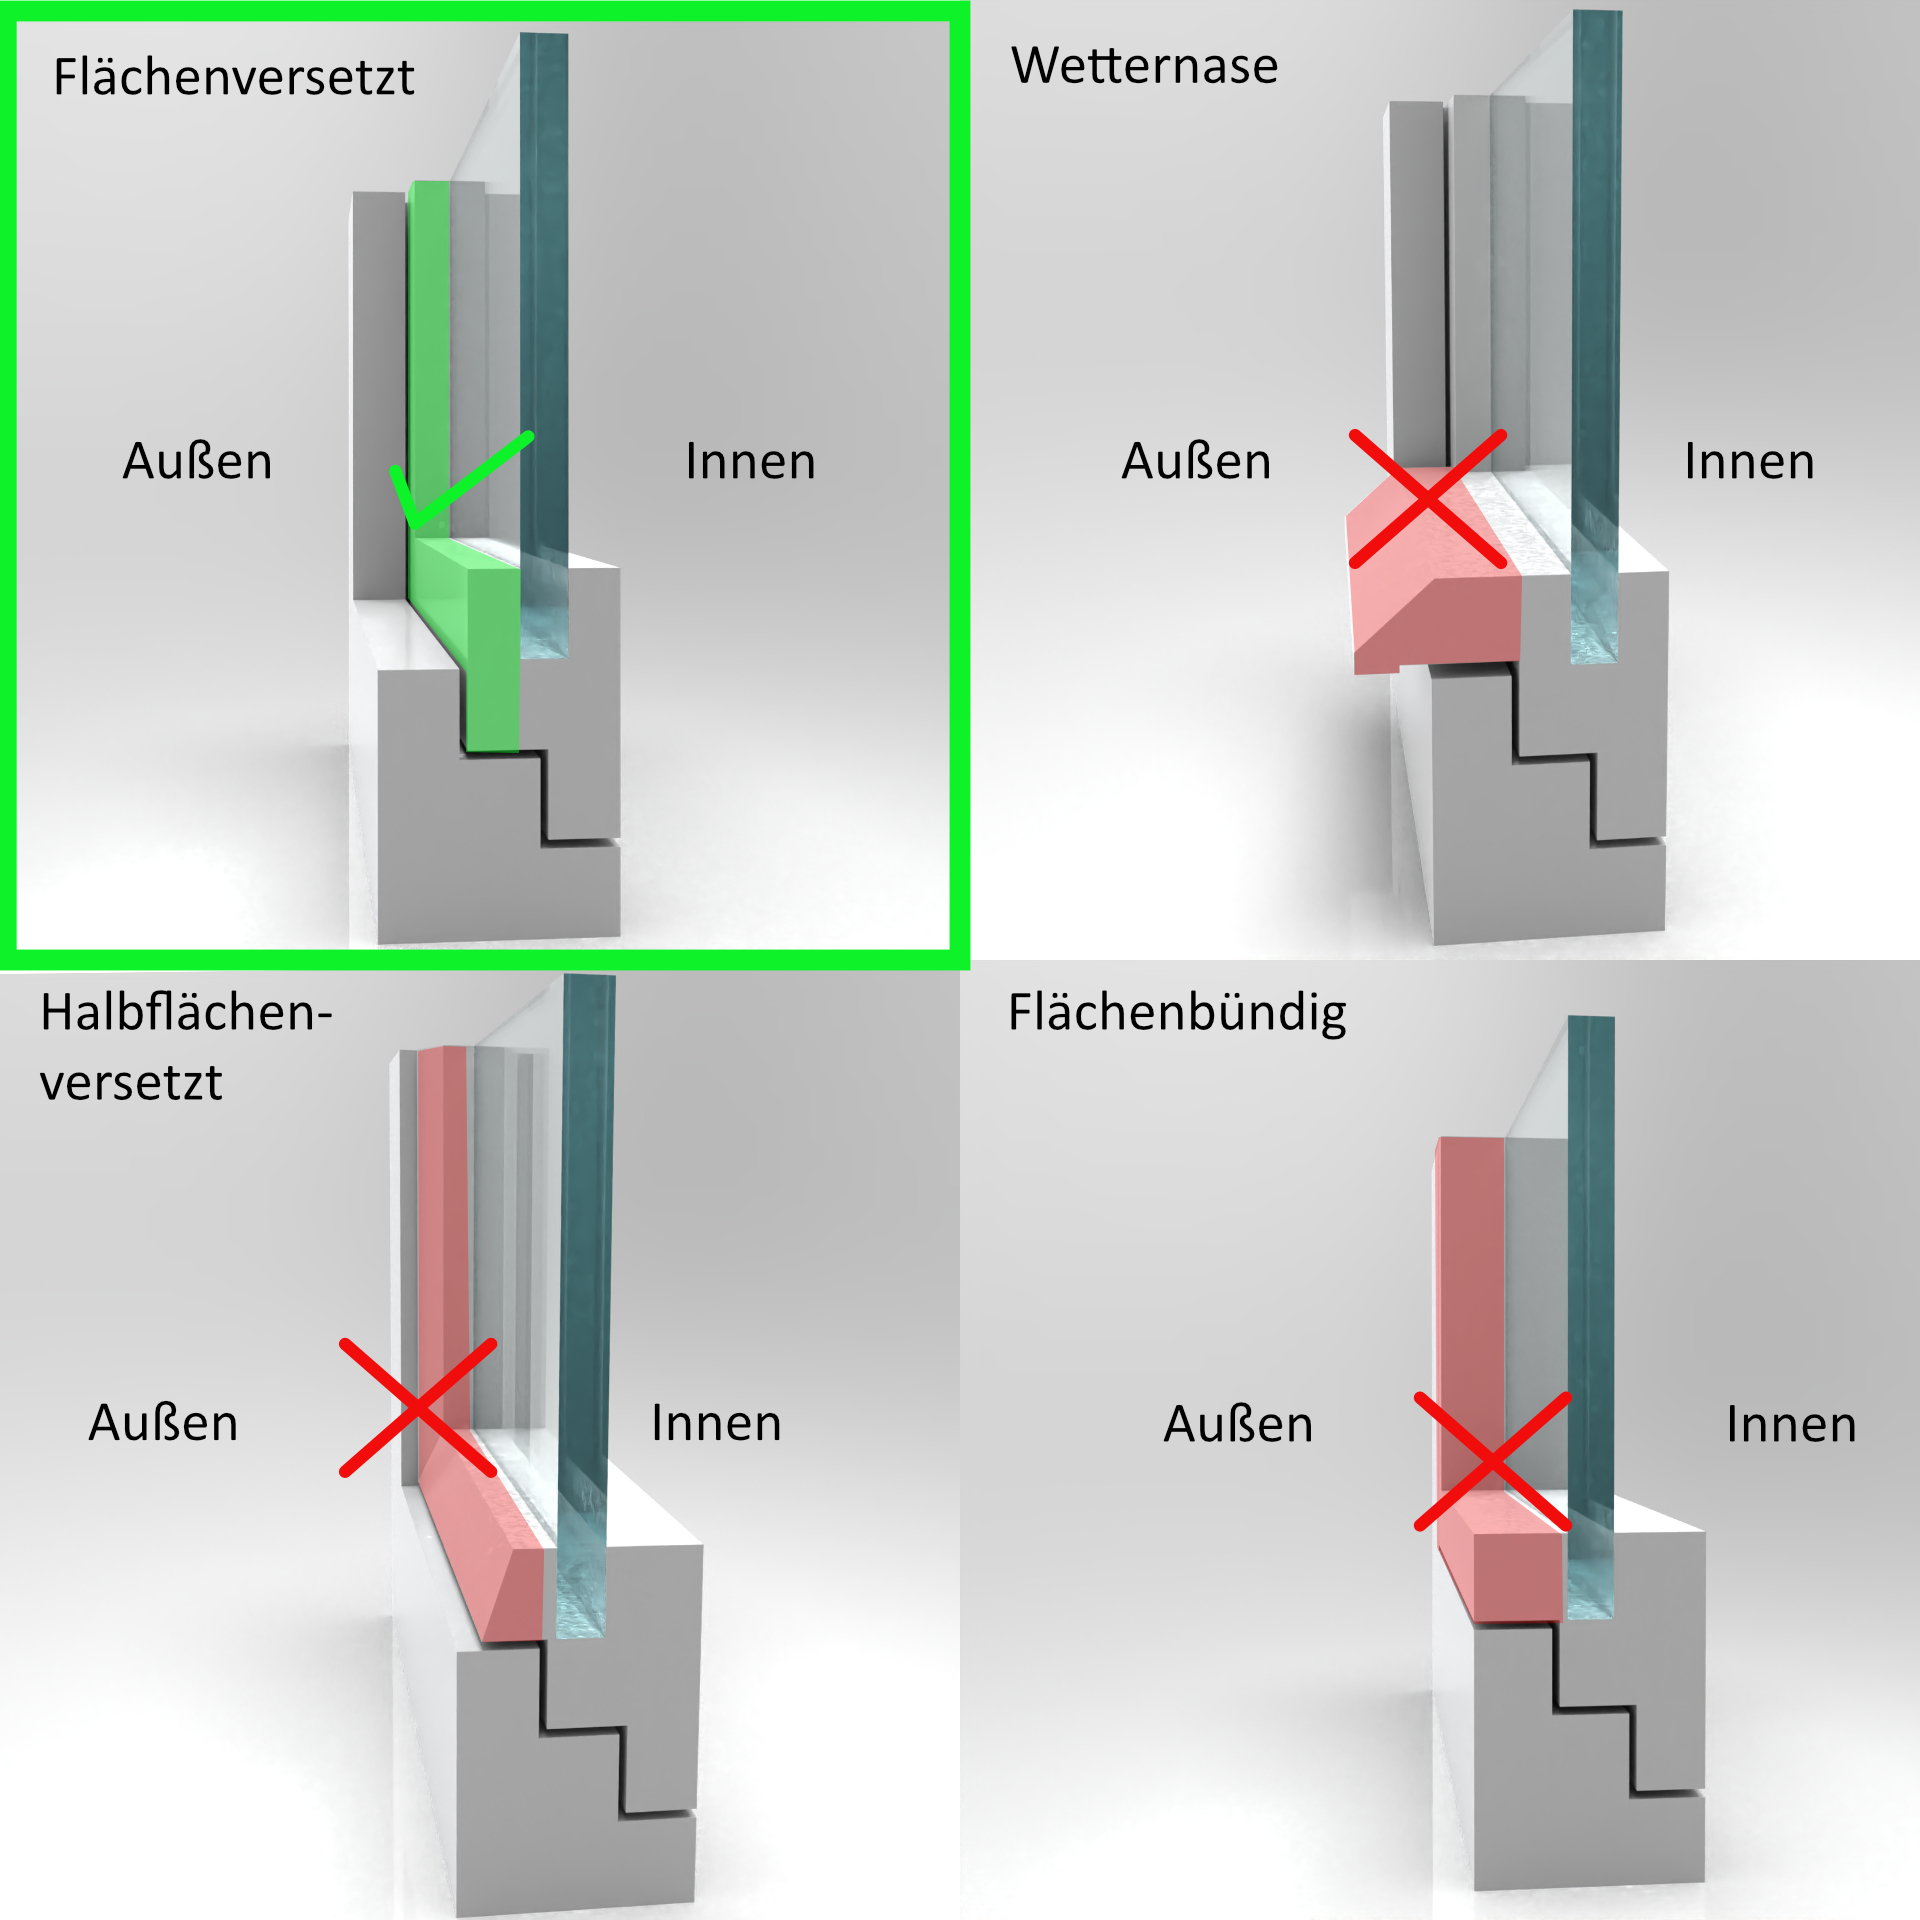
- offset window profiles (stepped transition between frame and sash) without weather board

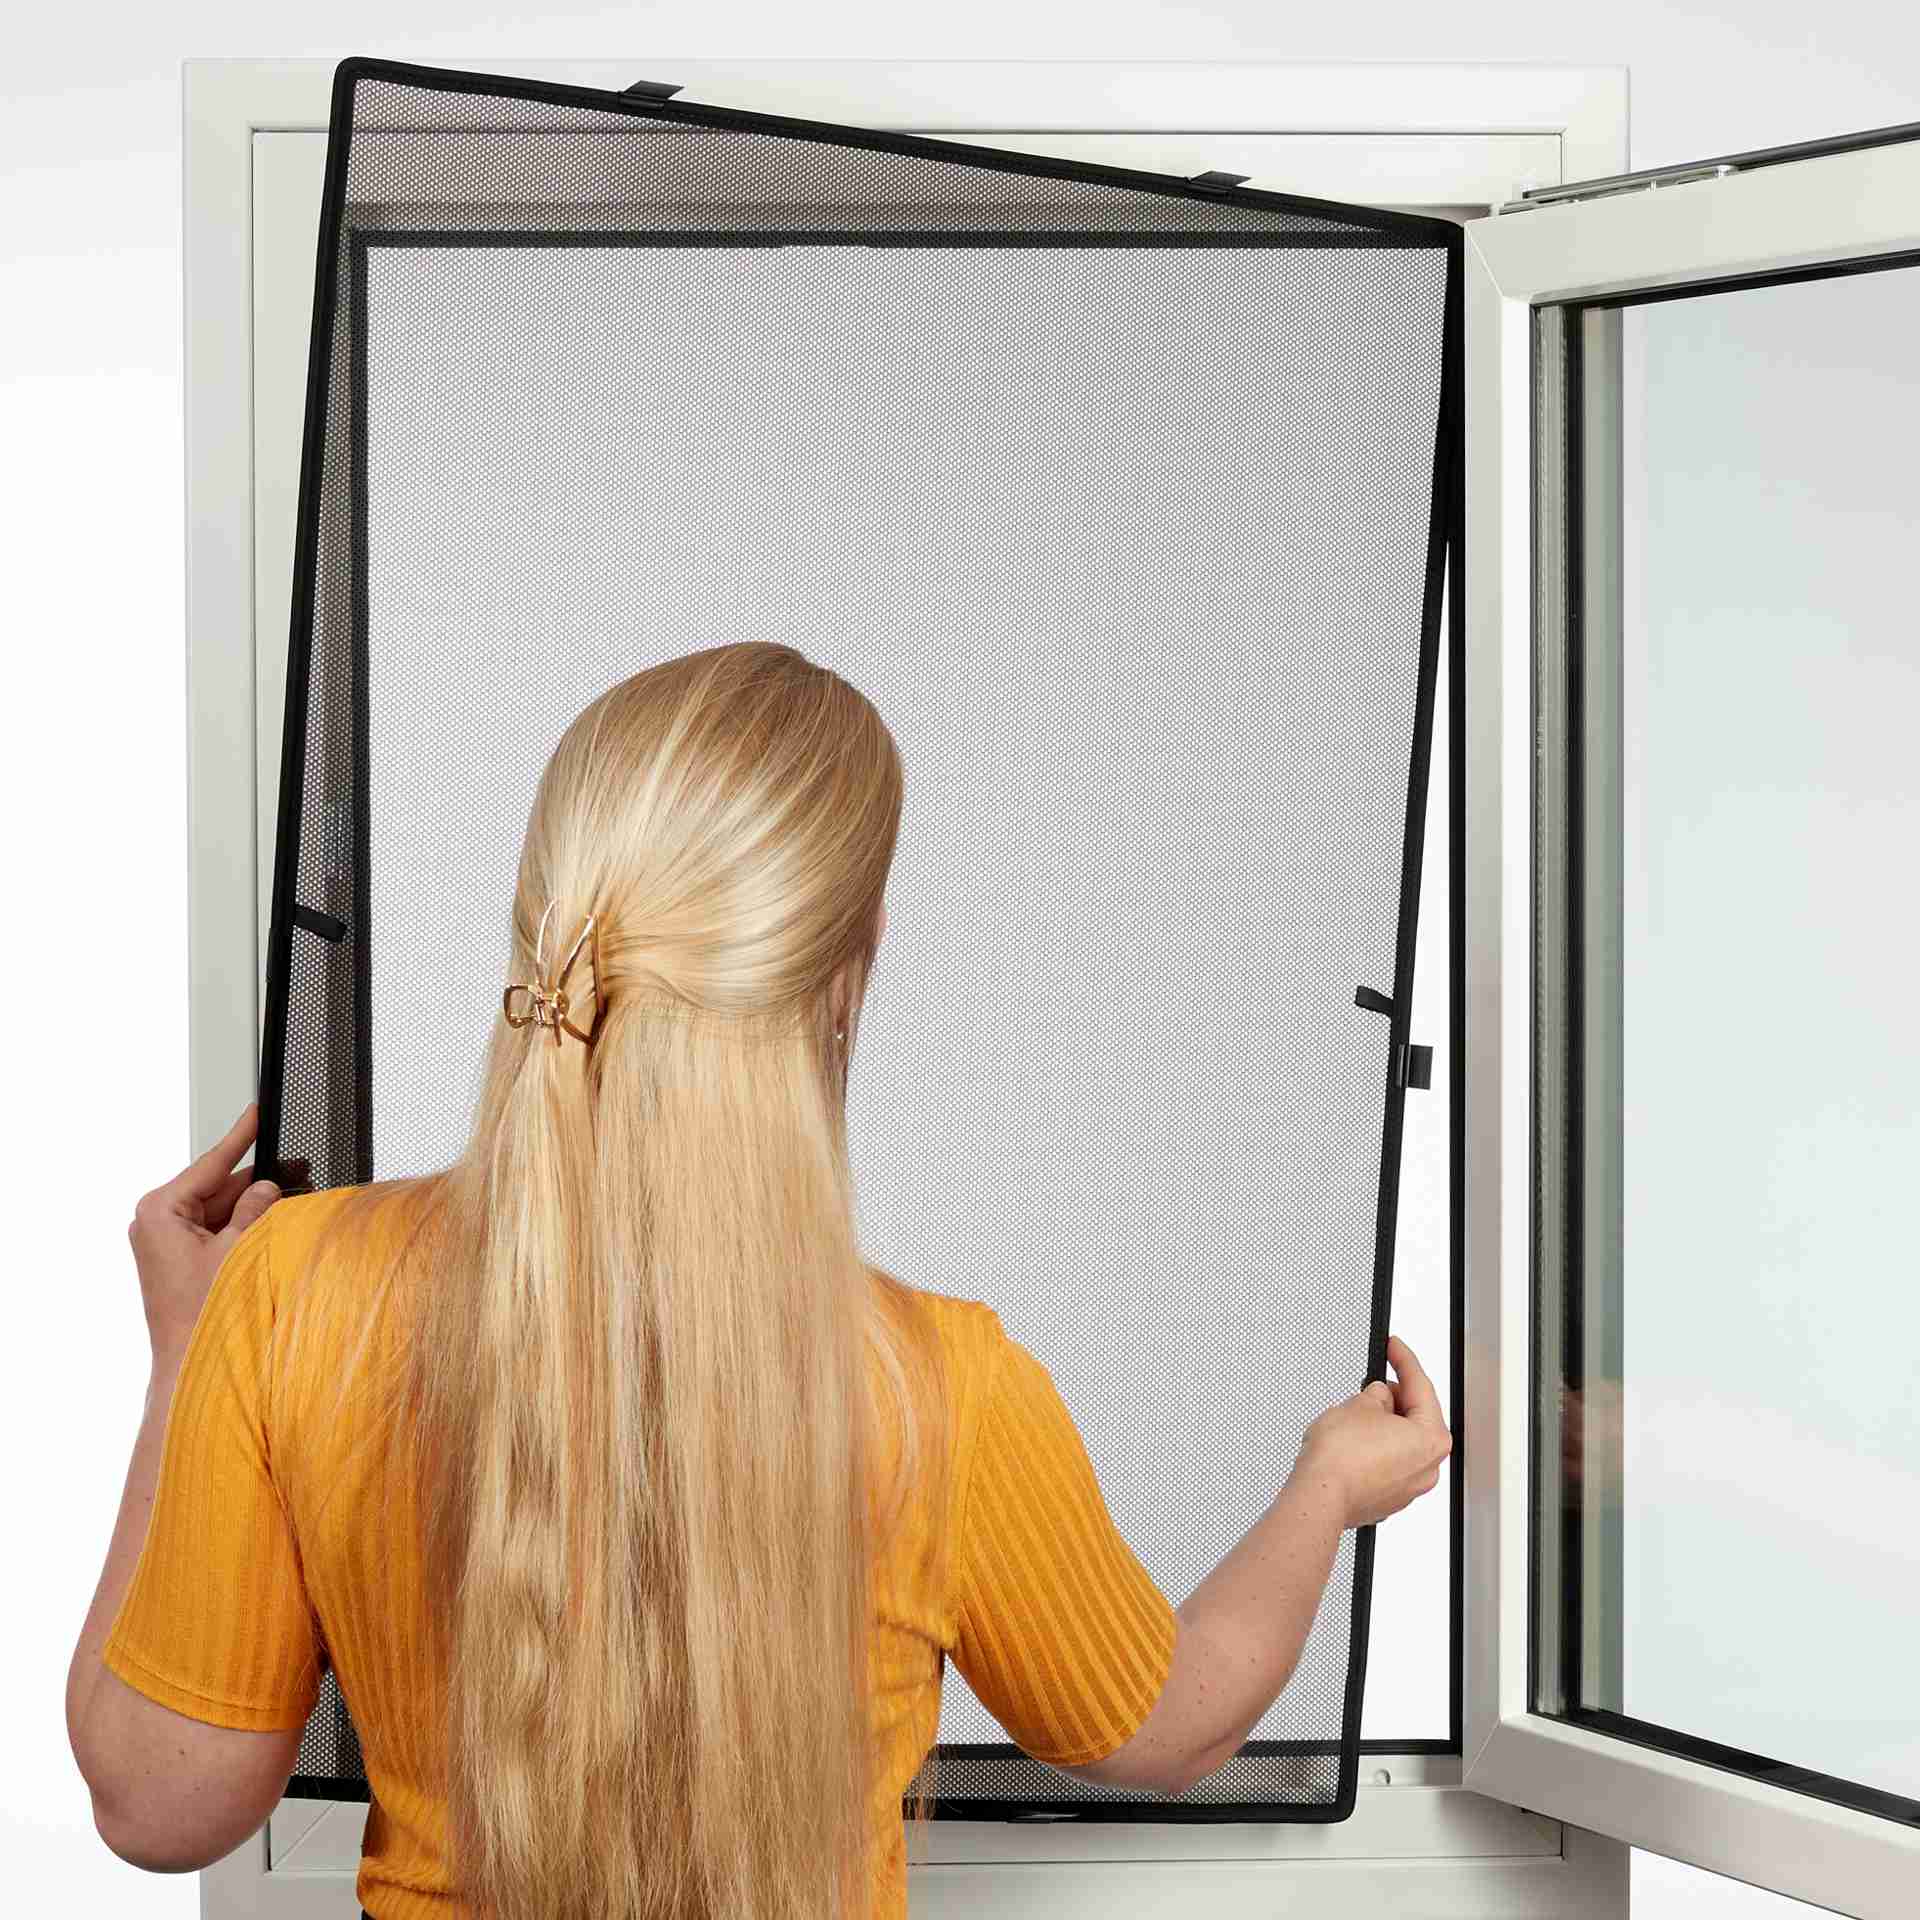
Now it’s time to measure the window. In this video, we show you how to measure the window and place an order in our shop:
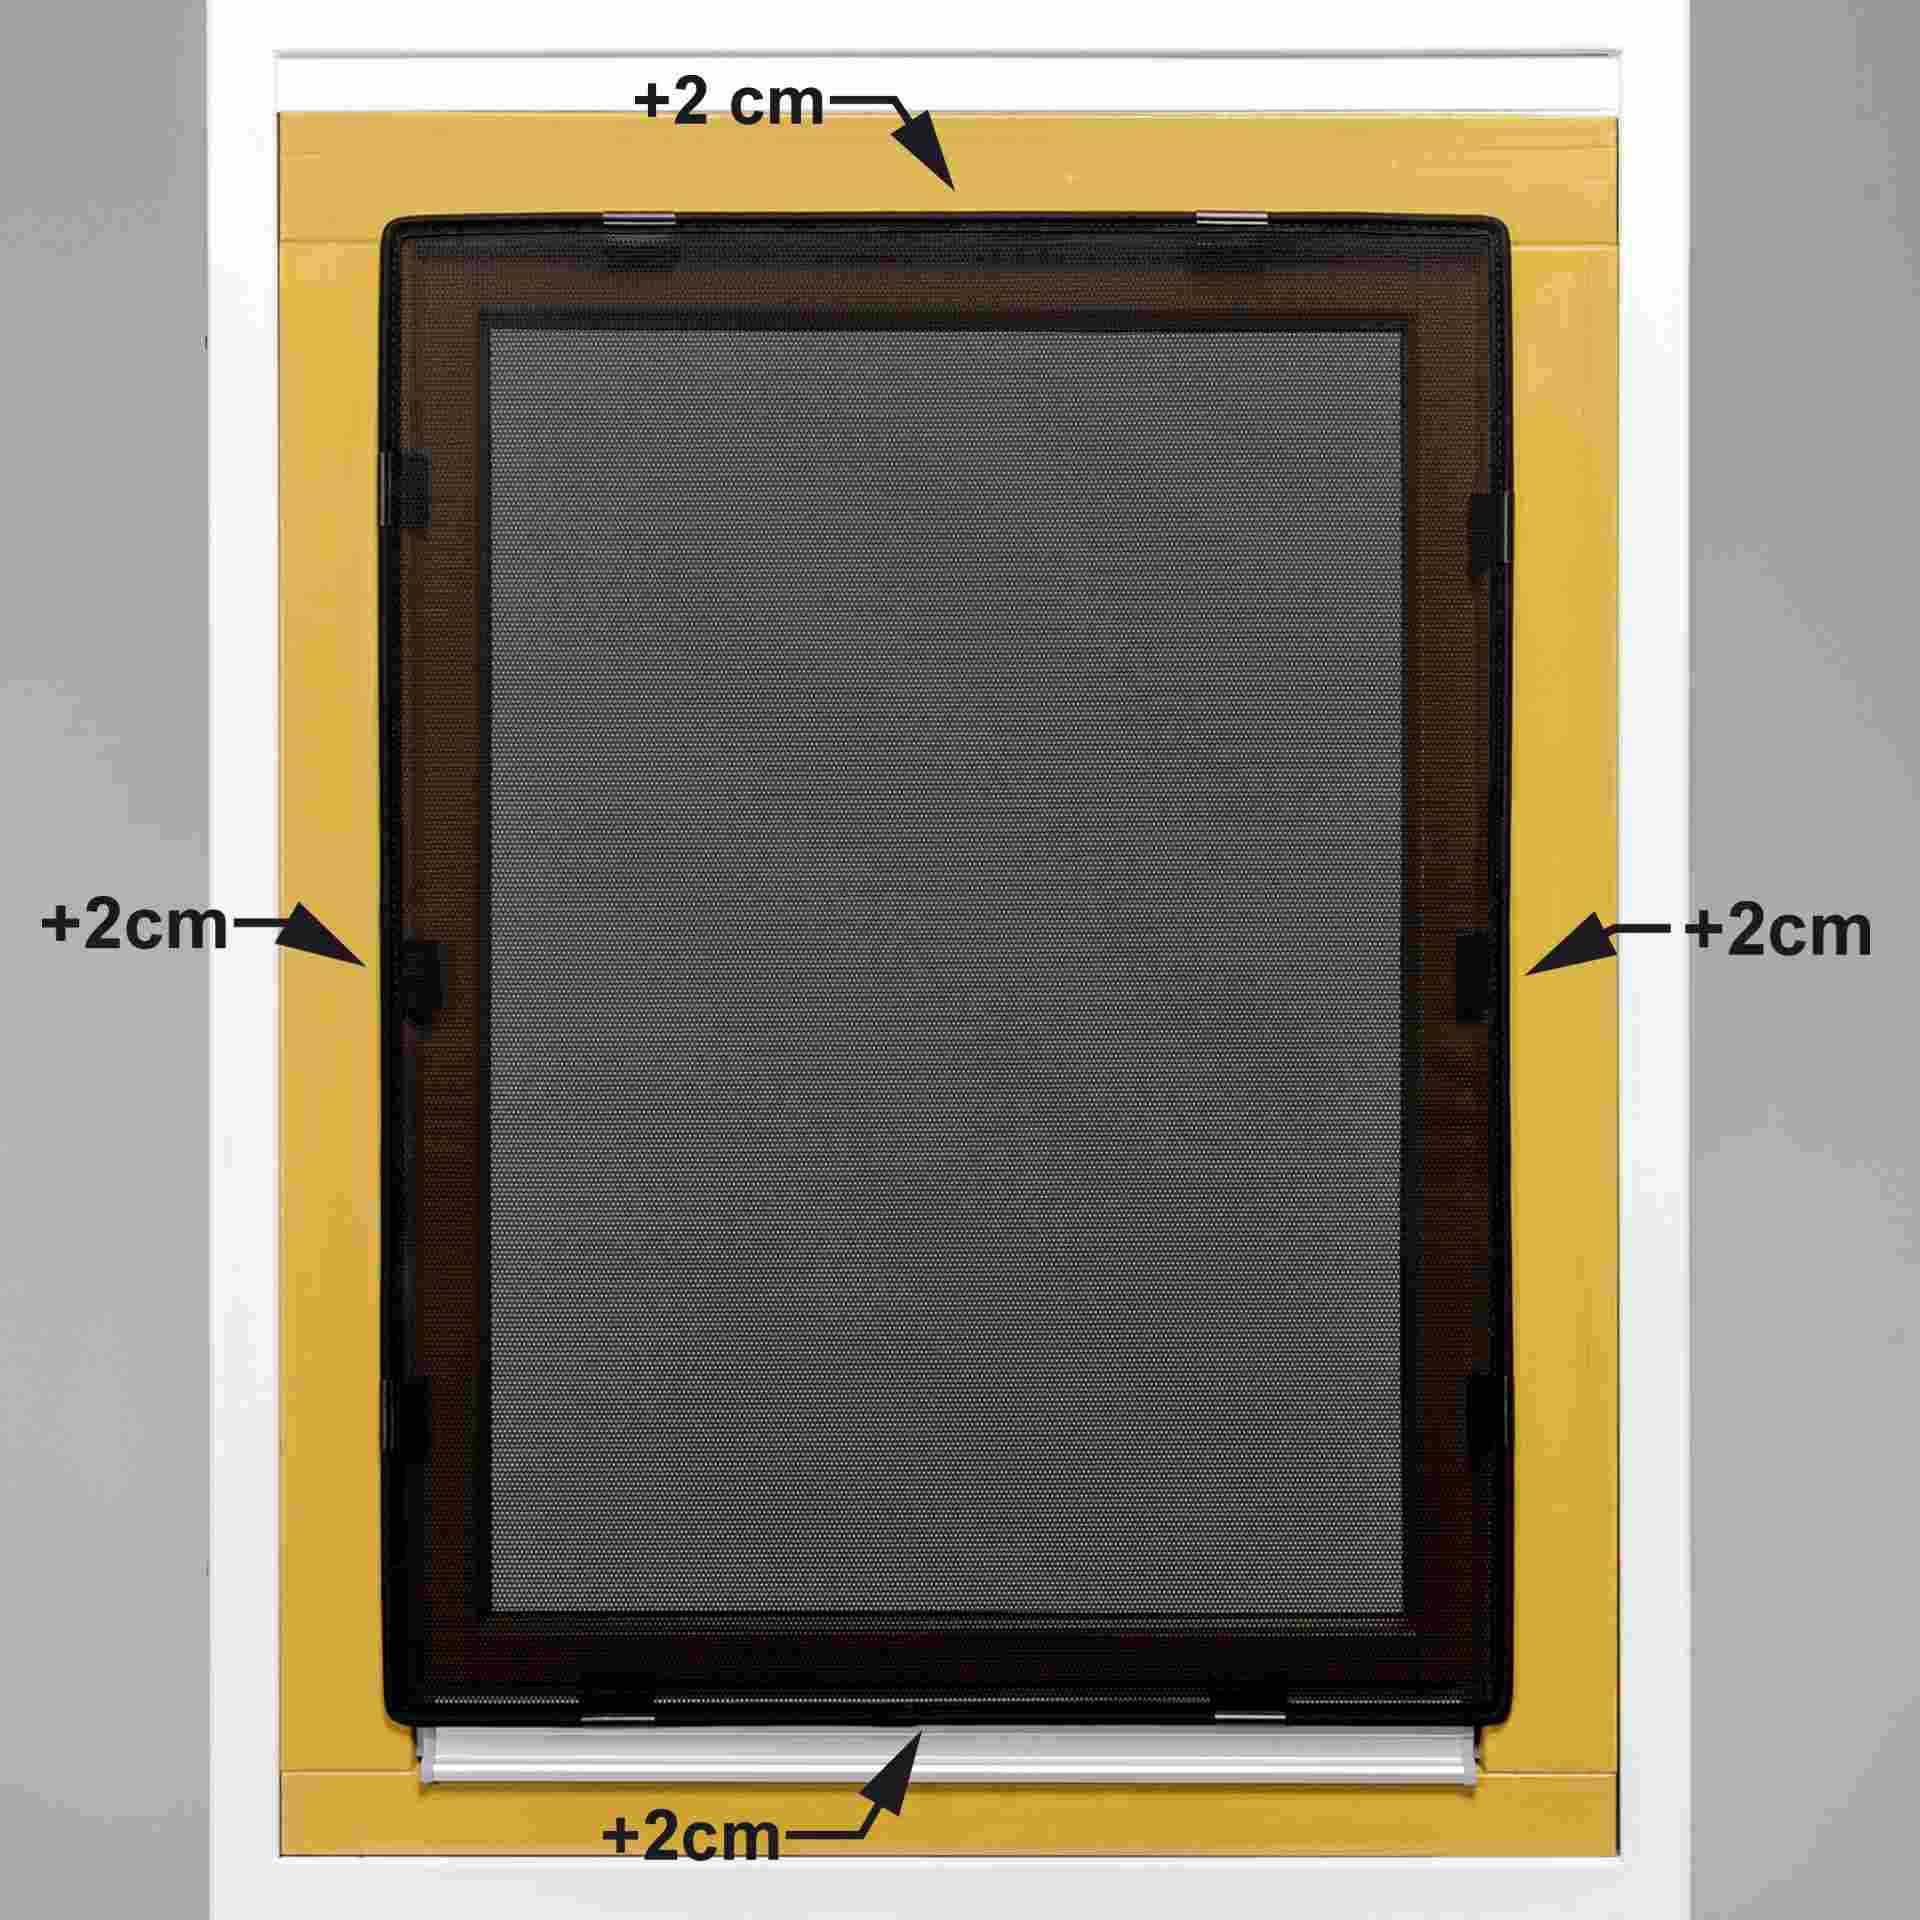
Place a standard tape measure against the window frame of an open window and measure the width and height to the nearest millimetre. Then enter the measurements into our configurator on the order form and add the item to your basket.
In this video below, we demonstrate how to install the WinClip STYLE in a plastic window:
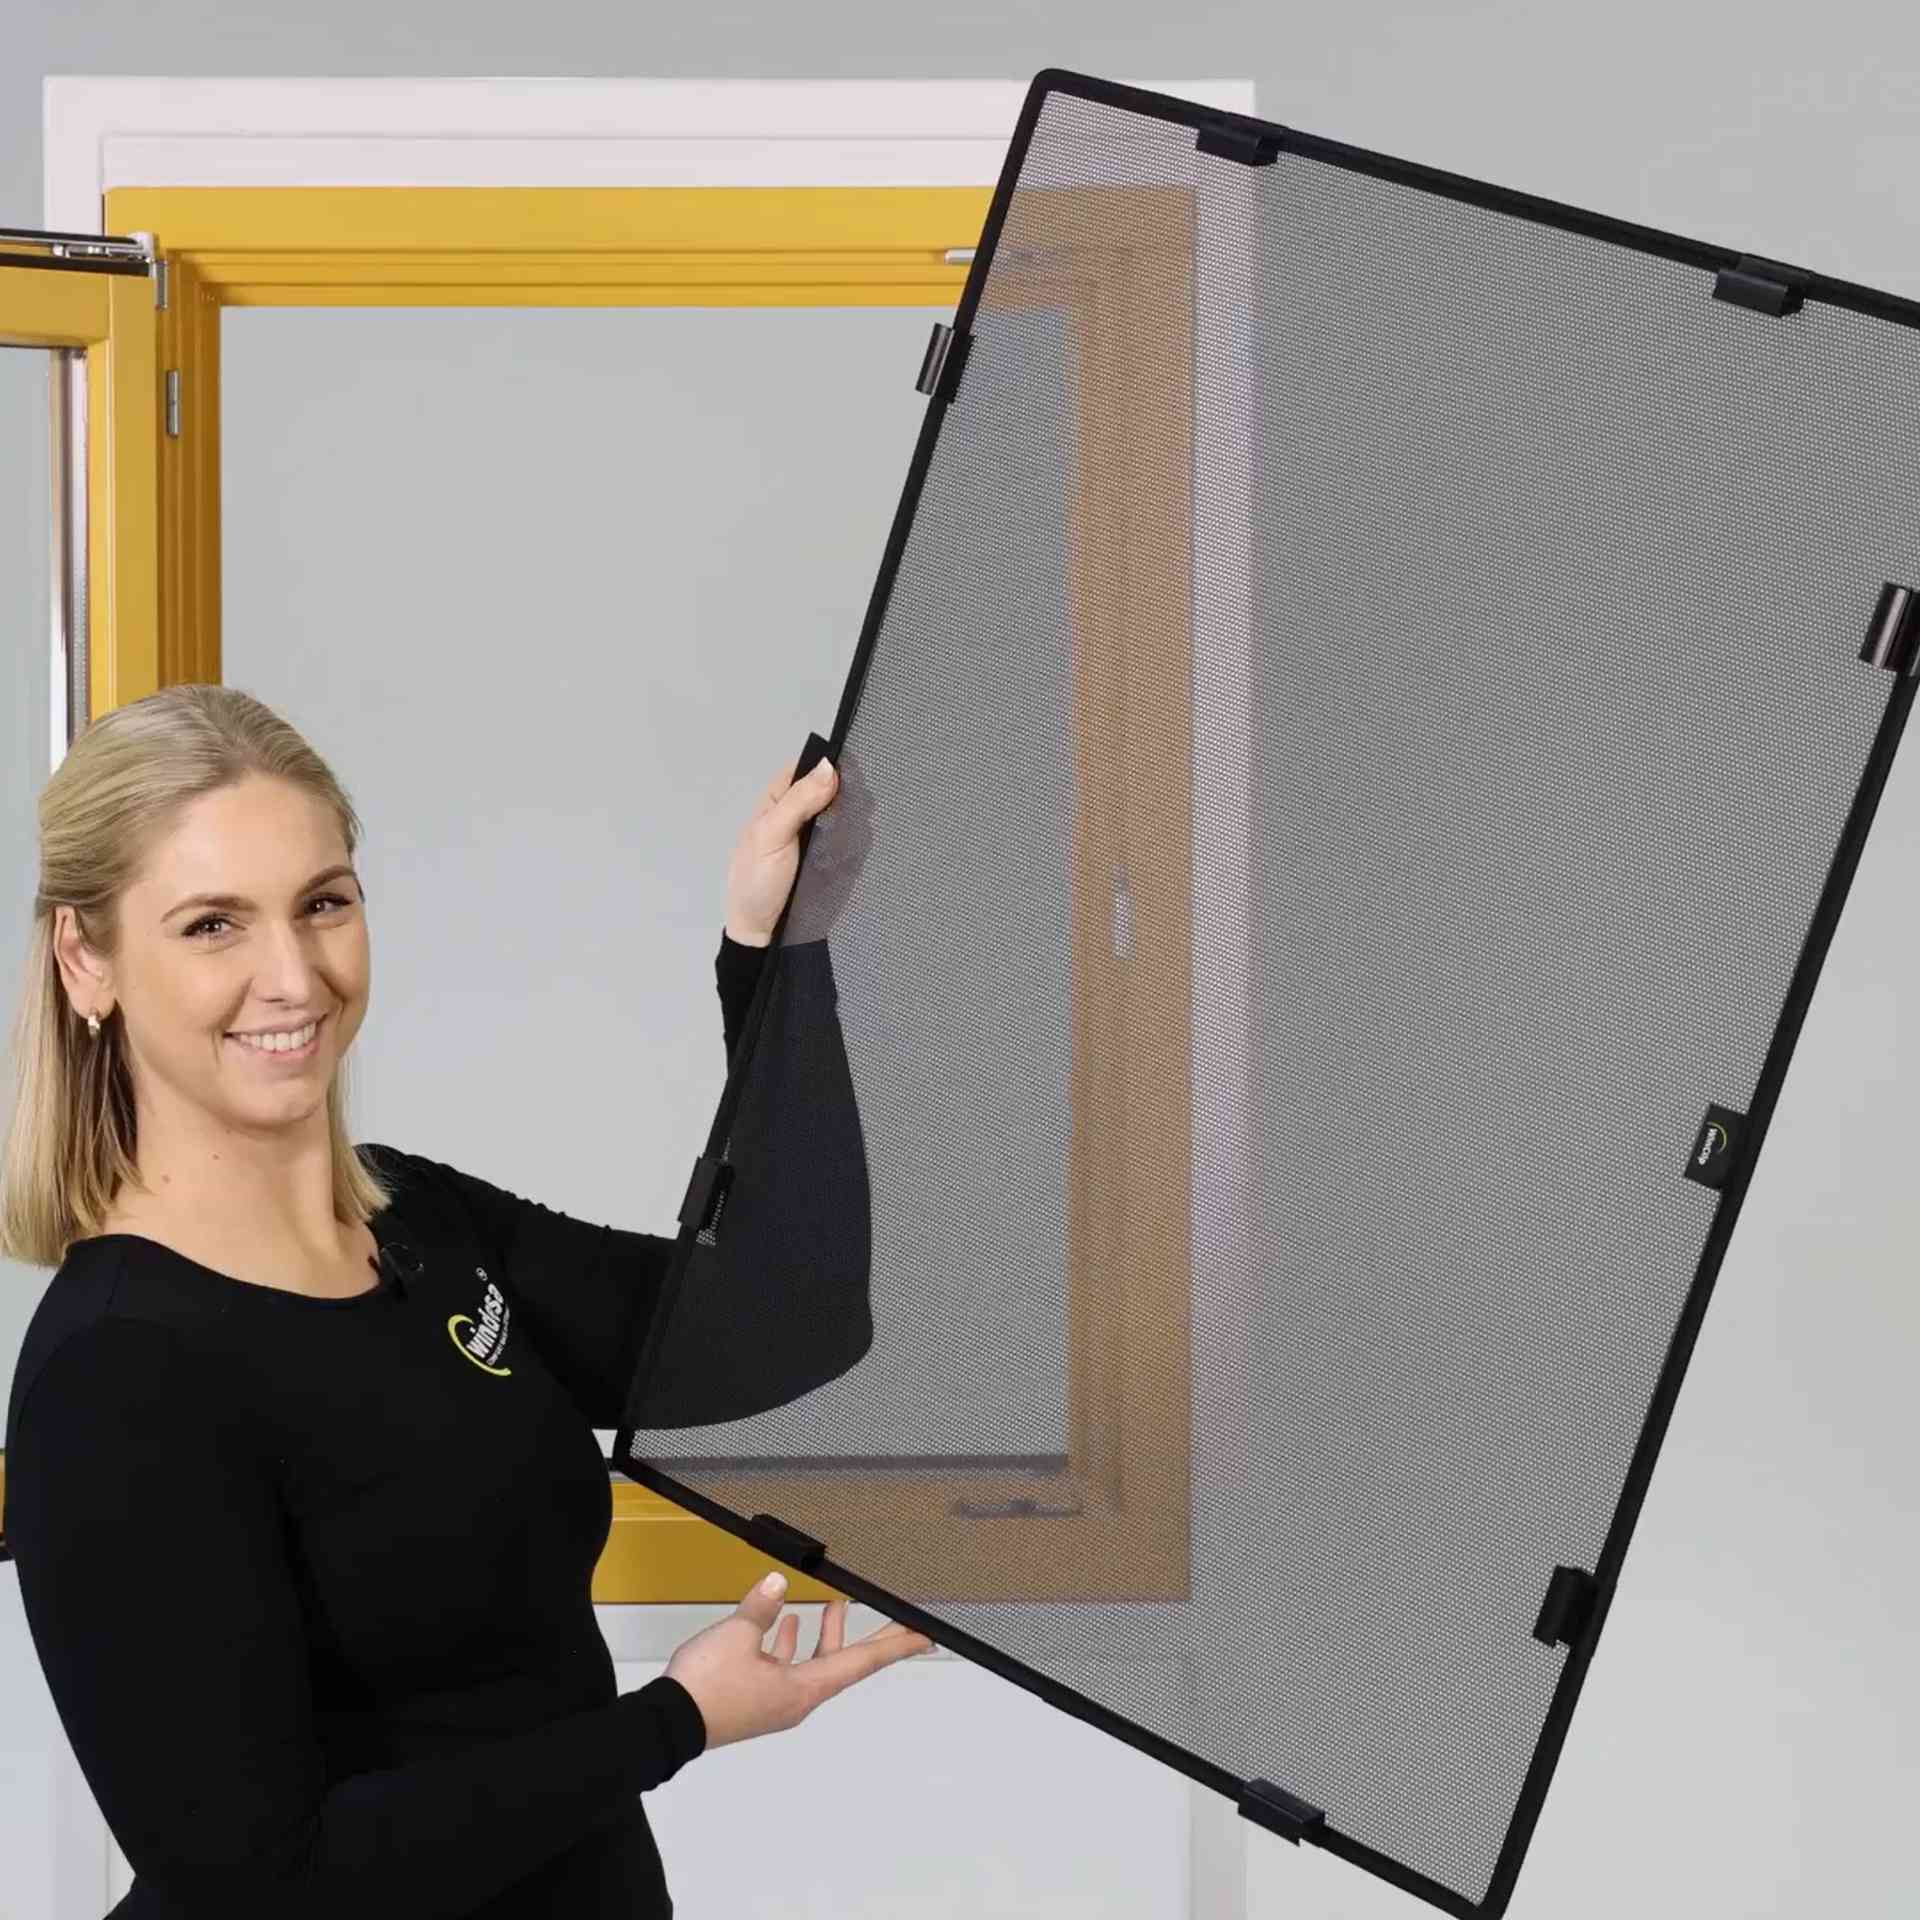
After unpacking it, the woman in the video twists the WinClip, causing it to snap open into a rectangular frame.
The woman in the video positions the supplied black plastic brackets against the inner window frame and marks the depth with a pen.
She then uses scissors to cut the brackets along the marked line.
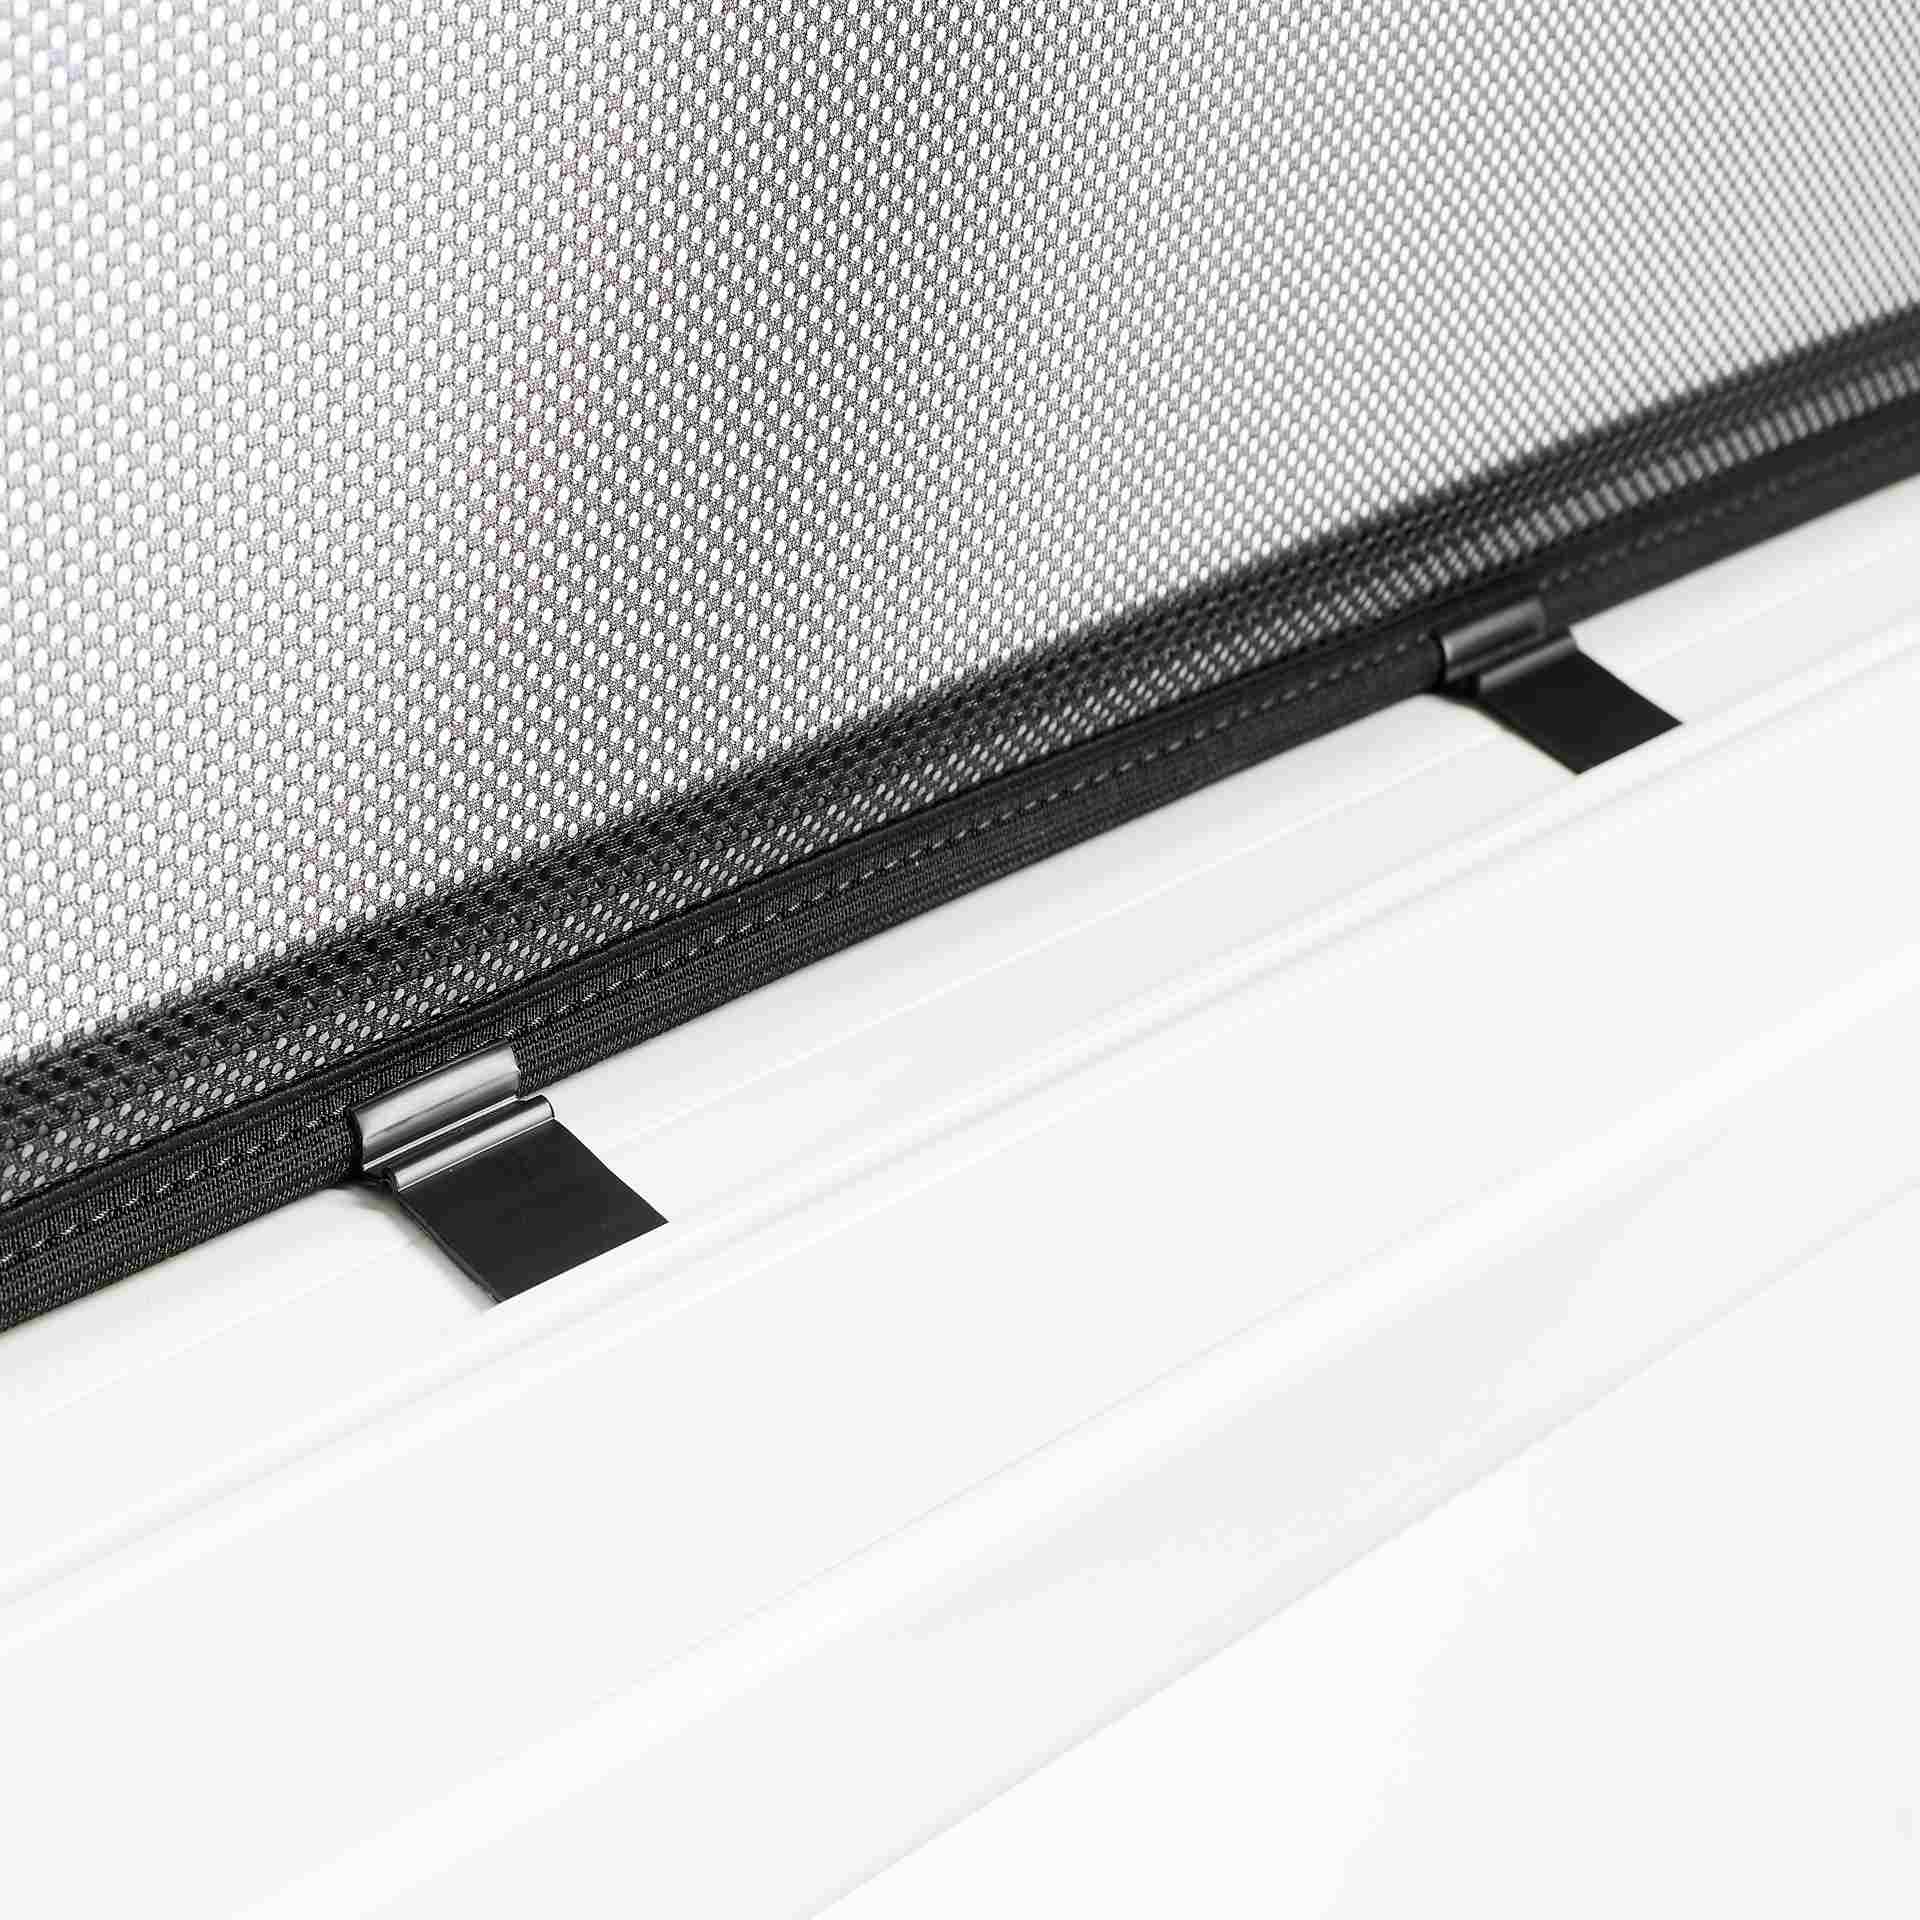
Next, the woman presses the eight black brackets onto the WinClip frame.
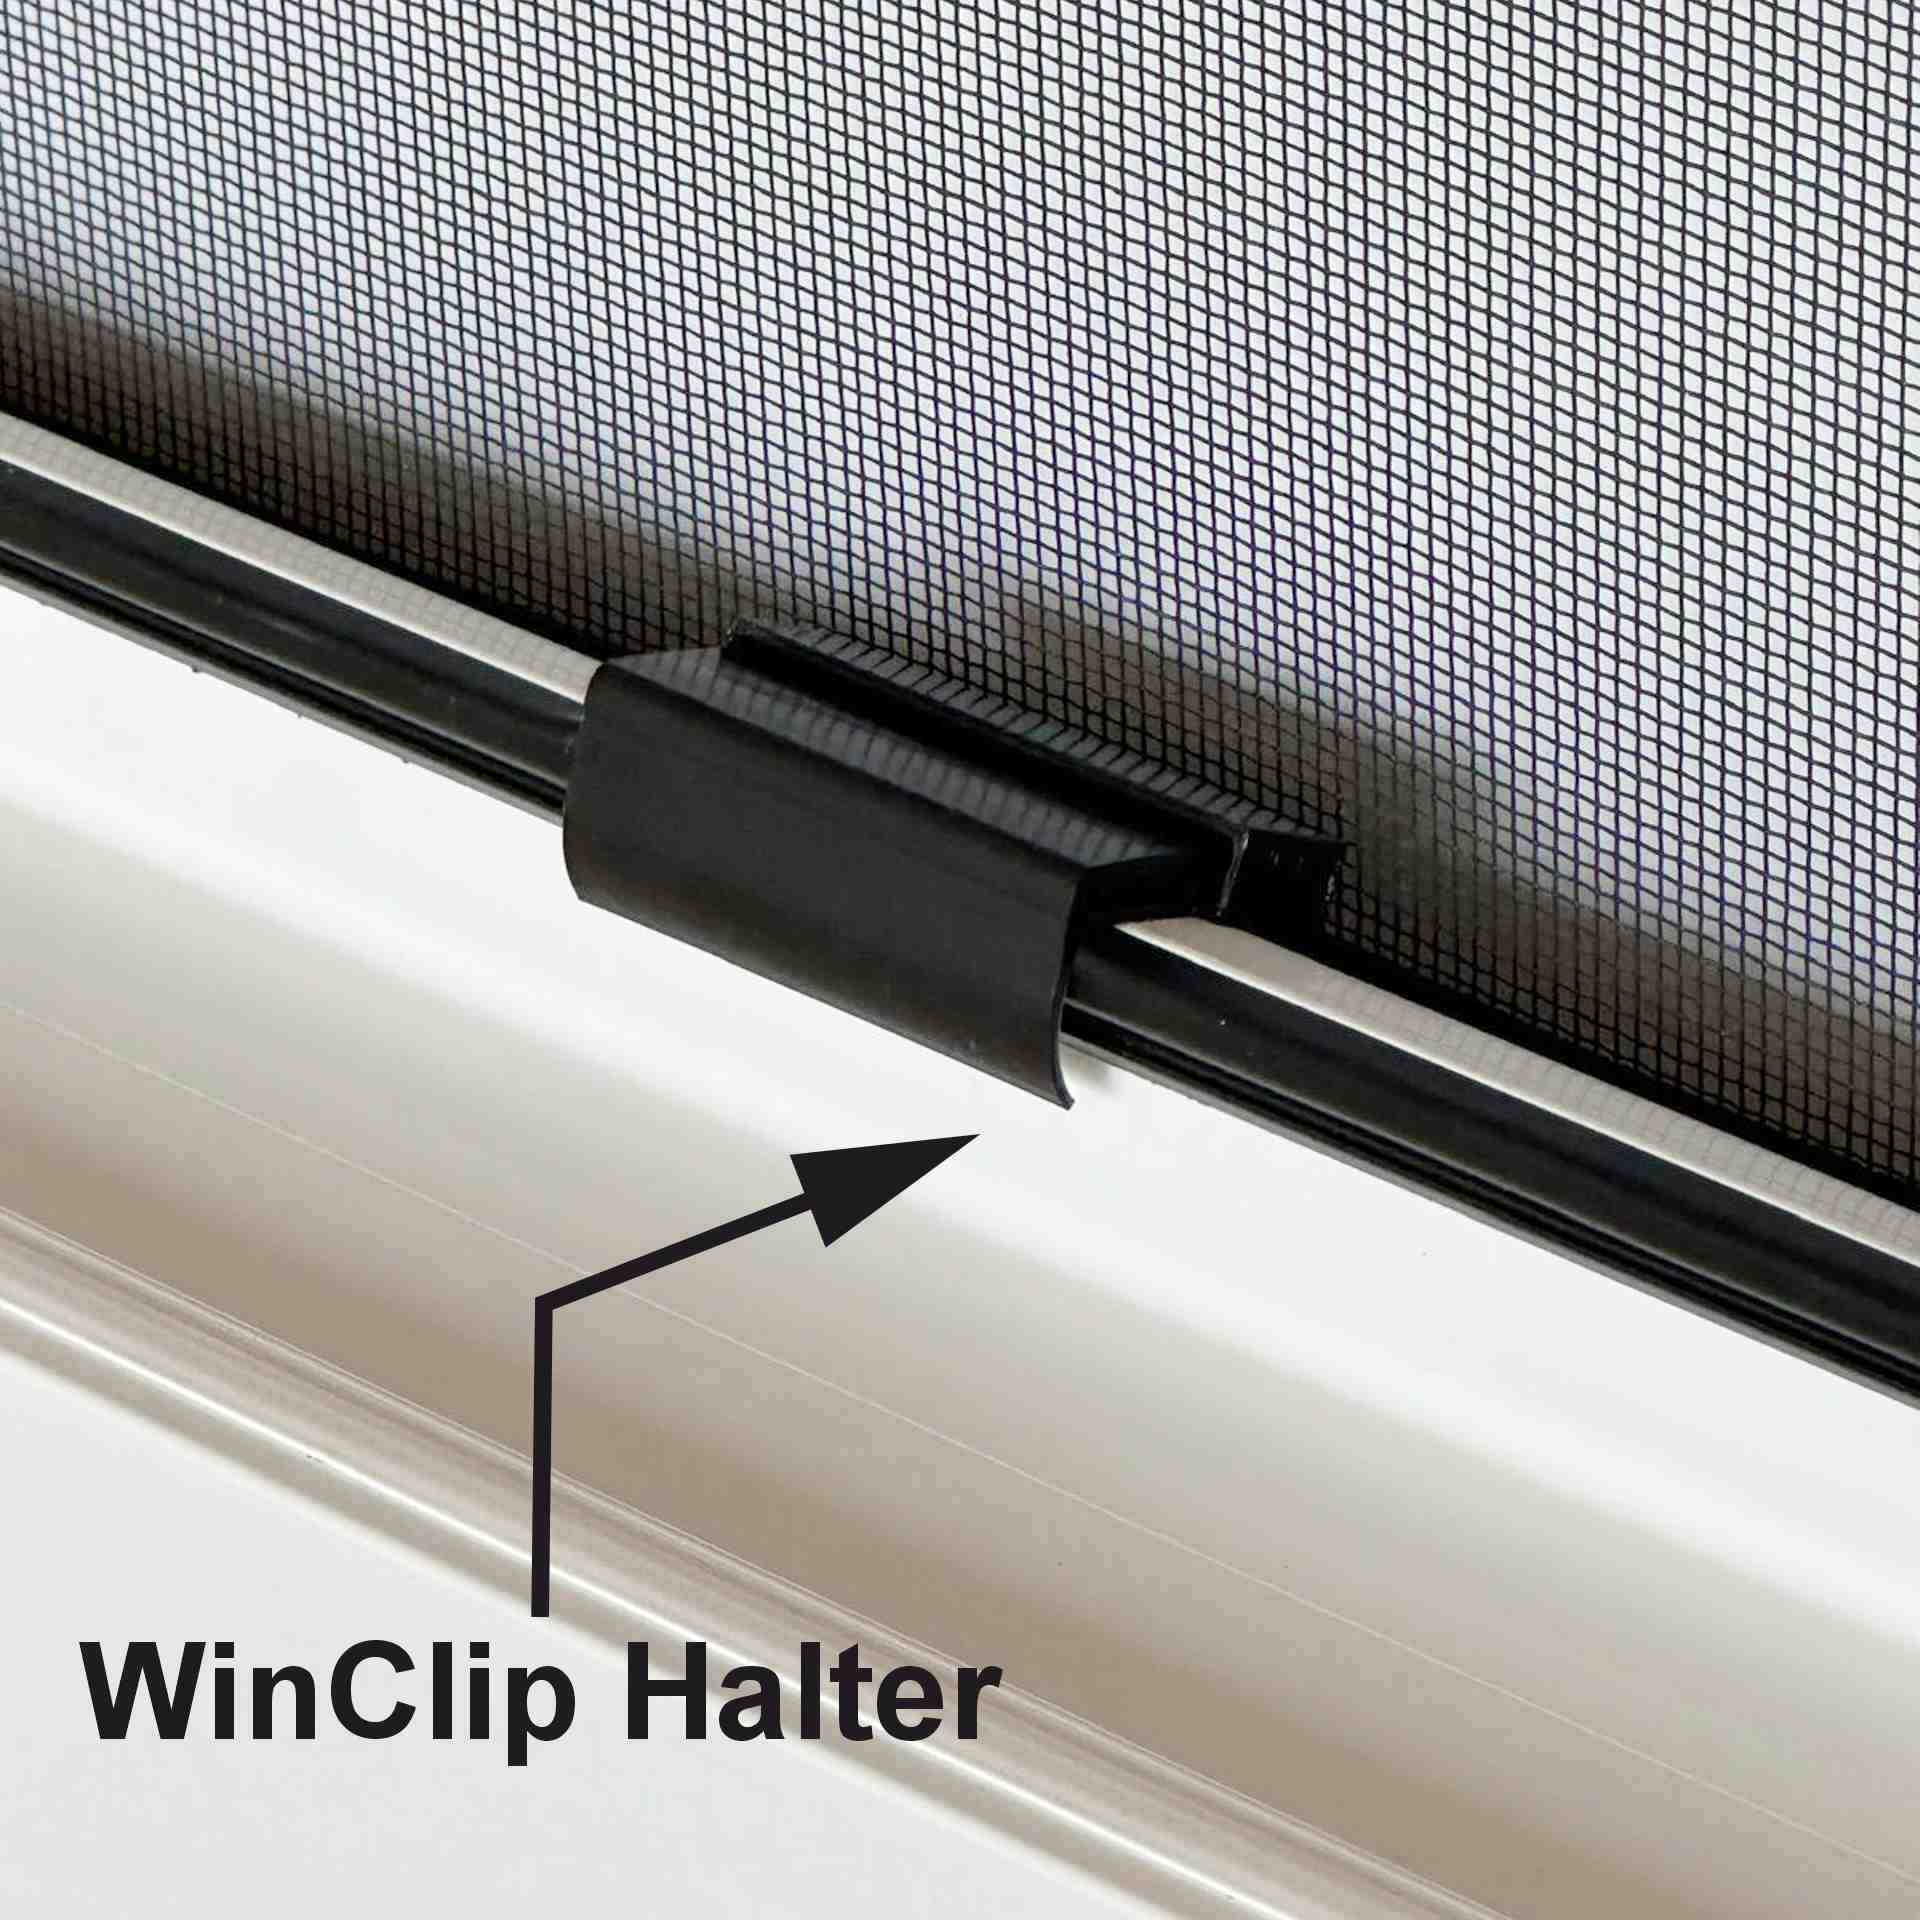
She then inserts the WinClip into the window frame from the inside and presses the retaining clips firmly into place.
She then closes the window.
The WinClip can then be inserted into or removed from the window frame as often as required.
Please note:
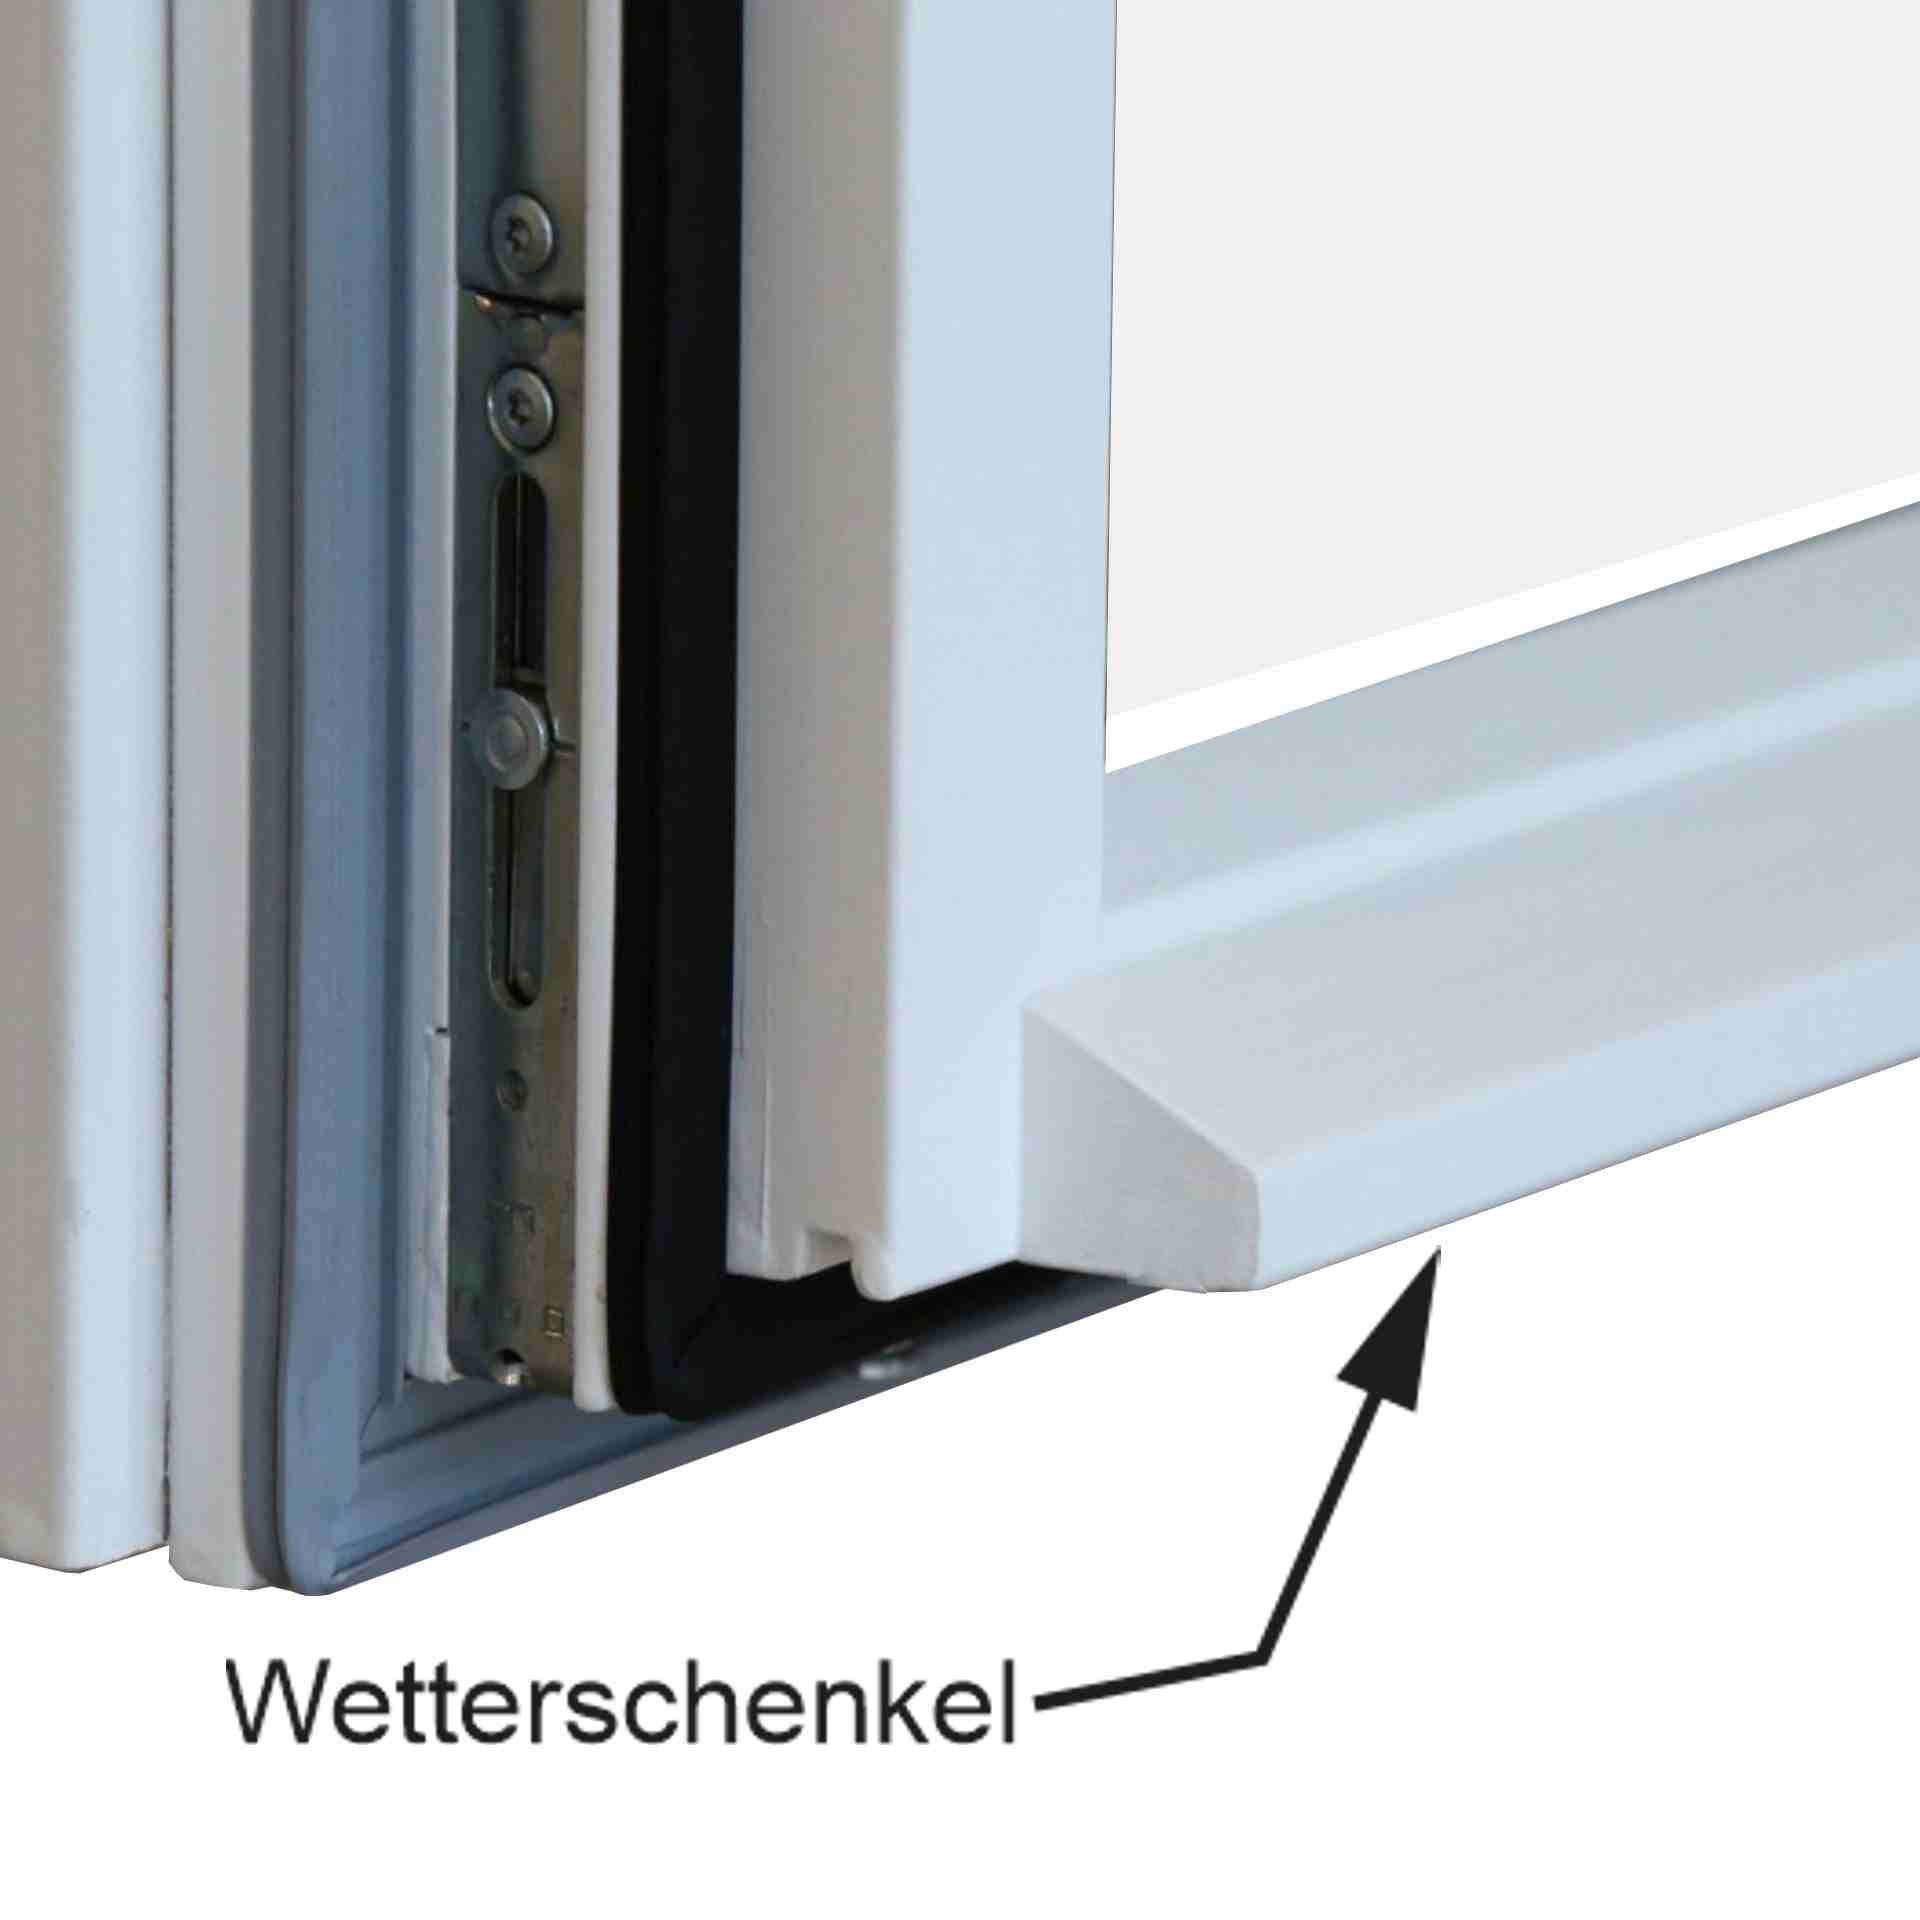
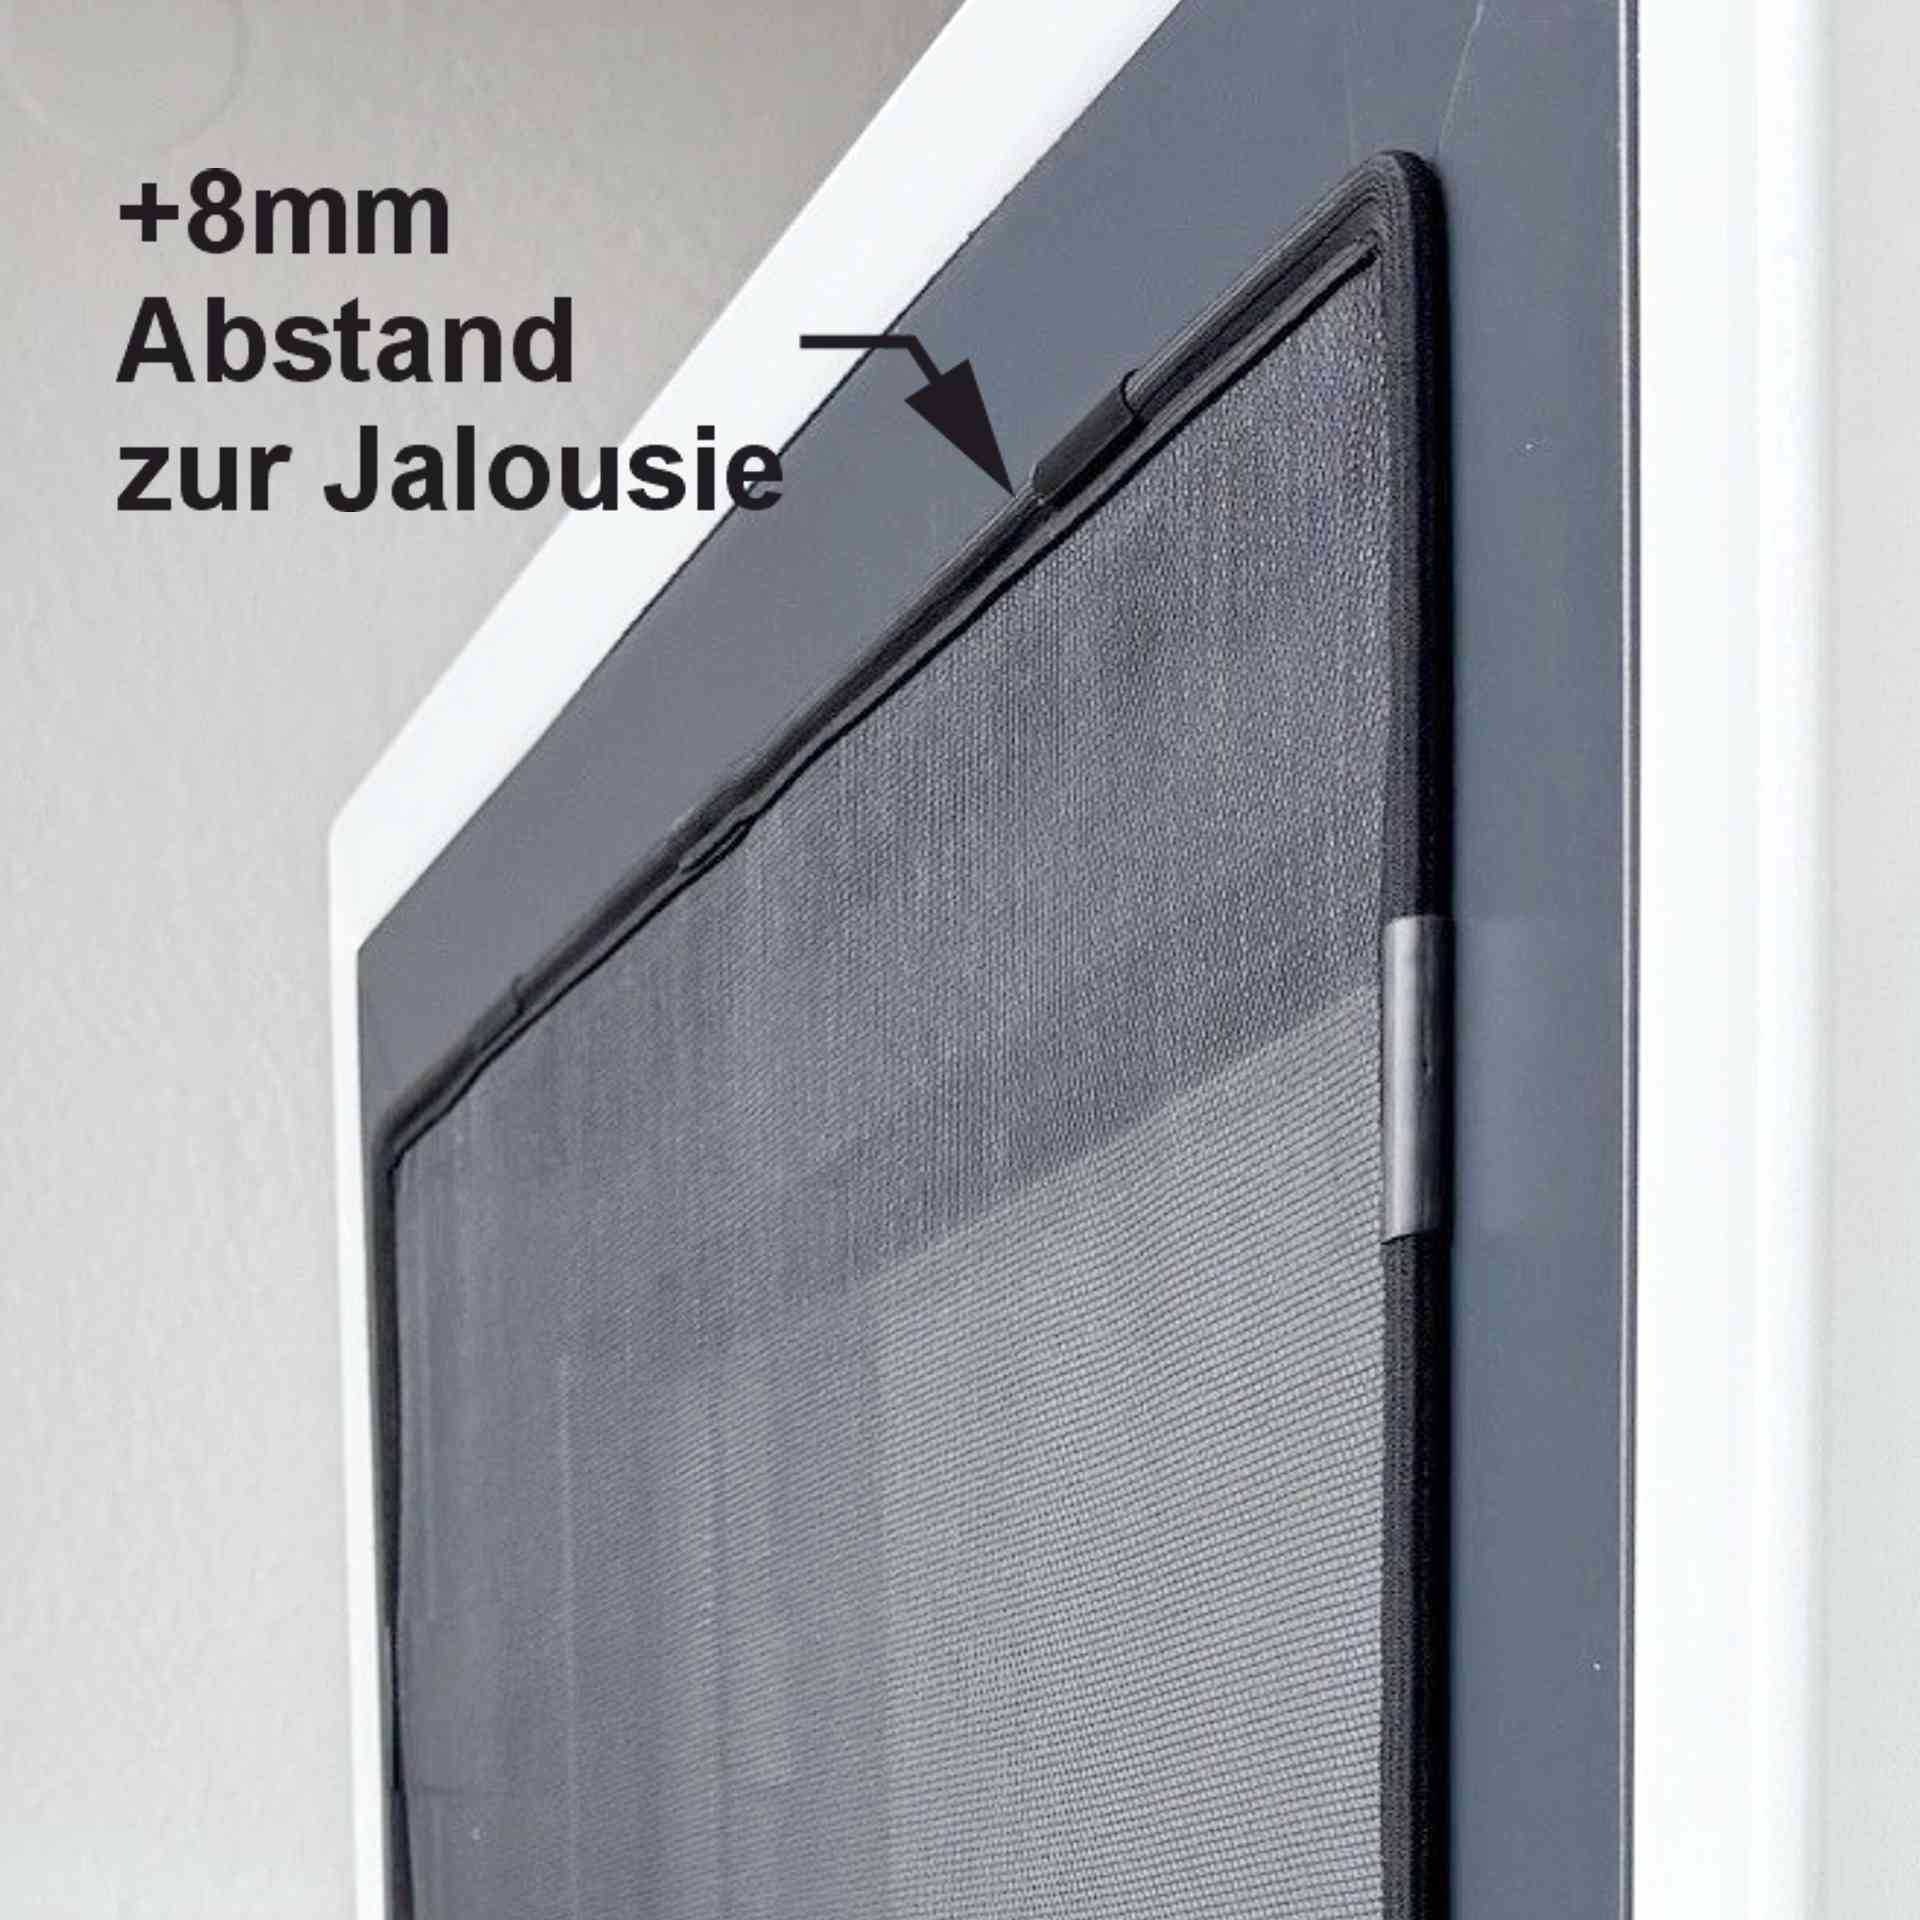
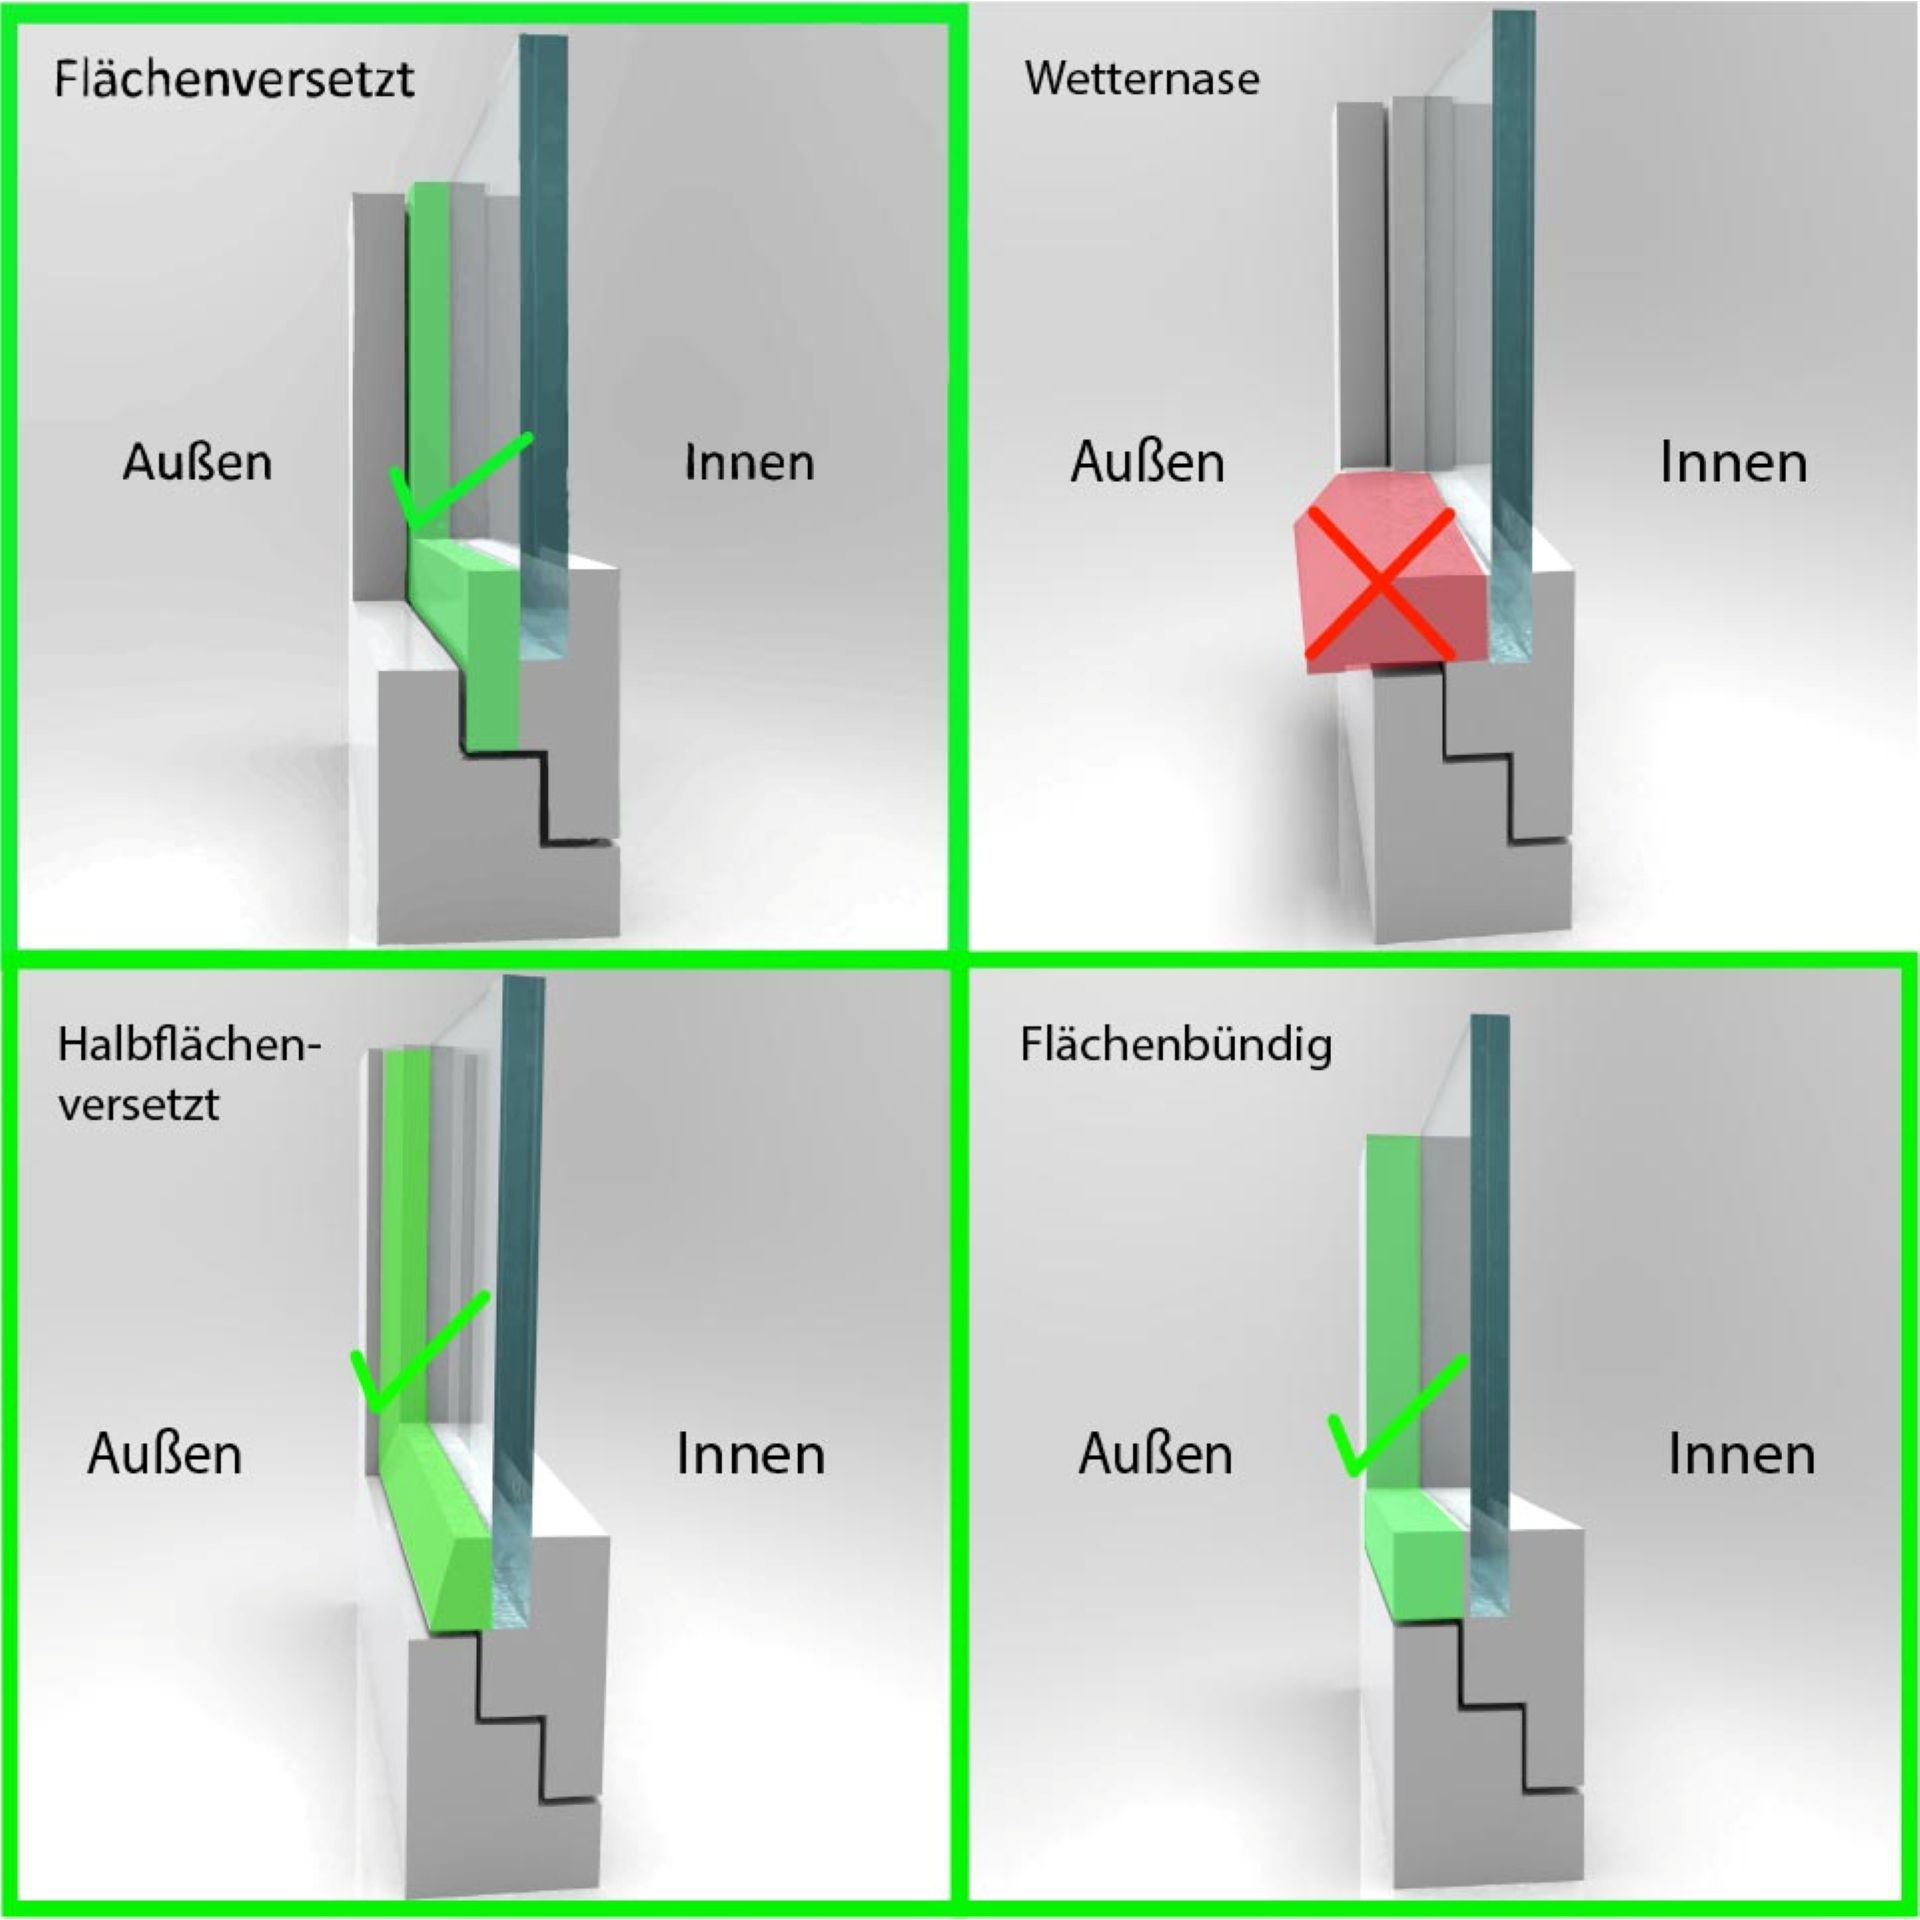
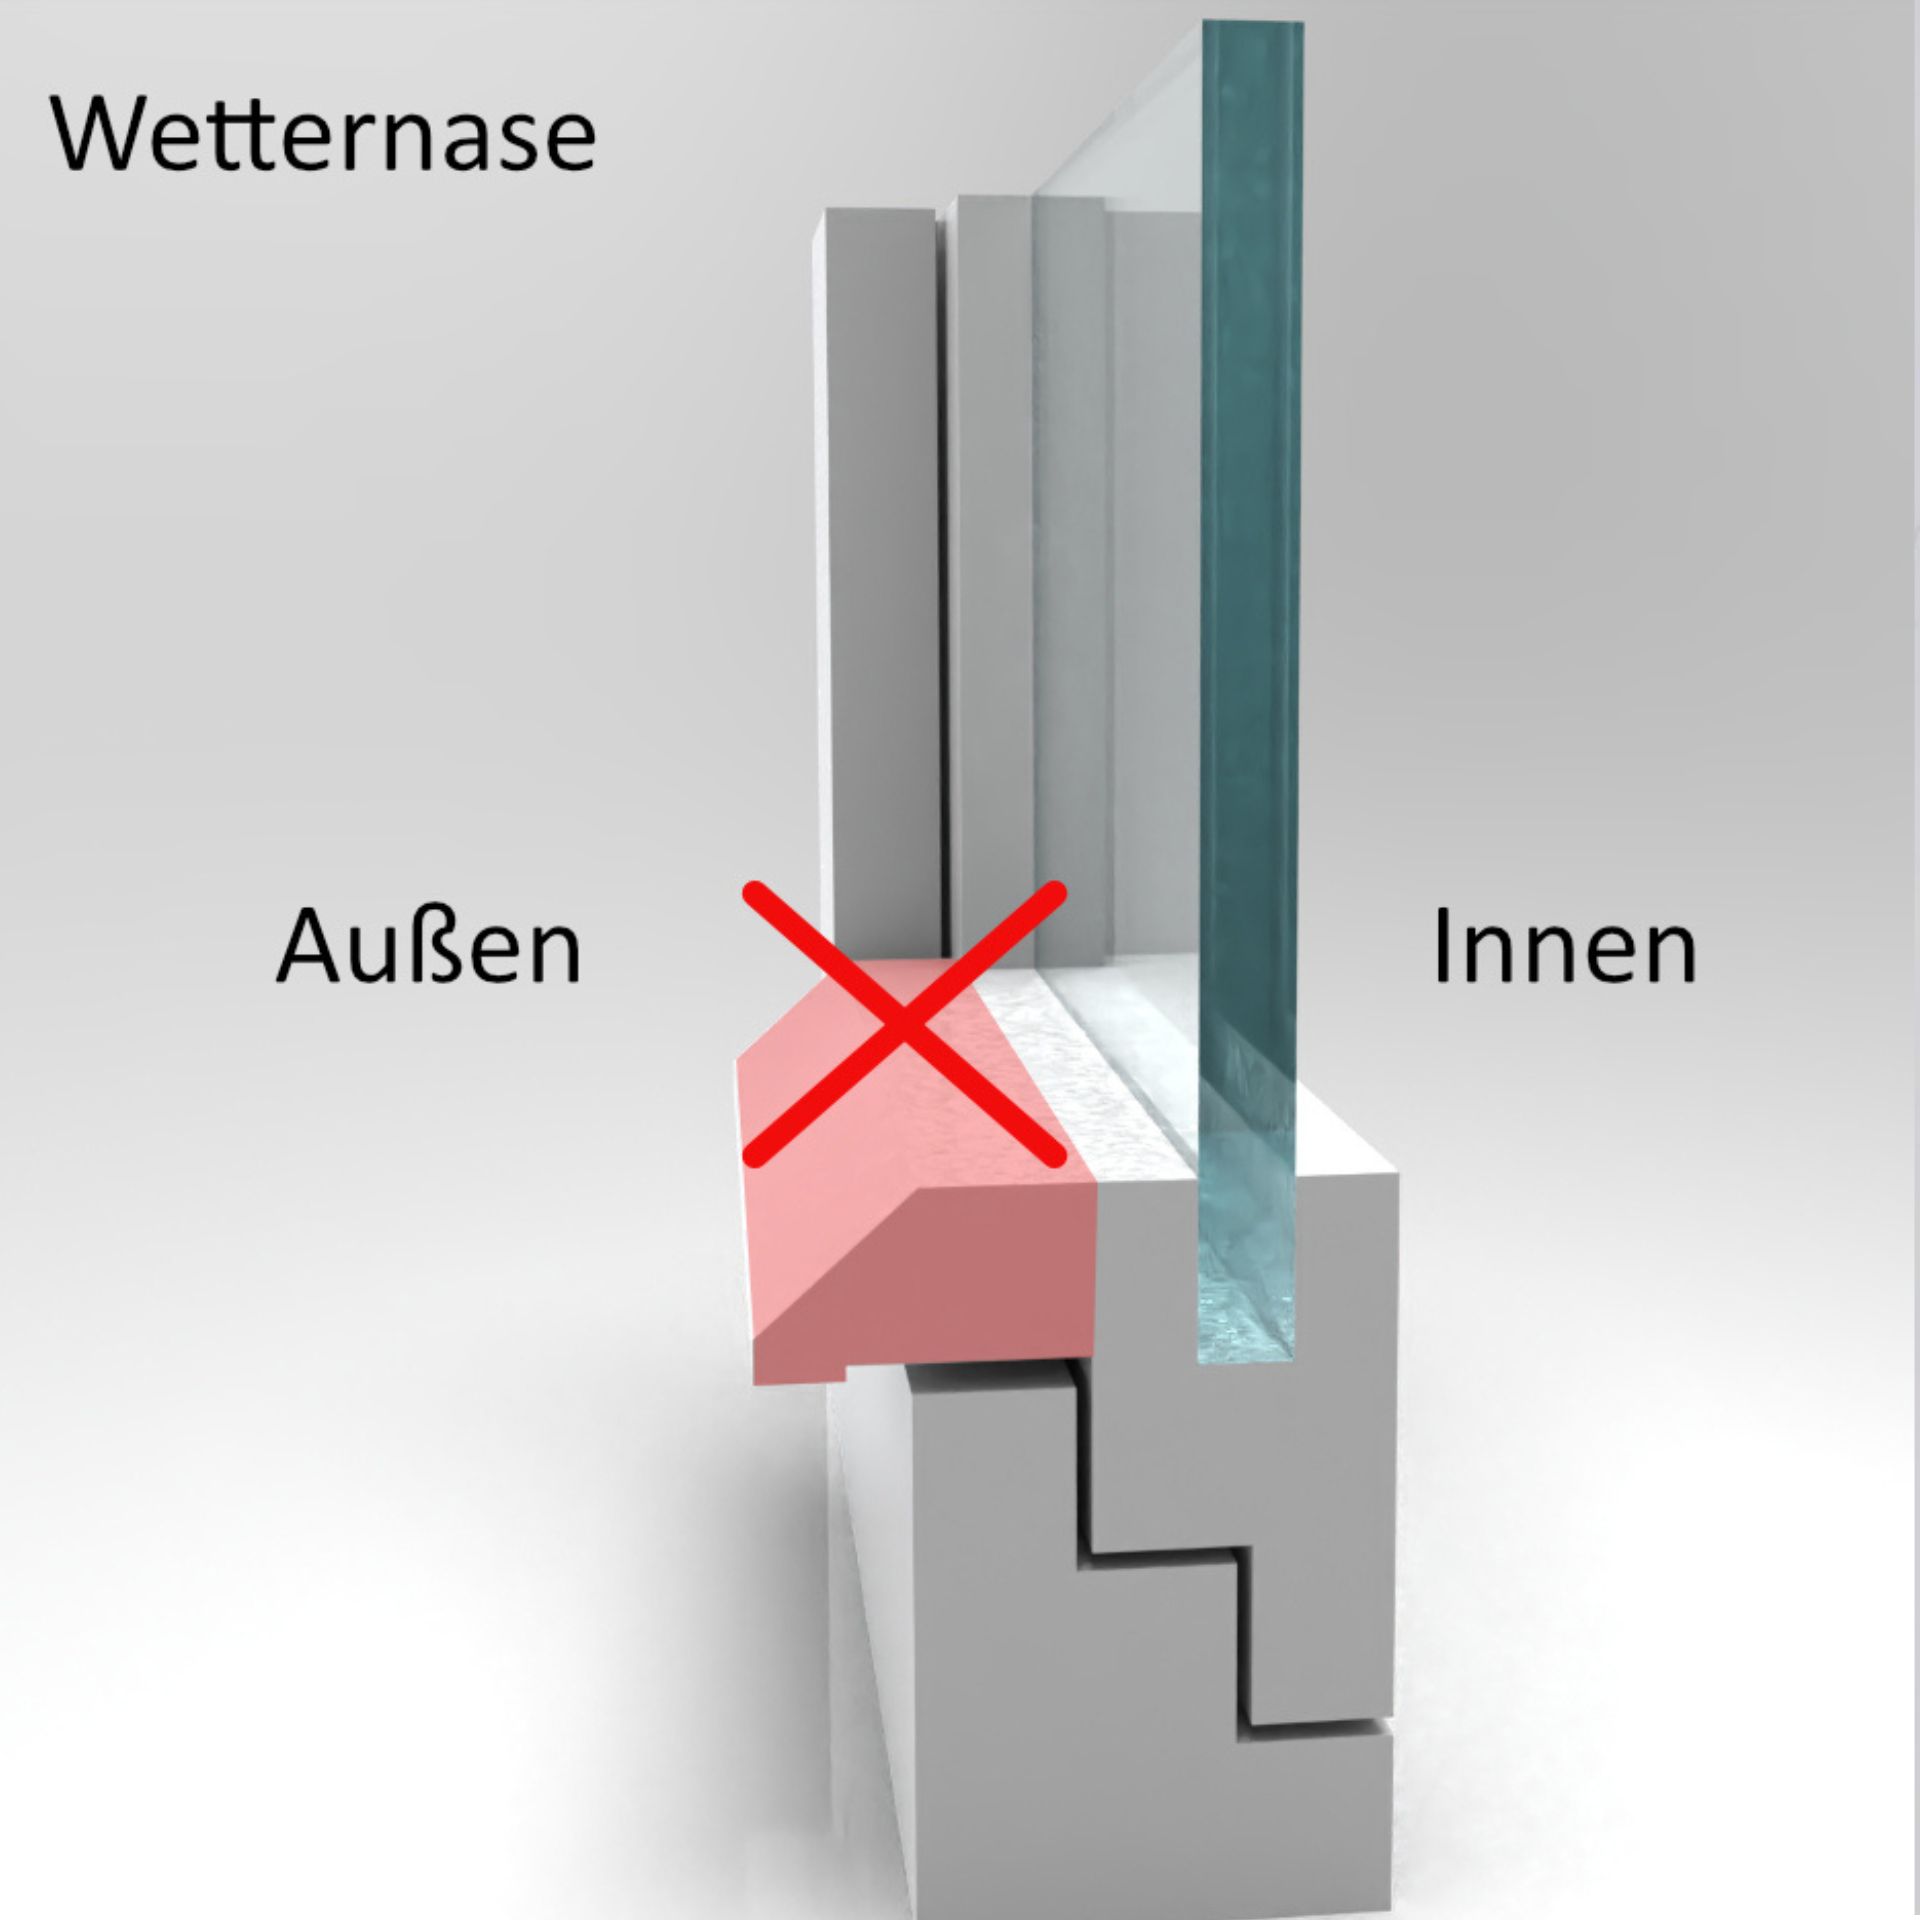
If there is a water nose (a sloping edge on the lower outer edge of the window sash designed to channel rainwater away) on the outside of the window, check whether it can be removed.
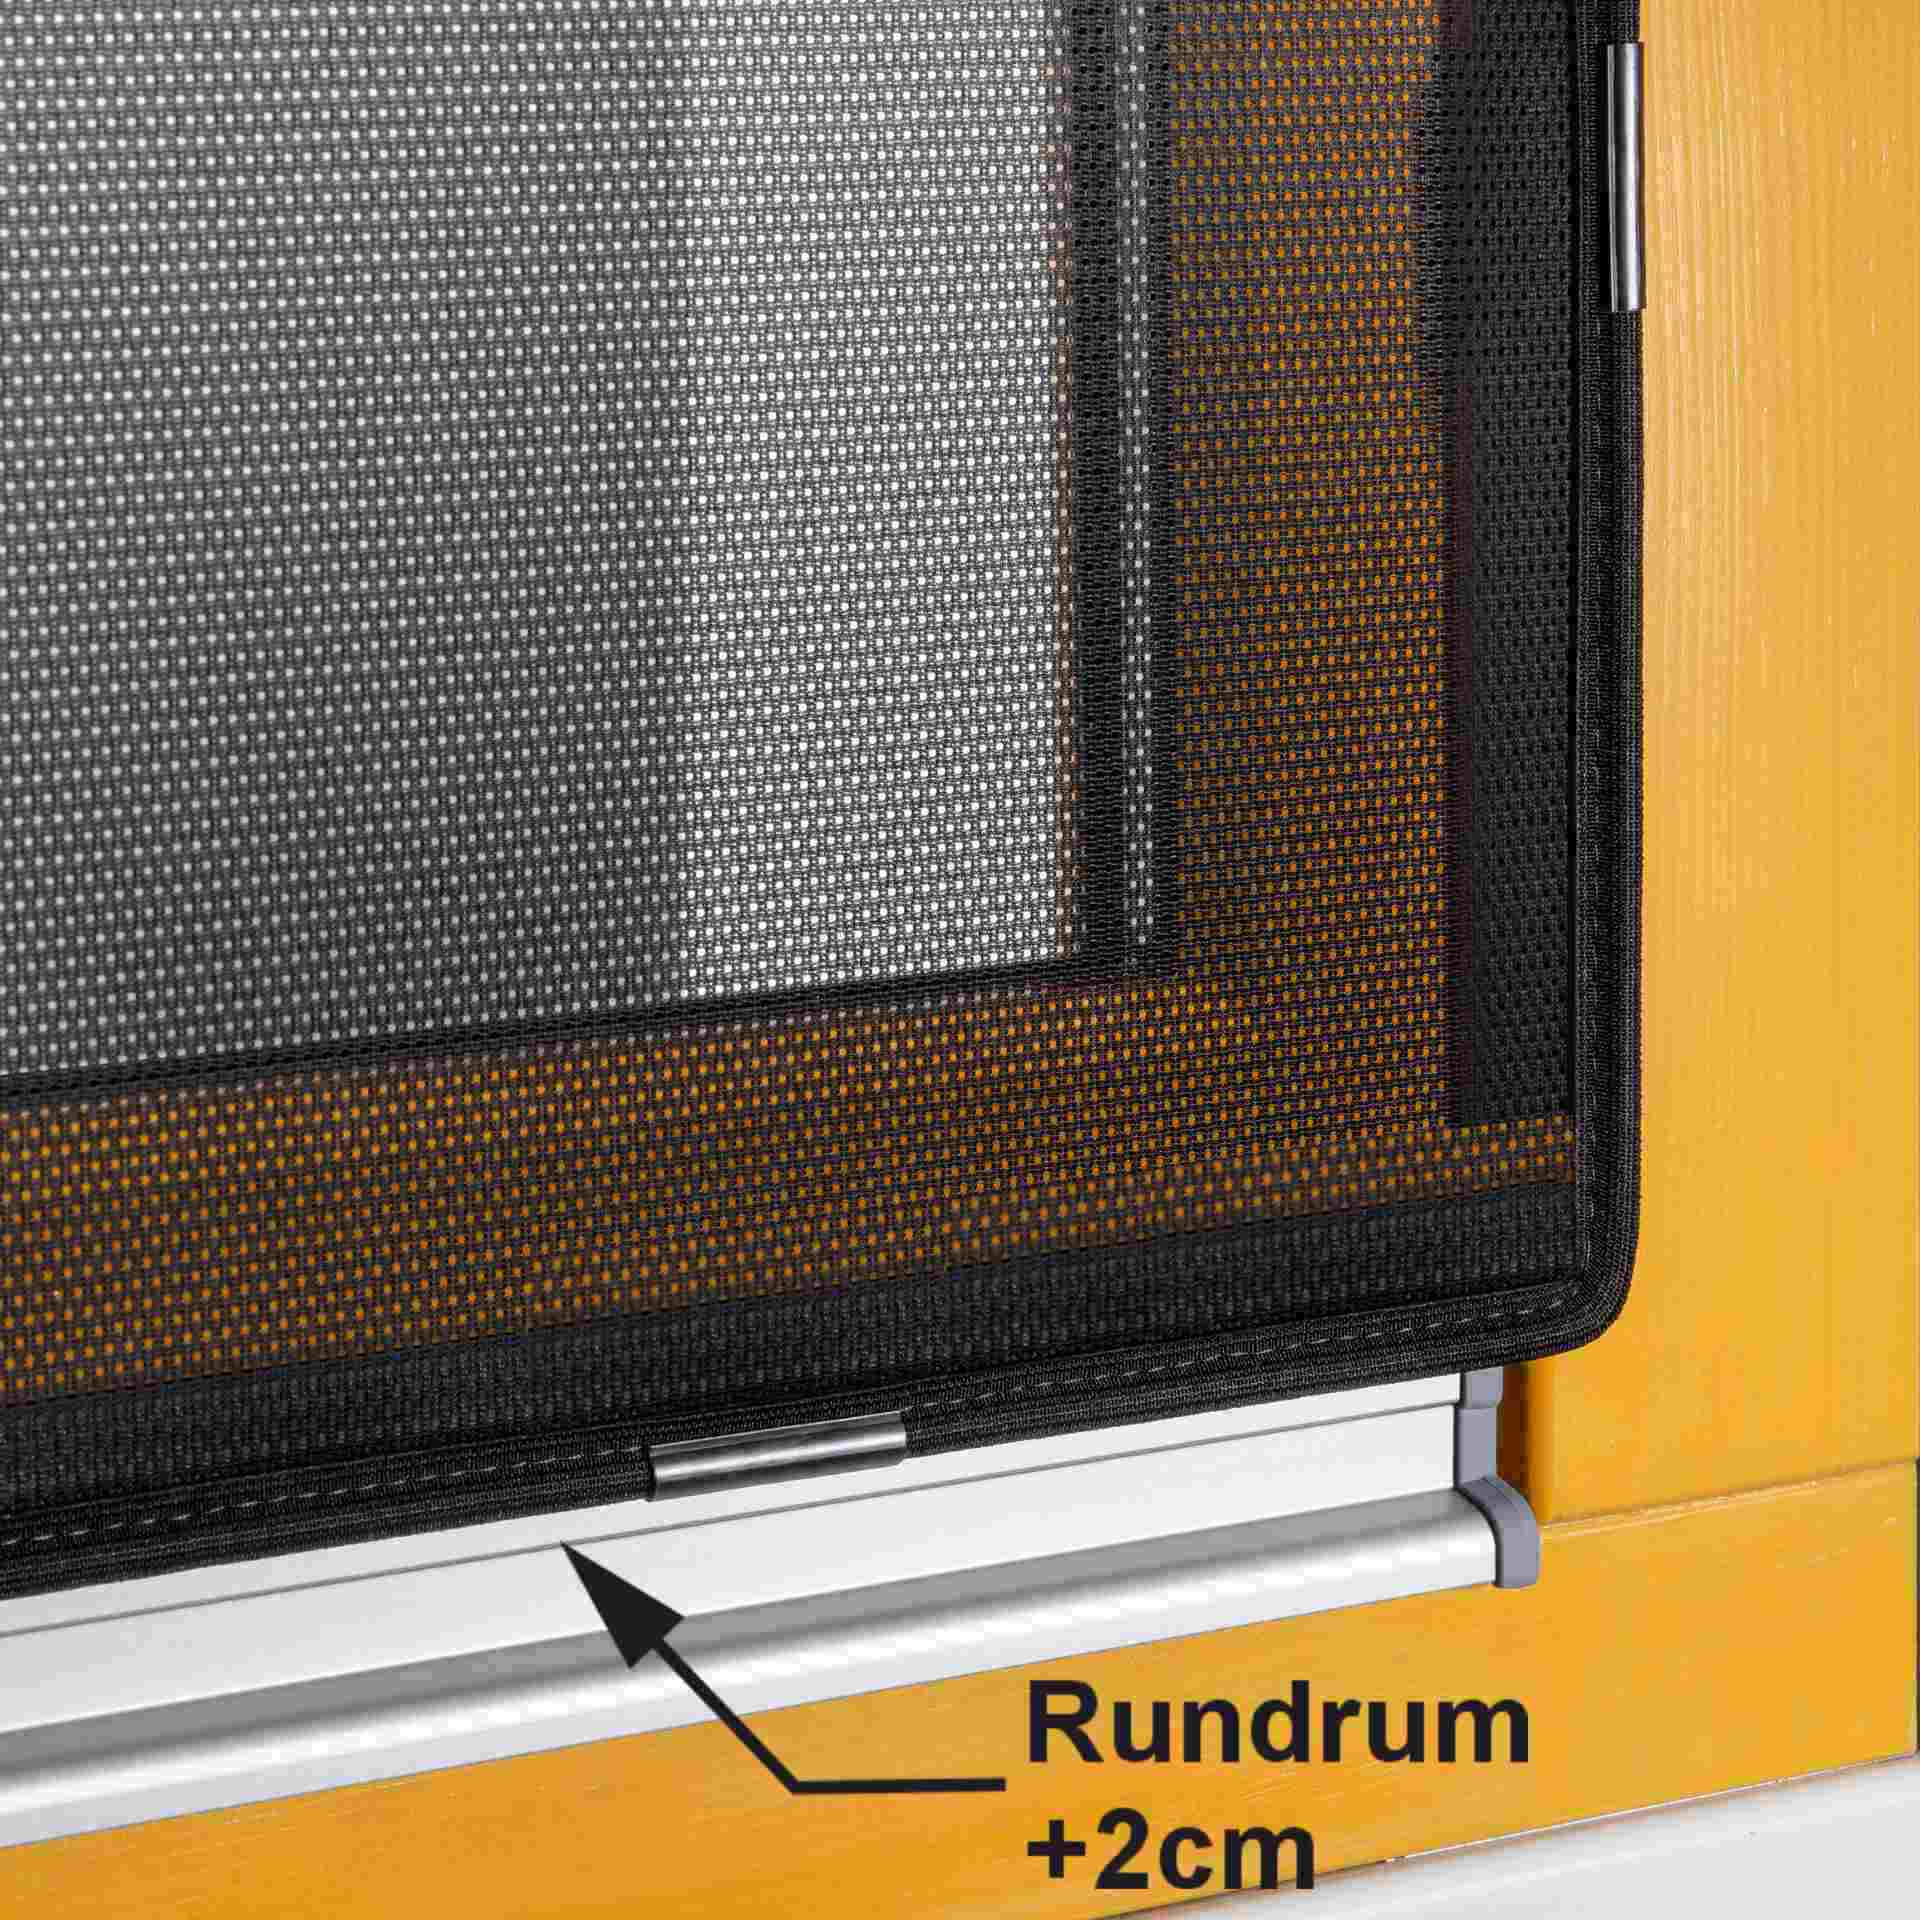
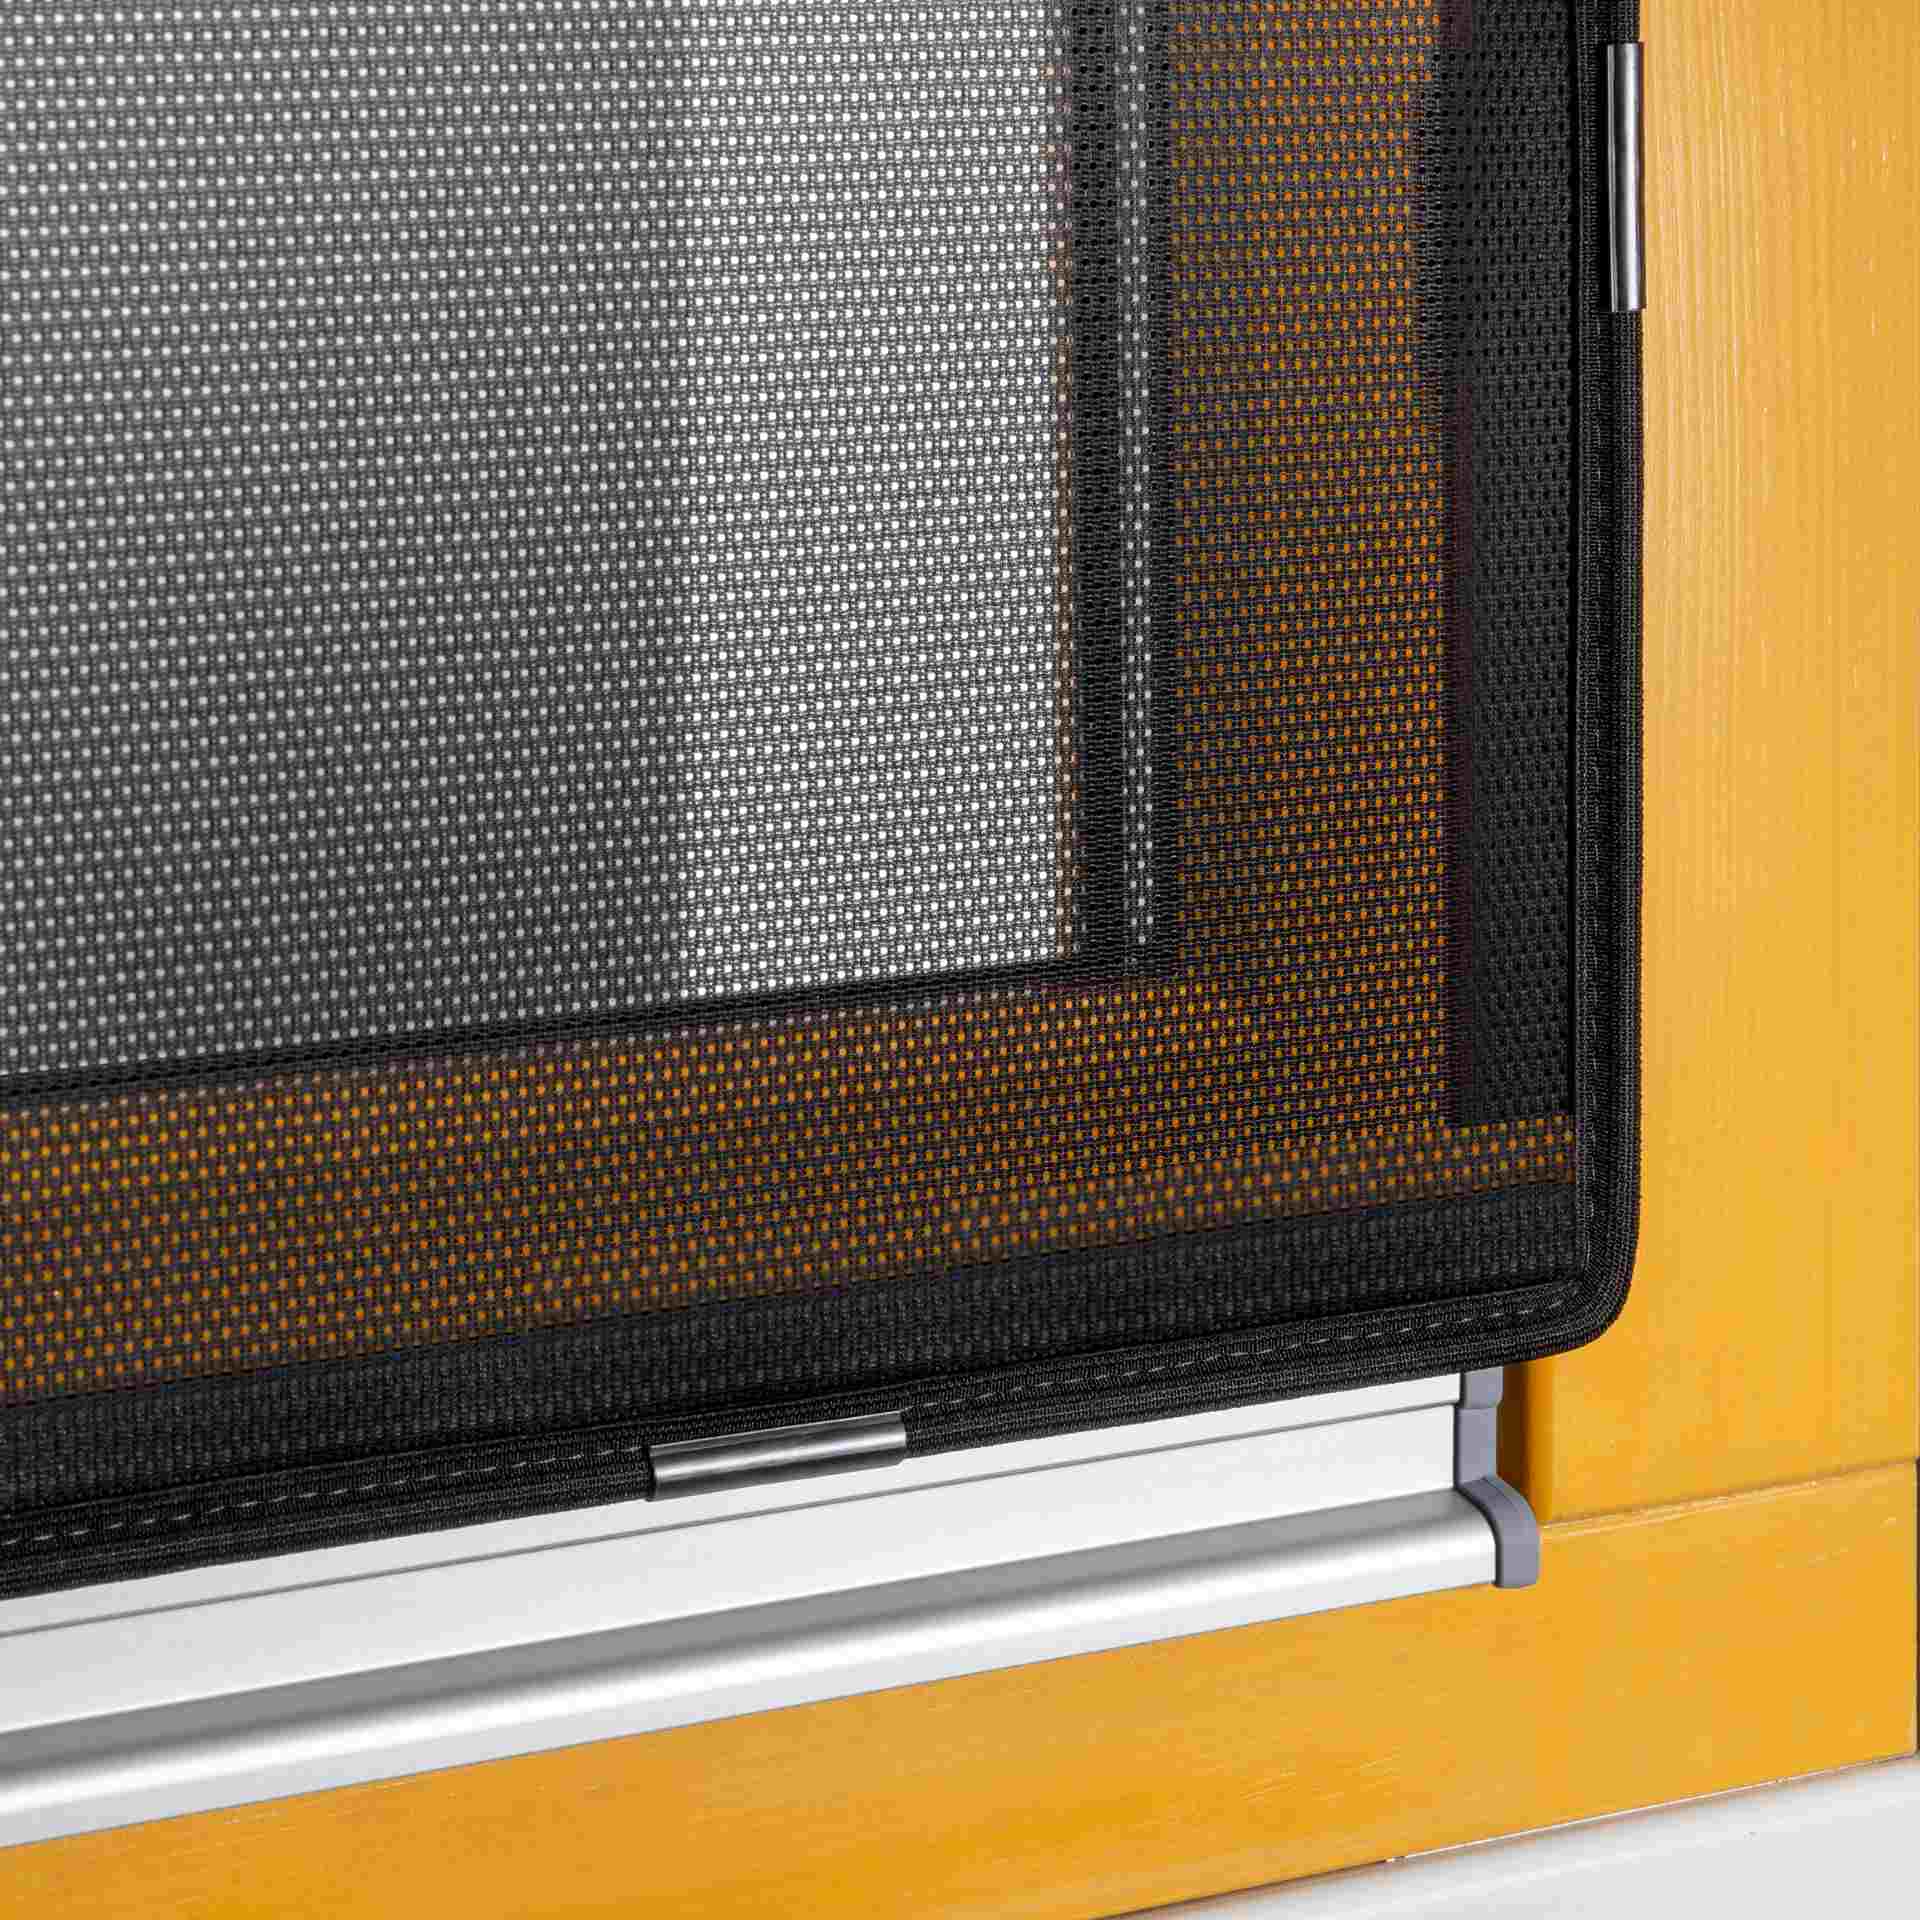
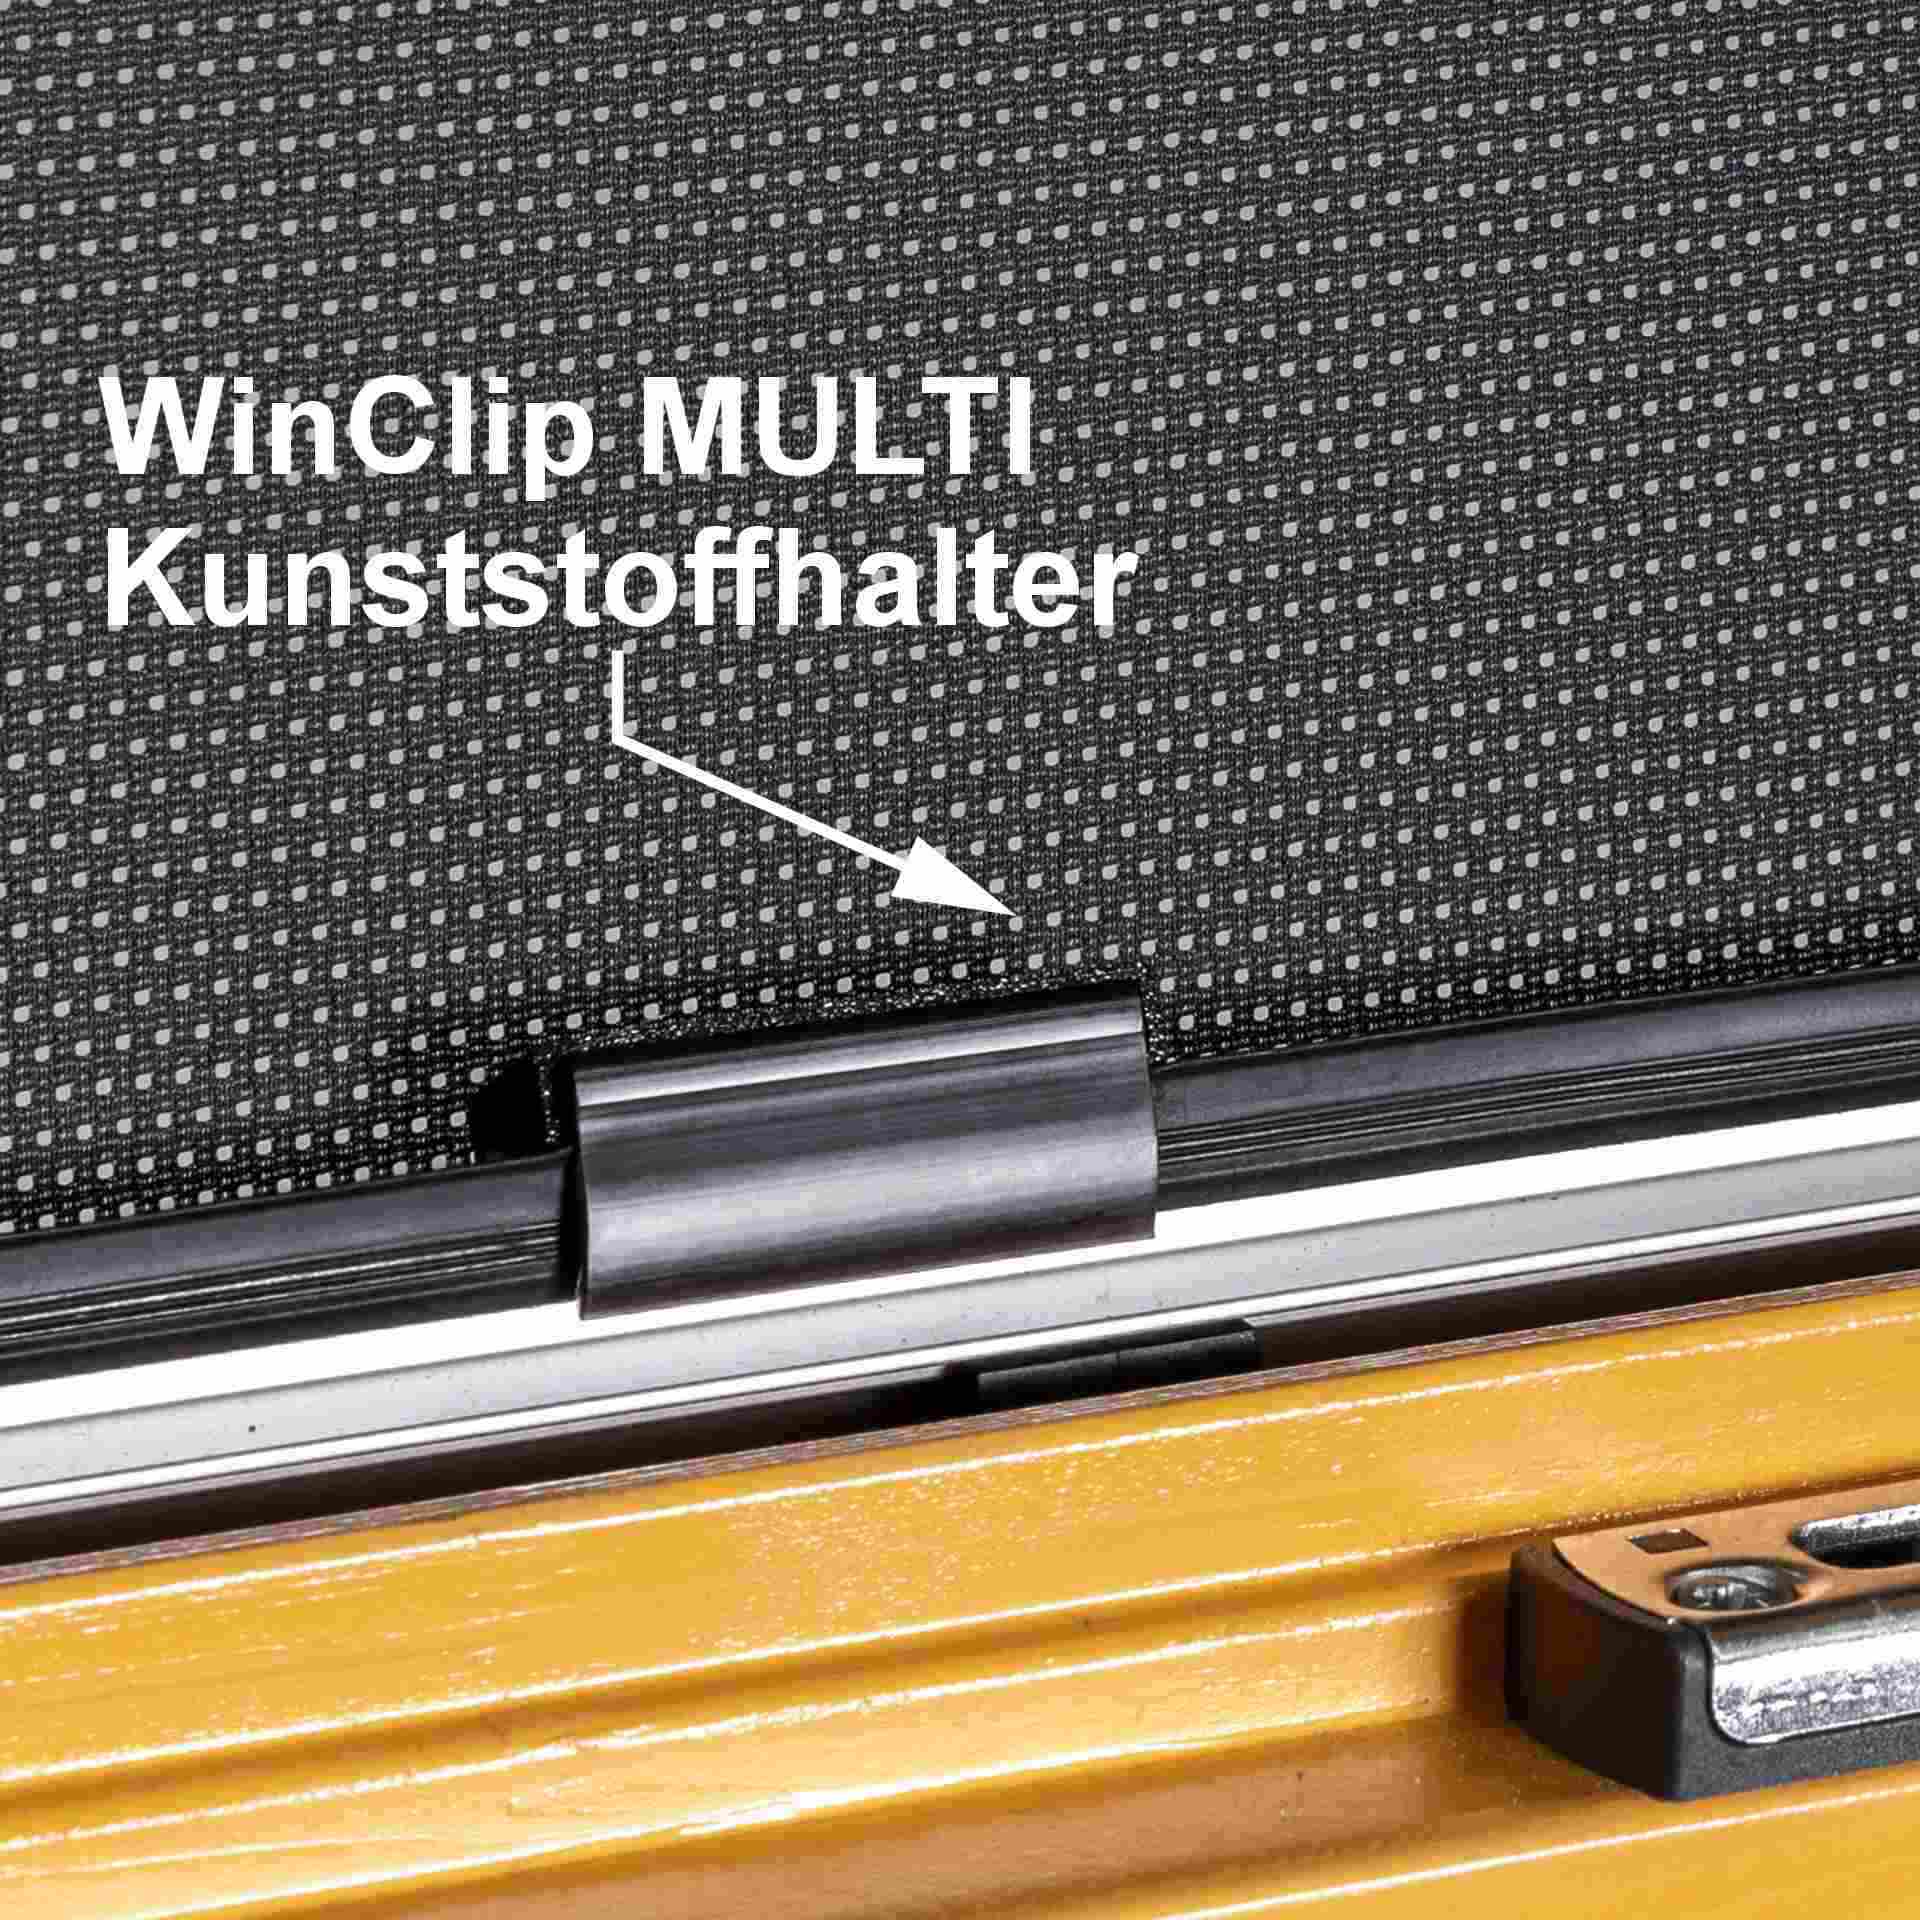
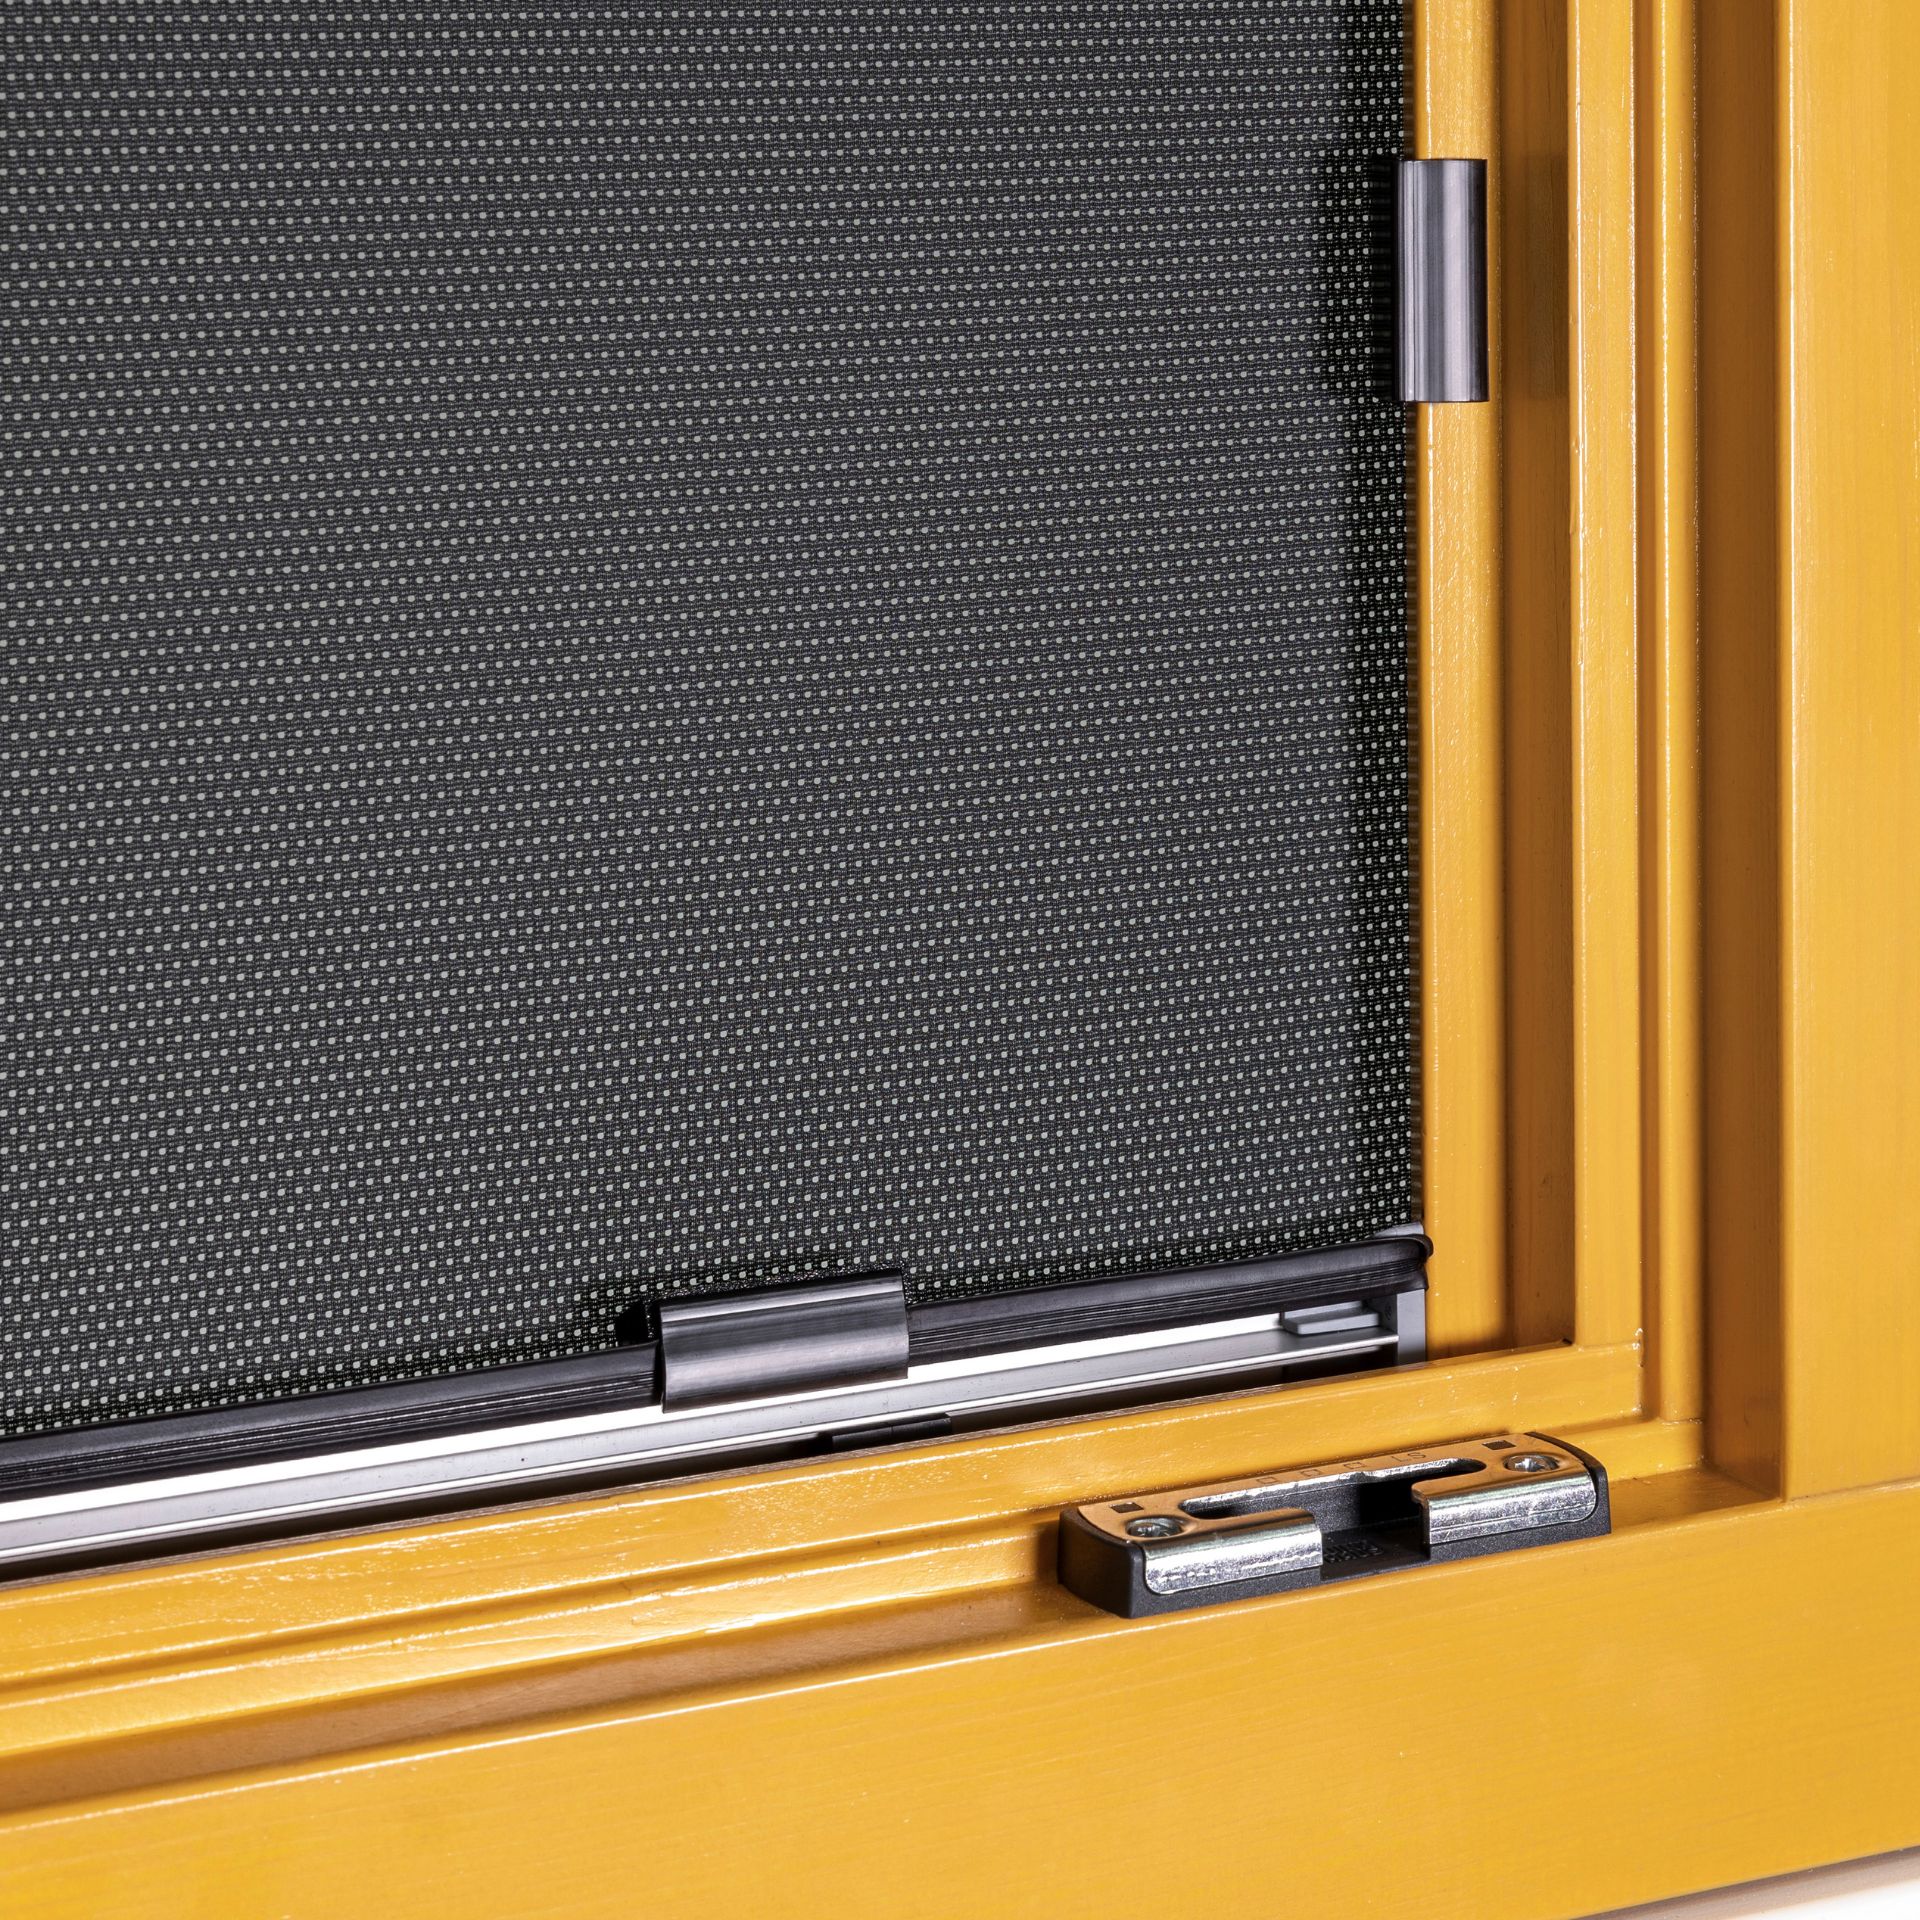
2. WinClip MULTI
- our multi-talent for all windows -
- Complete and precise protection when the window is open
- Suitable for all window types (timber, PVC, aluminium)
- Suitable for all window profiles (flush and offset)
- Lies on the outside of the window frame
- Very easy to install
- Residue-free removal
- Secure hold thanks to patented clip system
- UV-resistant and light-fast material
- PVC, timber or aluminium windows
- Flush and (semi-) offset window profiles without weather board
Now it’s time to measure the window. In this video, we show you how to measure the window and place an order in our shop:
Place a standard tape measure against the window frame of an open window and measure the width and height to the nearest millimetre. Then enter the measurements into our configurator on the order form and add the item to your basket.
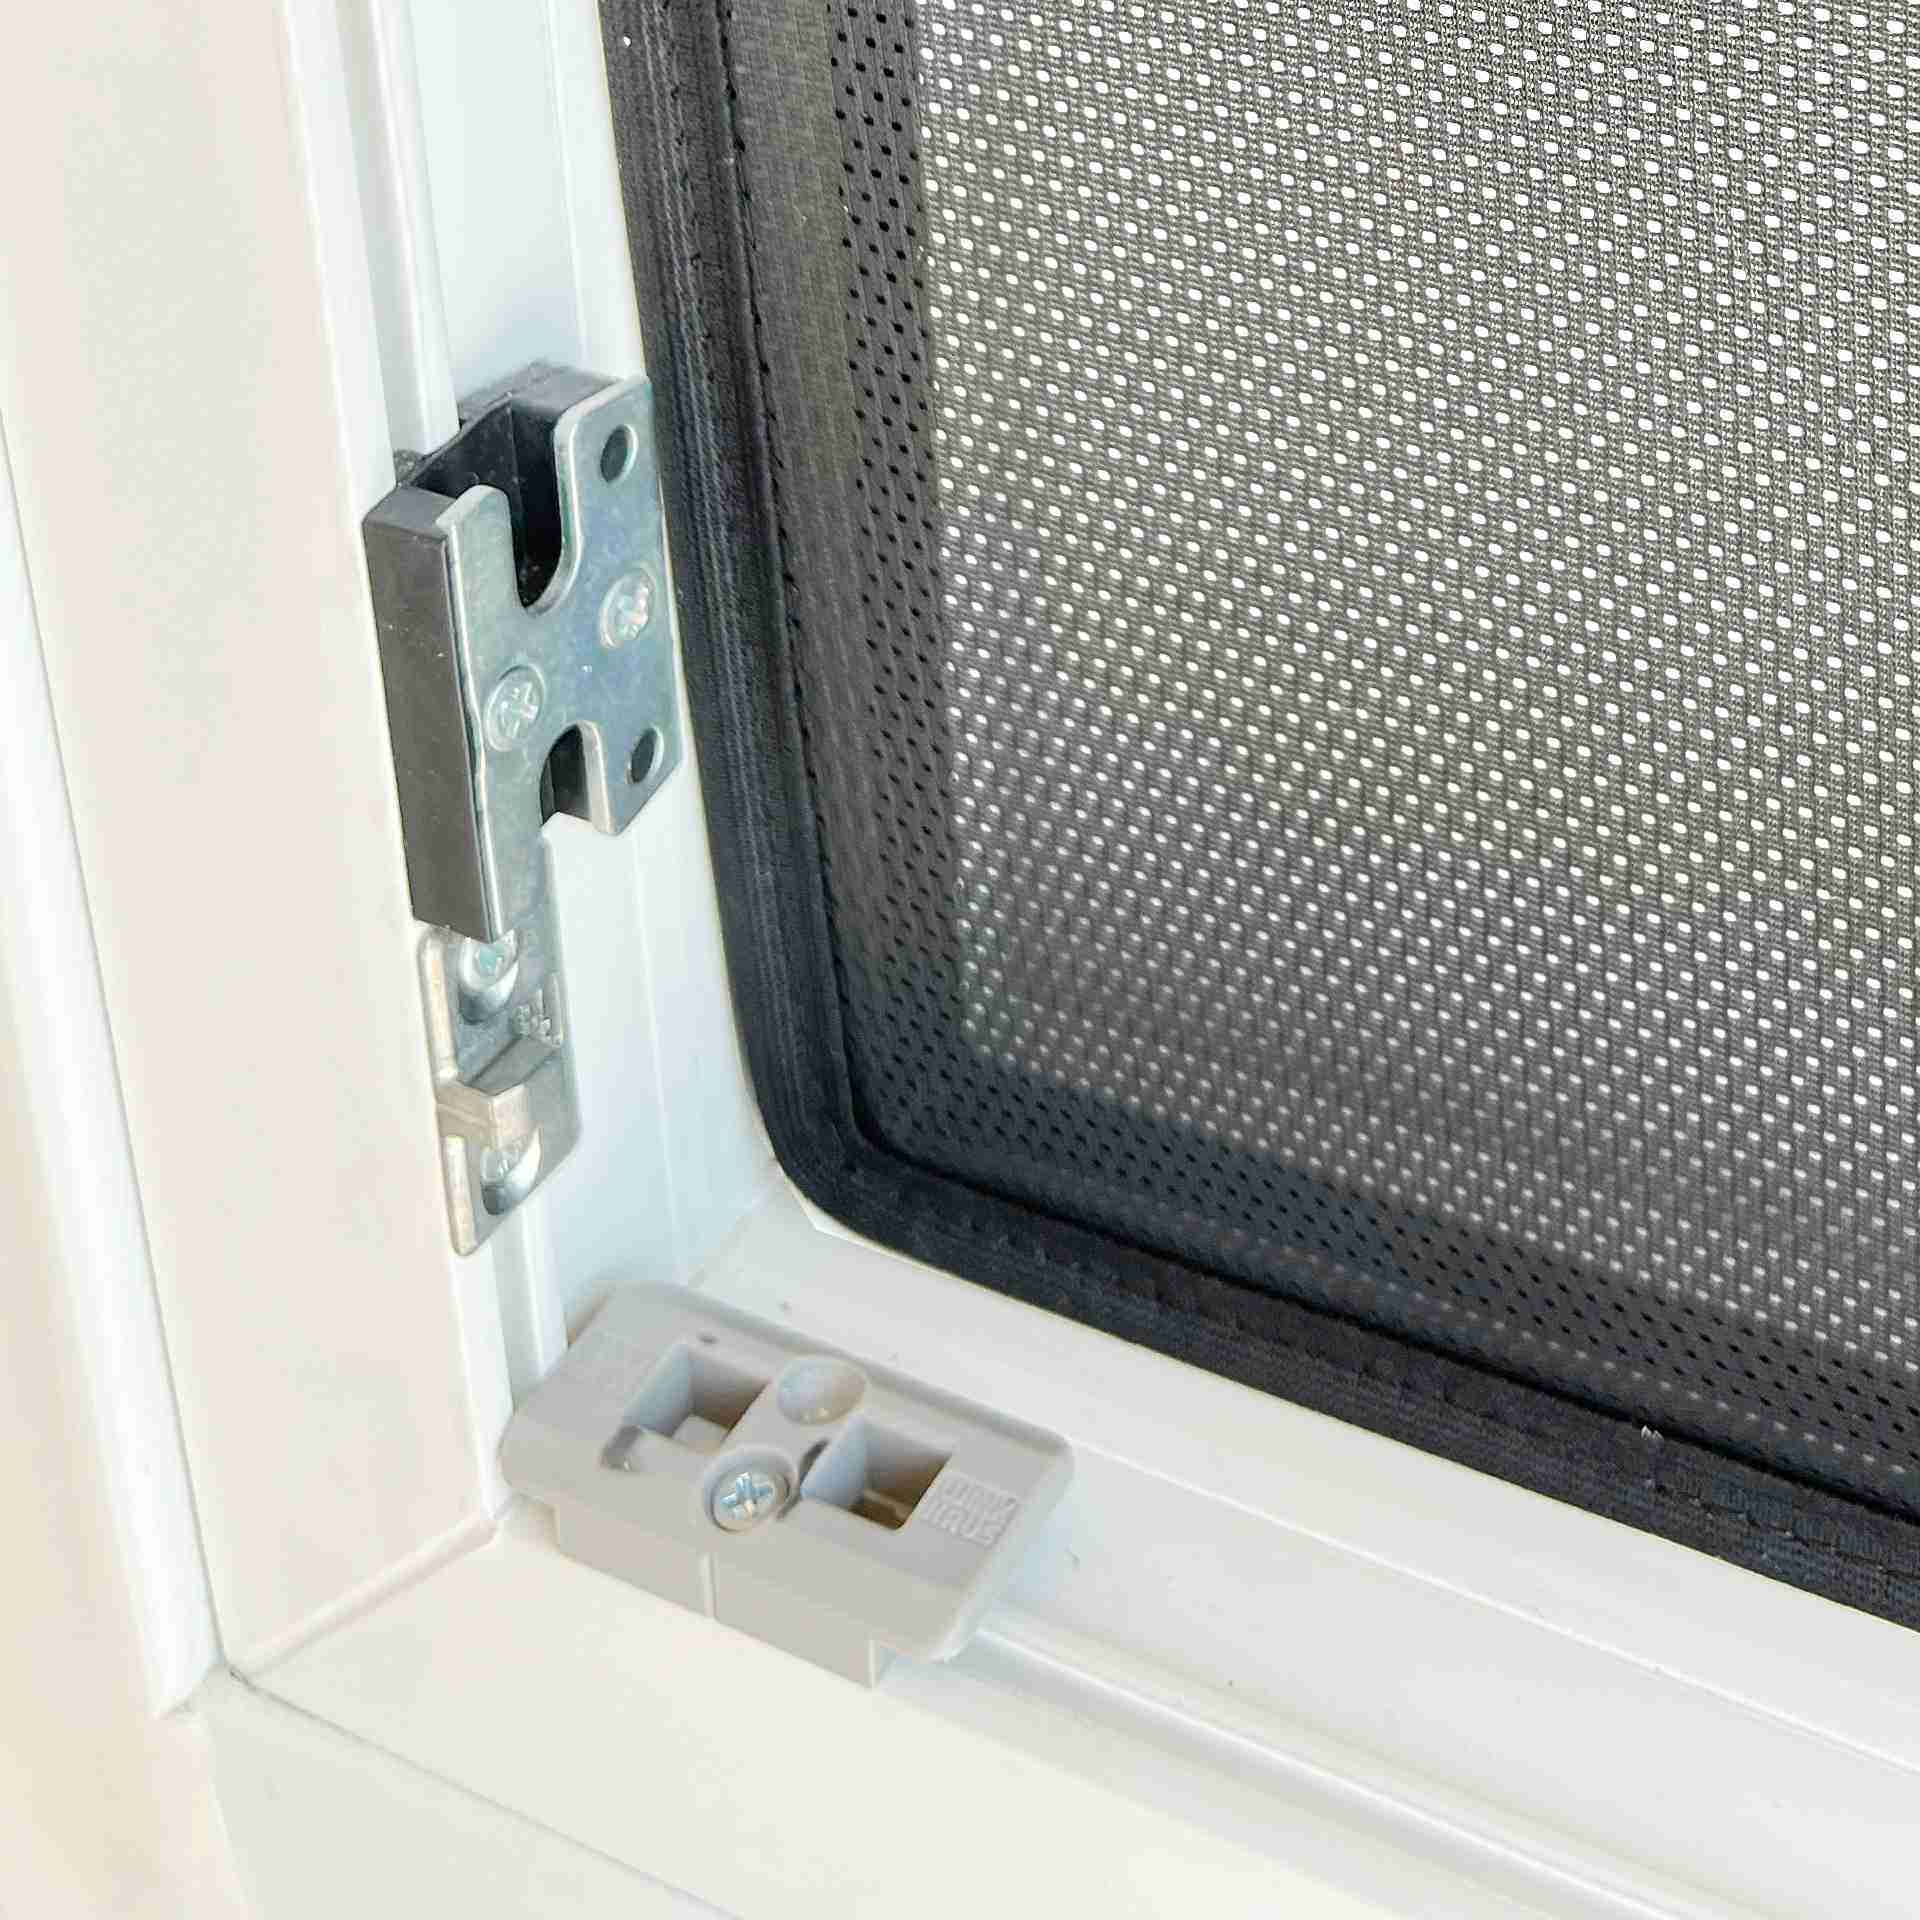
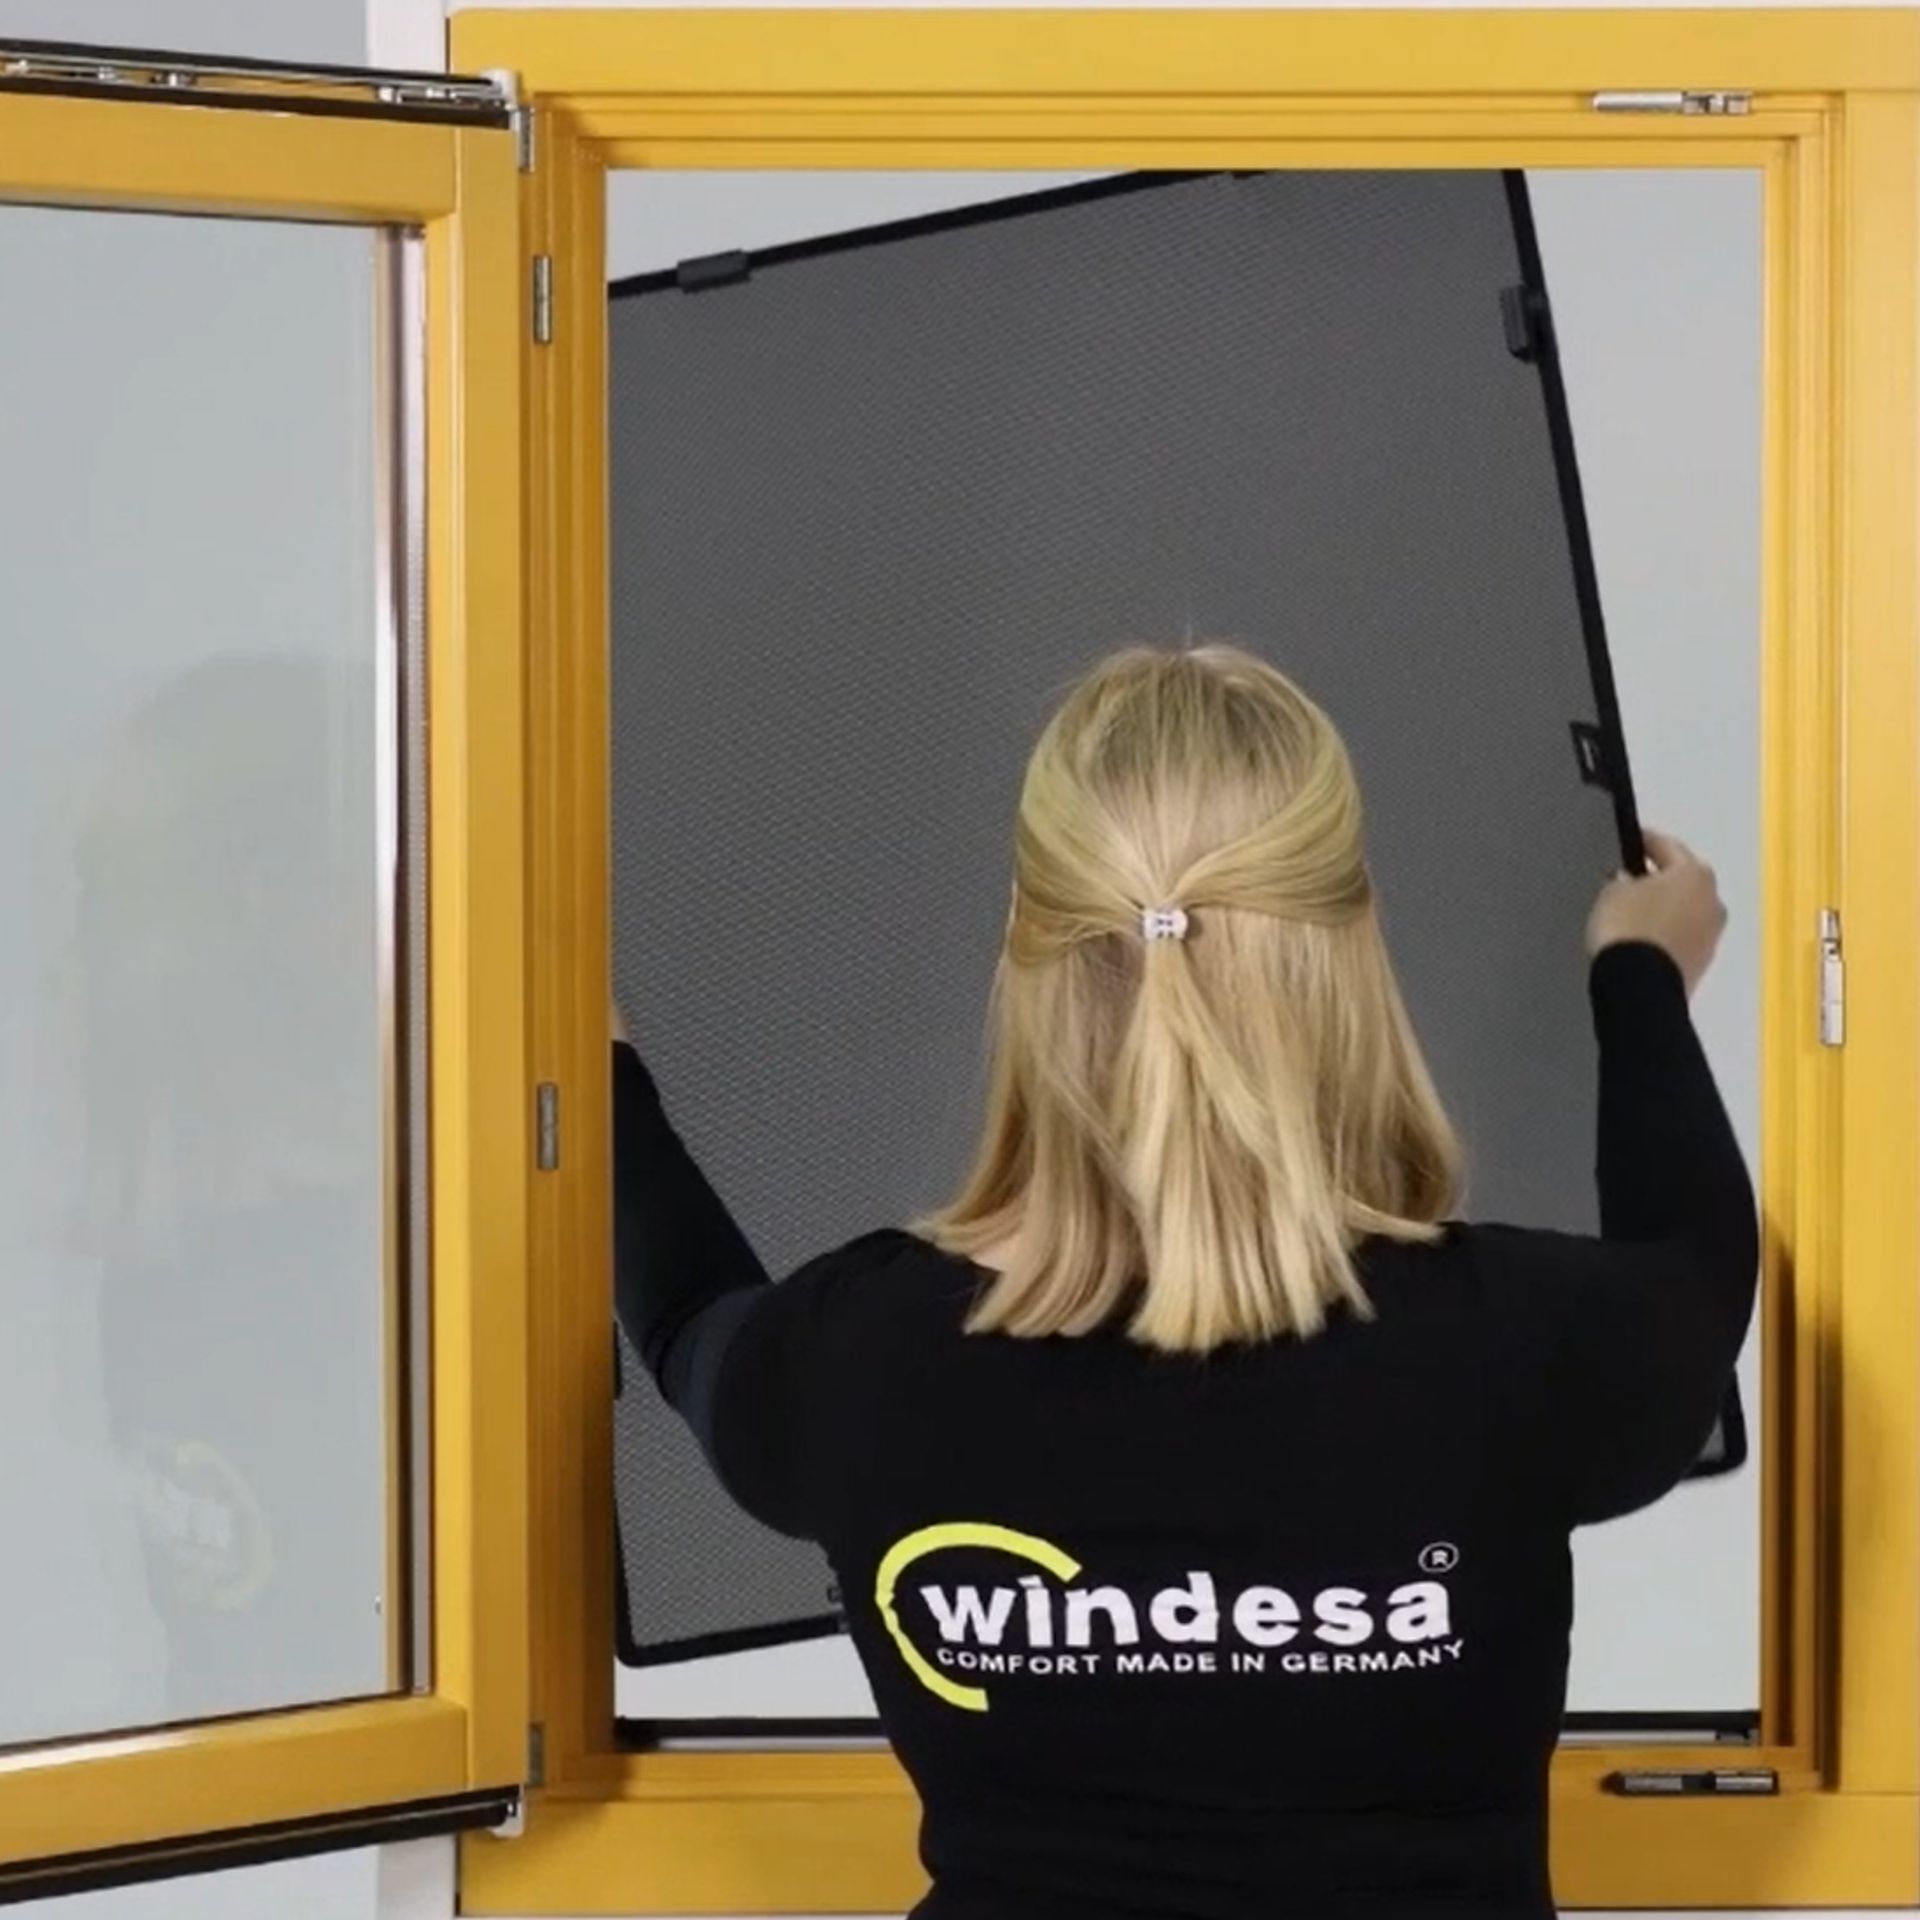
In this video, we demonstrate how to install the WinClip MULTI in a wooden window:
1. The woman in the video shows a WinClip Multi in front of a wooden window.
2. She places the black plastic brackets supplied with the kit against the inside of the window frame and marks the depth of the window frame with a pen.
3. She then uses scissors to cut the L-shaped section of the brackets at the mark.
4. The woman now assembles the three parts into a single bracket.
5. She then presses the eight black brackets onto the frame of the WinClip.
6. The woman then inserts the WinClip into the window frame from the outside and clicks the retaining clips into place.
7. She then closes the window and the WinClip is securely attached to the window.
The WinClip can then be inserted into or removed from the window frame as often as required.
Please note:
If there is a water nose (a sloping edge on the lower outer edge of the window sash designed to channel rainwater away) on the outside of the window, check whether it can be removed.
Find the right WinClip window protection in just four steps:

Step 1 ->
Step 2 ->
Step 3 ->
Step 4 ->
Enter the dimensions in the configurator. We will deliver within a few days.


Now it’s time to measure the window. In this video, we show you how to measure the window and place an order in our shop:
Place a standard tape measure against the window frame of an open window and measure the width and height to the nearest millimetre. Then enter the measurements into our configurator on the order form and add the item to your basket.
In the video below, we demonstrate how to install the WinClip STYLE in a plastic window:
1. After unpacking it, the woman in the video twists the WinClip, causing it to snap open into a rectangular frame.
2. The woman in the video positions the supplied black plastic brackets against the inner window frame and marks the depth with a pen.
3. She then uses scissors to cut the brackets along the marked line.
4. Next, the woman presses the eight black brackets onto the WinClip frame.
5. She then inserts the WinClip into the window frame from the inside and presses the retaining clips firmly into place.
6. She then closes the window.
The WinClip can then be inserted into or removed from the window frame as often as required.

Now it’s time to measure the window. In this video, we show you how to measure the window and place an order in our shop:
Place a standard tape measure against the window frame of an open wooden window and measure the width and height to the nearest millimetre. Then enter the measurements into our configurator on the order form and add the item to your basket.
In this video, we demonstrate how to install the WinClip MULTI in a wooden window:
1. The woman in the video shows a WinClip Multi in front of a wooden window.
2. She places the black plastic brackets supplied with the kit against the inside of the window frame and marks the depth of the window frame with a pen.
3. She then uses scissors to cut the L-shaped section of the brackets at the mark.
4. The woman now assembles the three parts into a single bracket.
5. She then presses the eight black brackets onto the frame of the WinClip.
6. The woman then inserts the WinClip into the window frame from the outside and clicks the retaining clips into place.
7. She then closes the window and the WinClip is securely attached to the window.
The WinClip can then be inserted into or removed from the window frame as often as required.
Please note:
If there is a water nose (a sloping edge on the lower outer edge of the window sash designed to channel rainwater away) on the outside of the window, check whether it can be removed.